Upload & Manage Files from the Device on Kaa Cloud
File uploading from the device on Kaa Cloud allows you to manage and process data within your IoT applications. Our file management functionality allows users to organize files per endpoint and get access management benefits.
In this tutorial, we’ll guide you through obtaining an upload token, uploading binary data and files, and even replacing existing files using the Kaa Cloud API.
Step 1: Obtain the upload token
To begin, you’ll need to get an upload token for your device. This token will be used to authenticate your upload requests. To get the token, request by publishing to the kp1/<app_version>/bcx/<token>/token[/<request ID>] topic over MQTT or make an HTTP POST request to the /kpc/kp1/<app_version>/bcx/<token>/token URL.
By default, a token is valid for 1 hour and revoked automatically when the expiration date exceeds. You can find connectivity and topic information to test it on the platform.
1. Navigate to Data Publish:
- Identify the device you want to upload data to.
- Go to the Data Publish section.
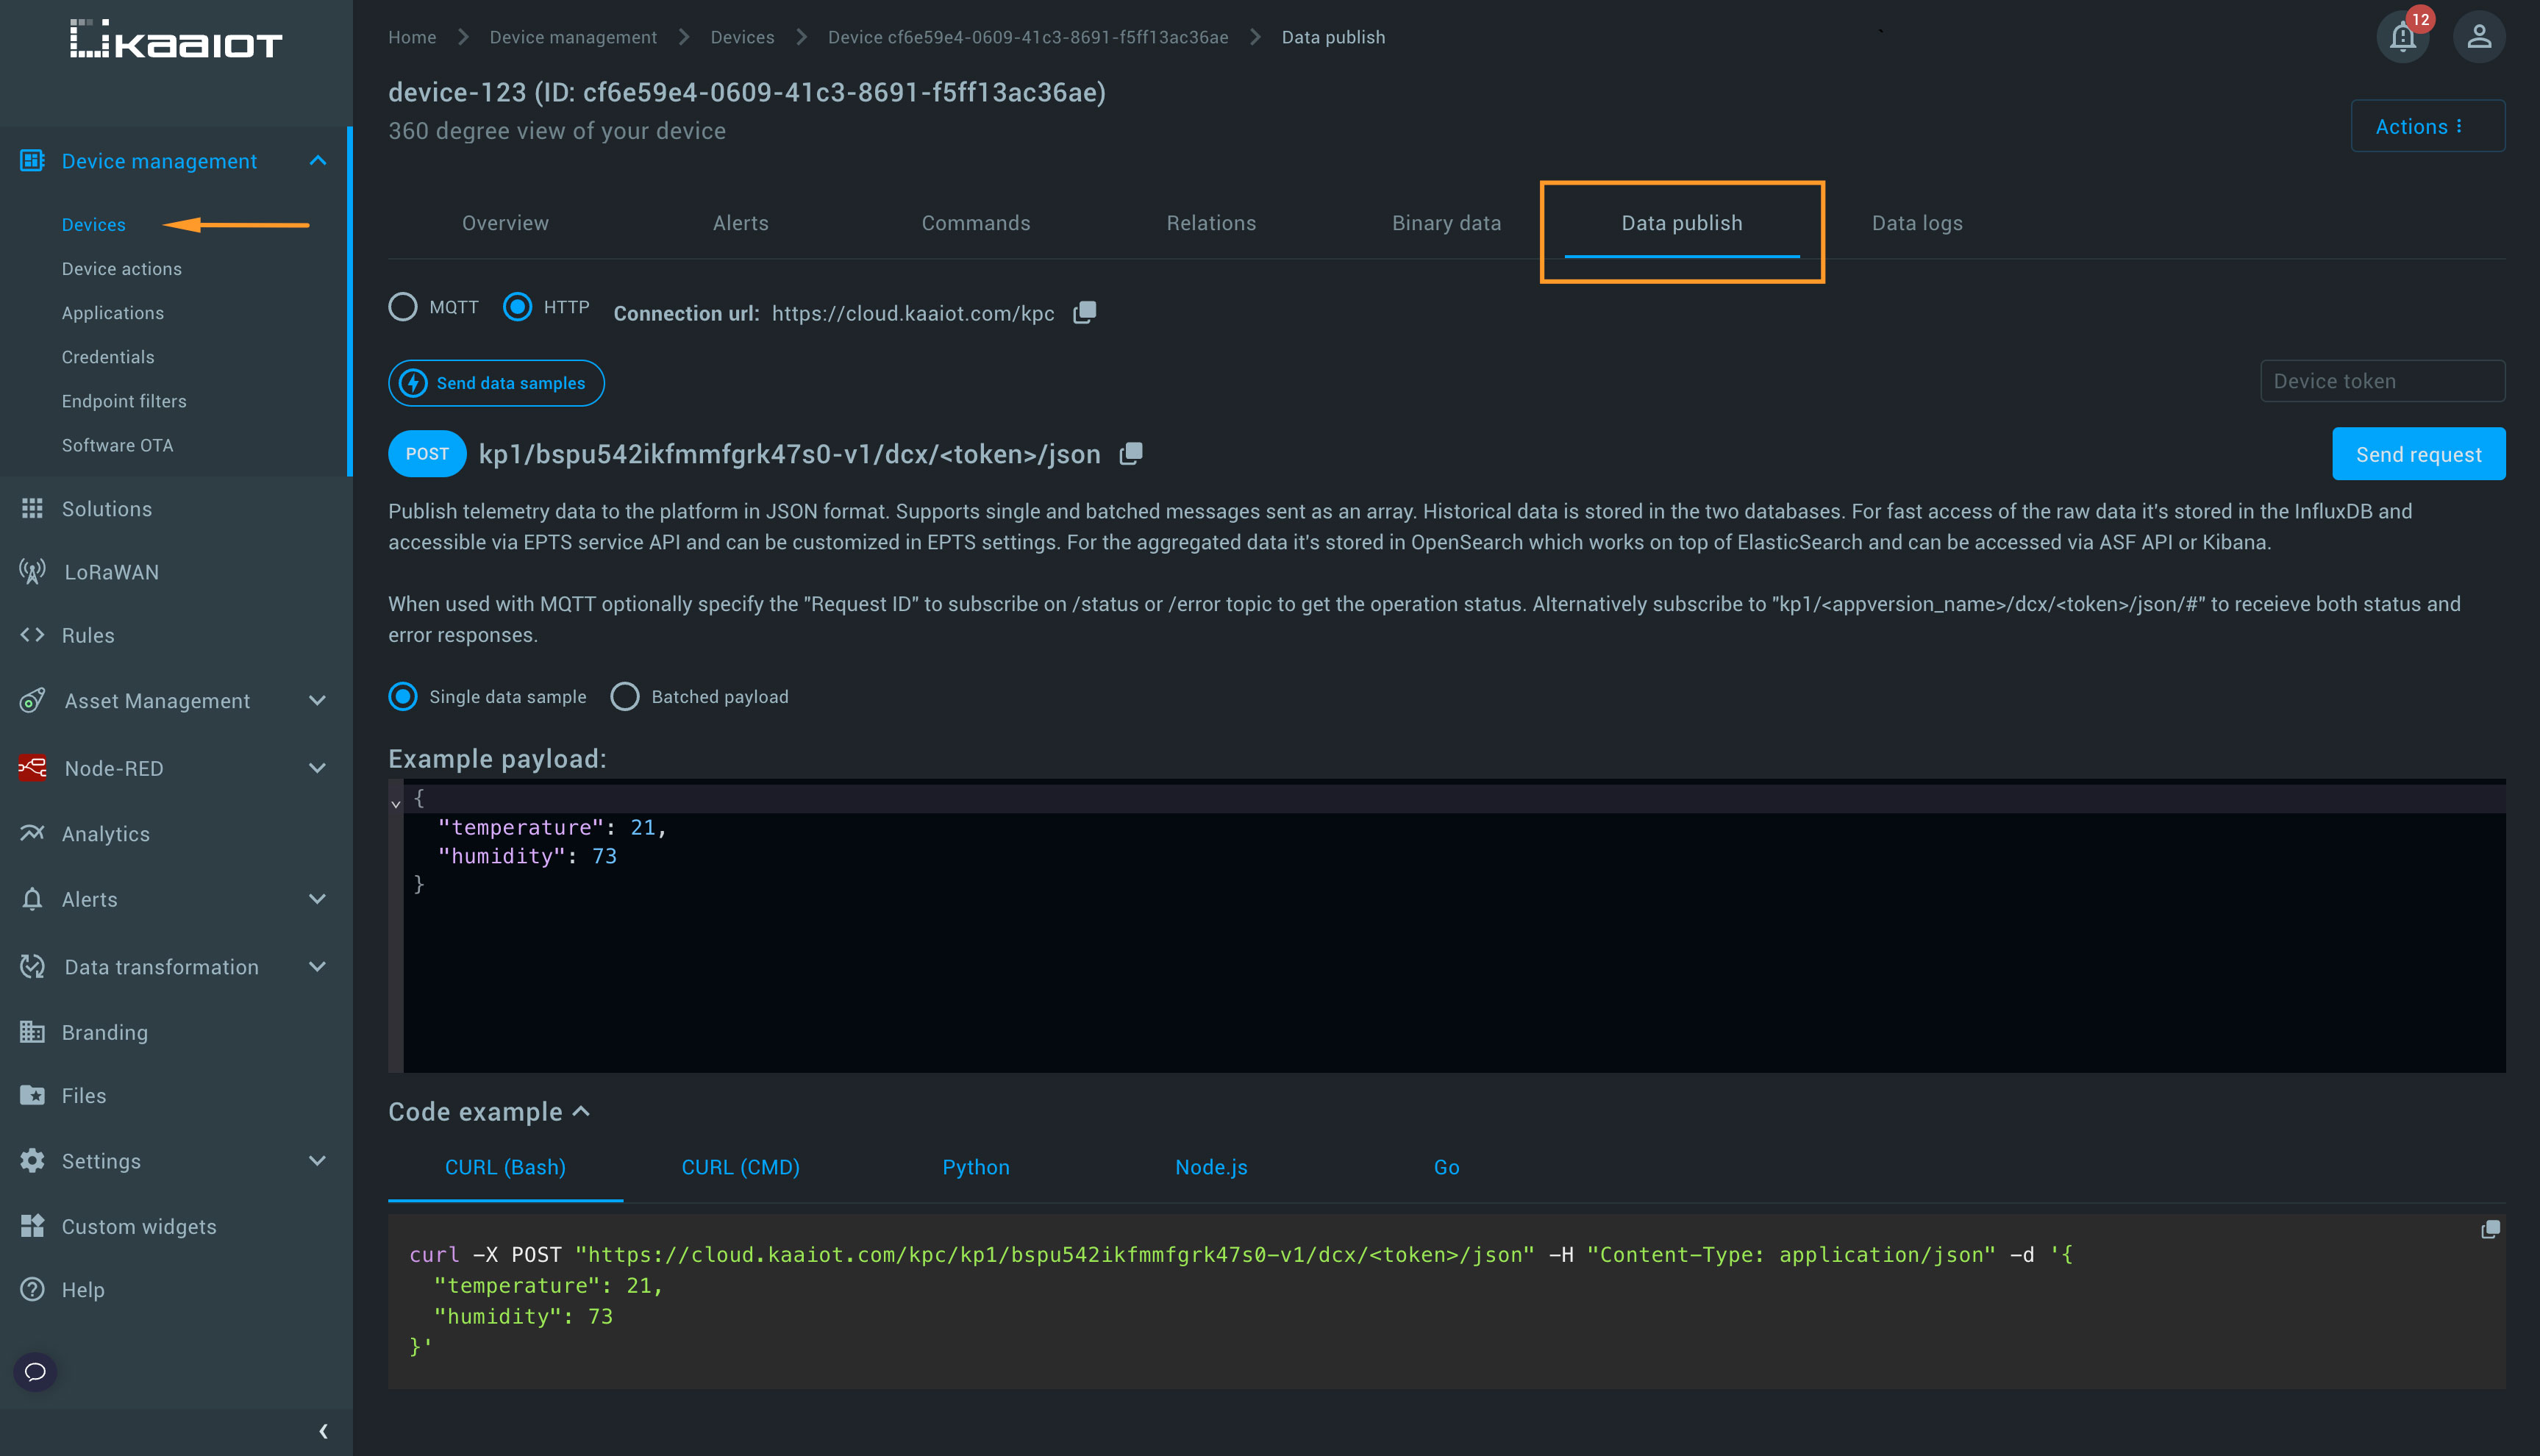
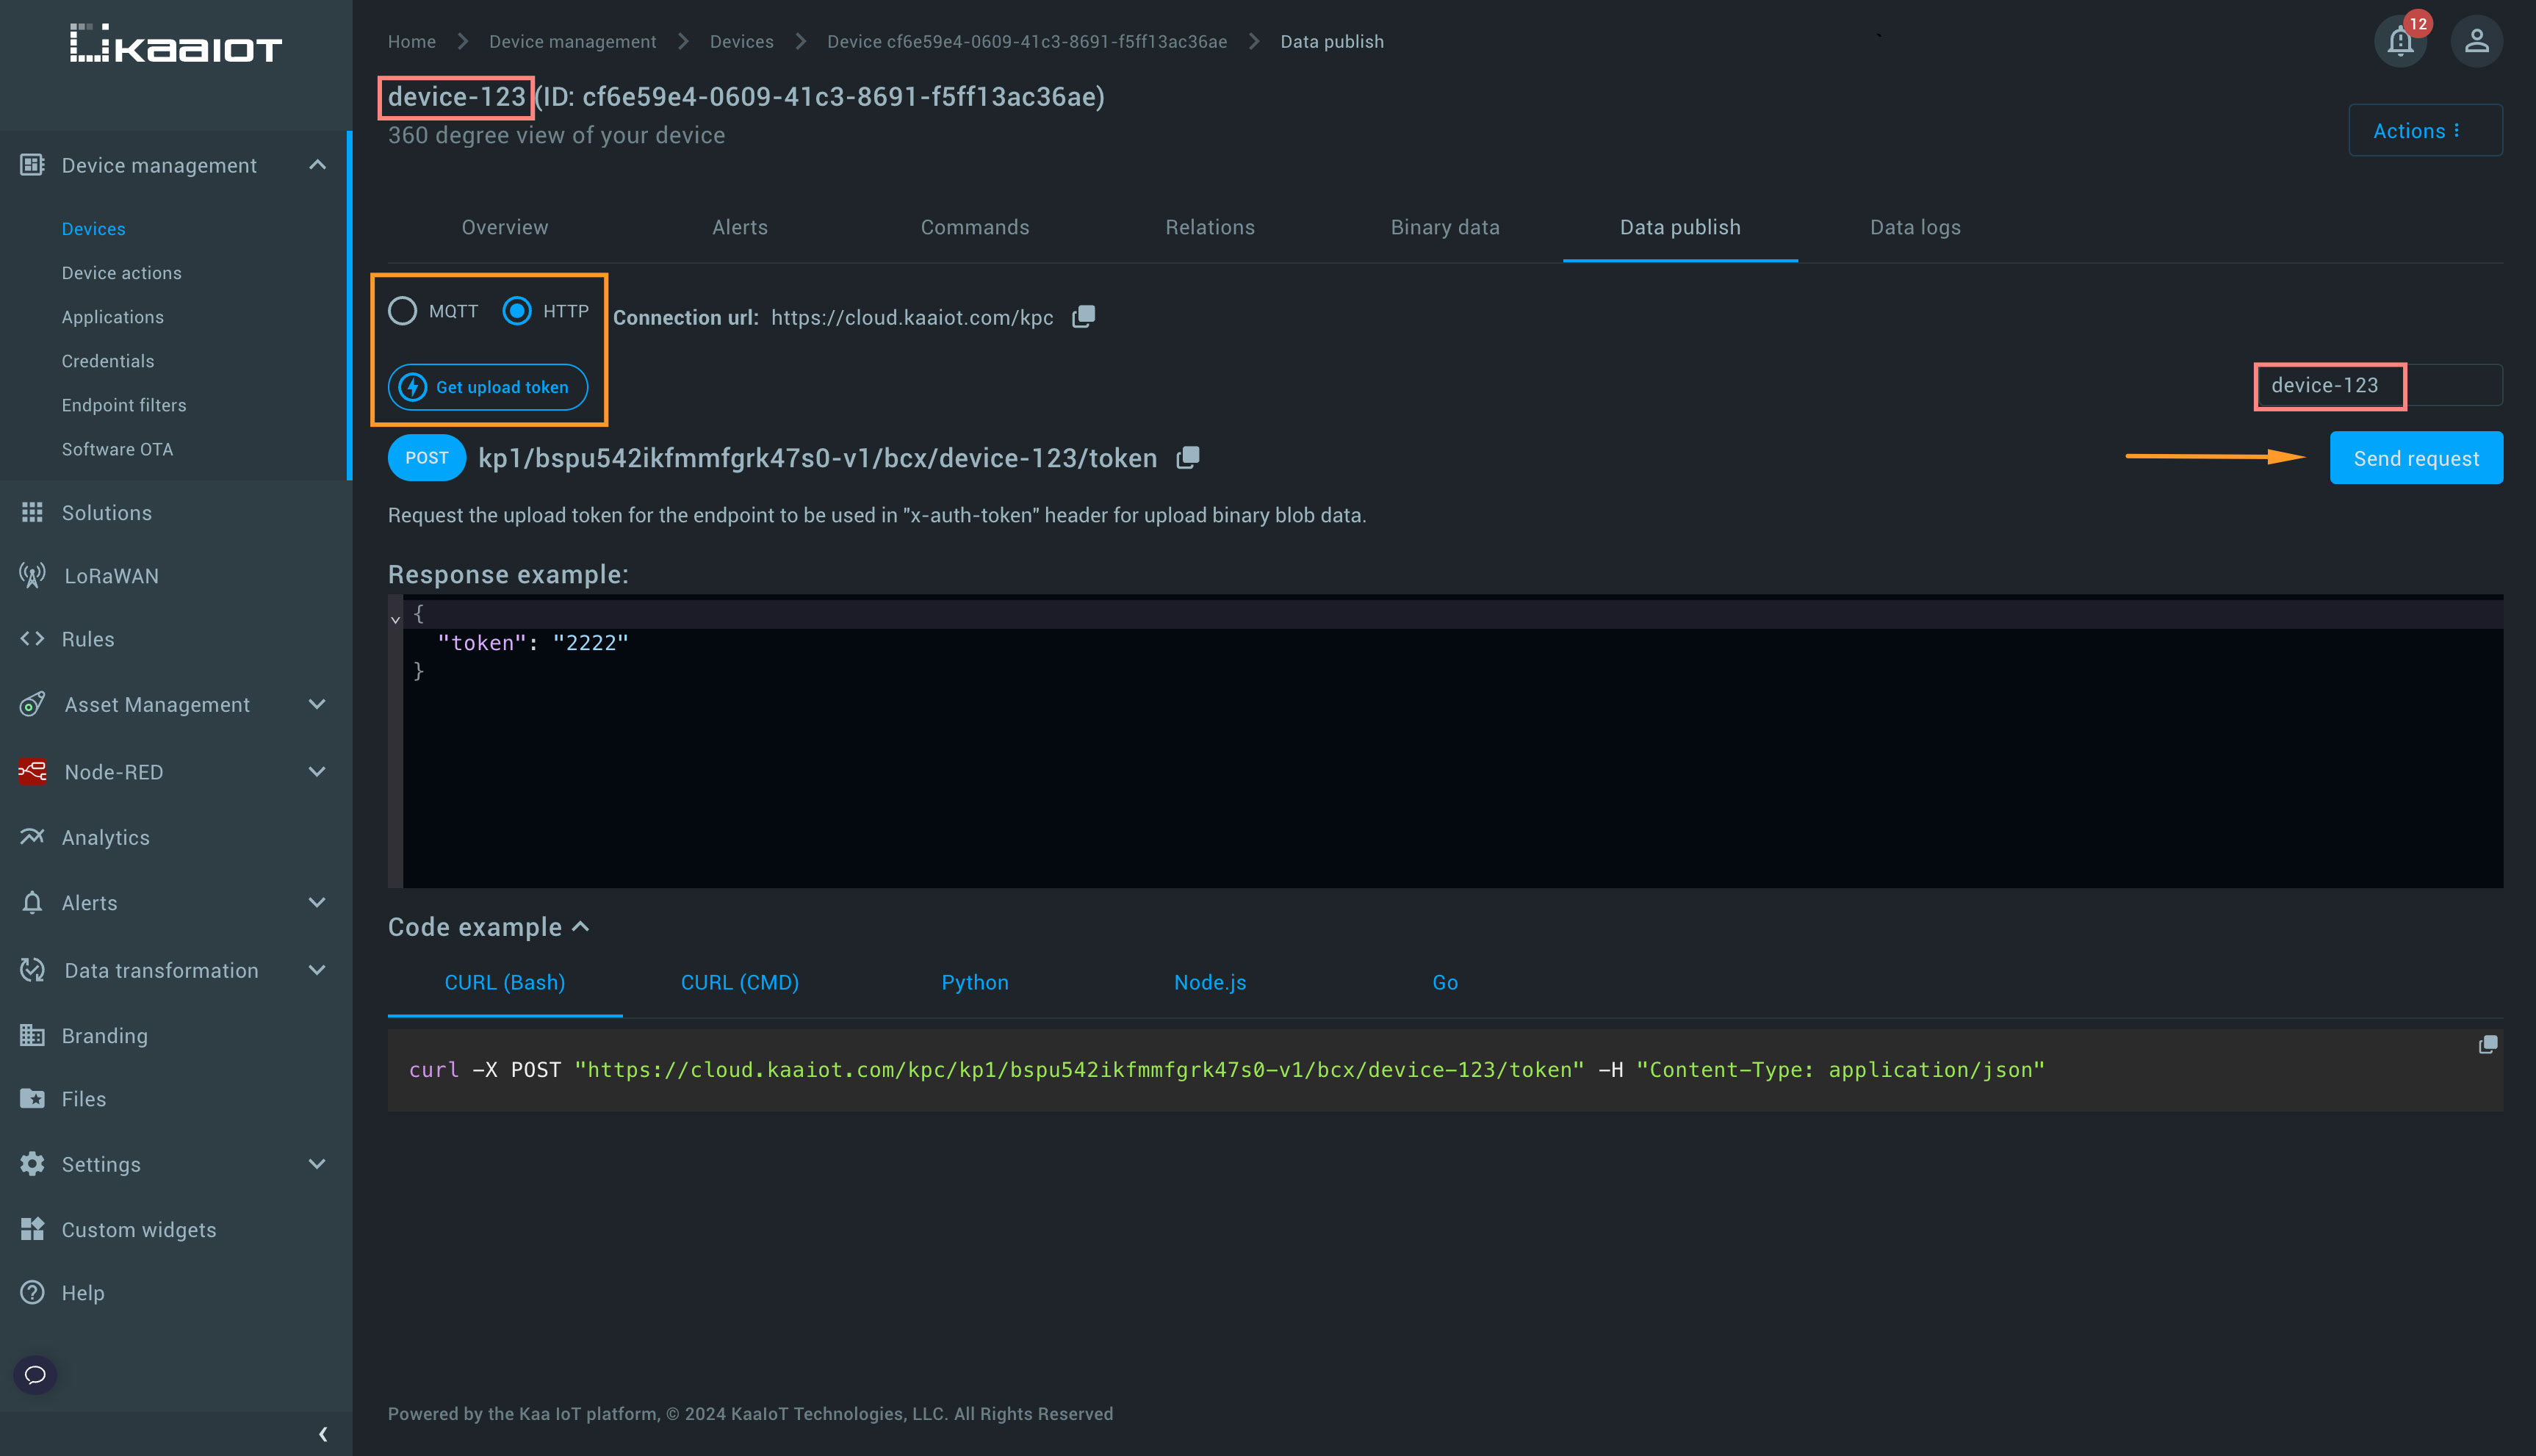
2. Request the upload token:
- Use the GET upload token API call to request the token.
- Click on Send Request.
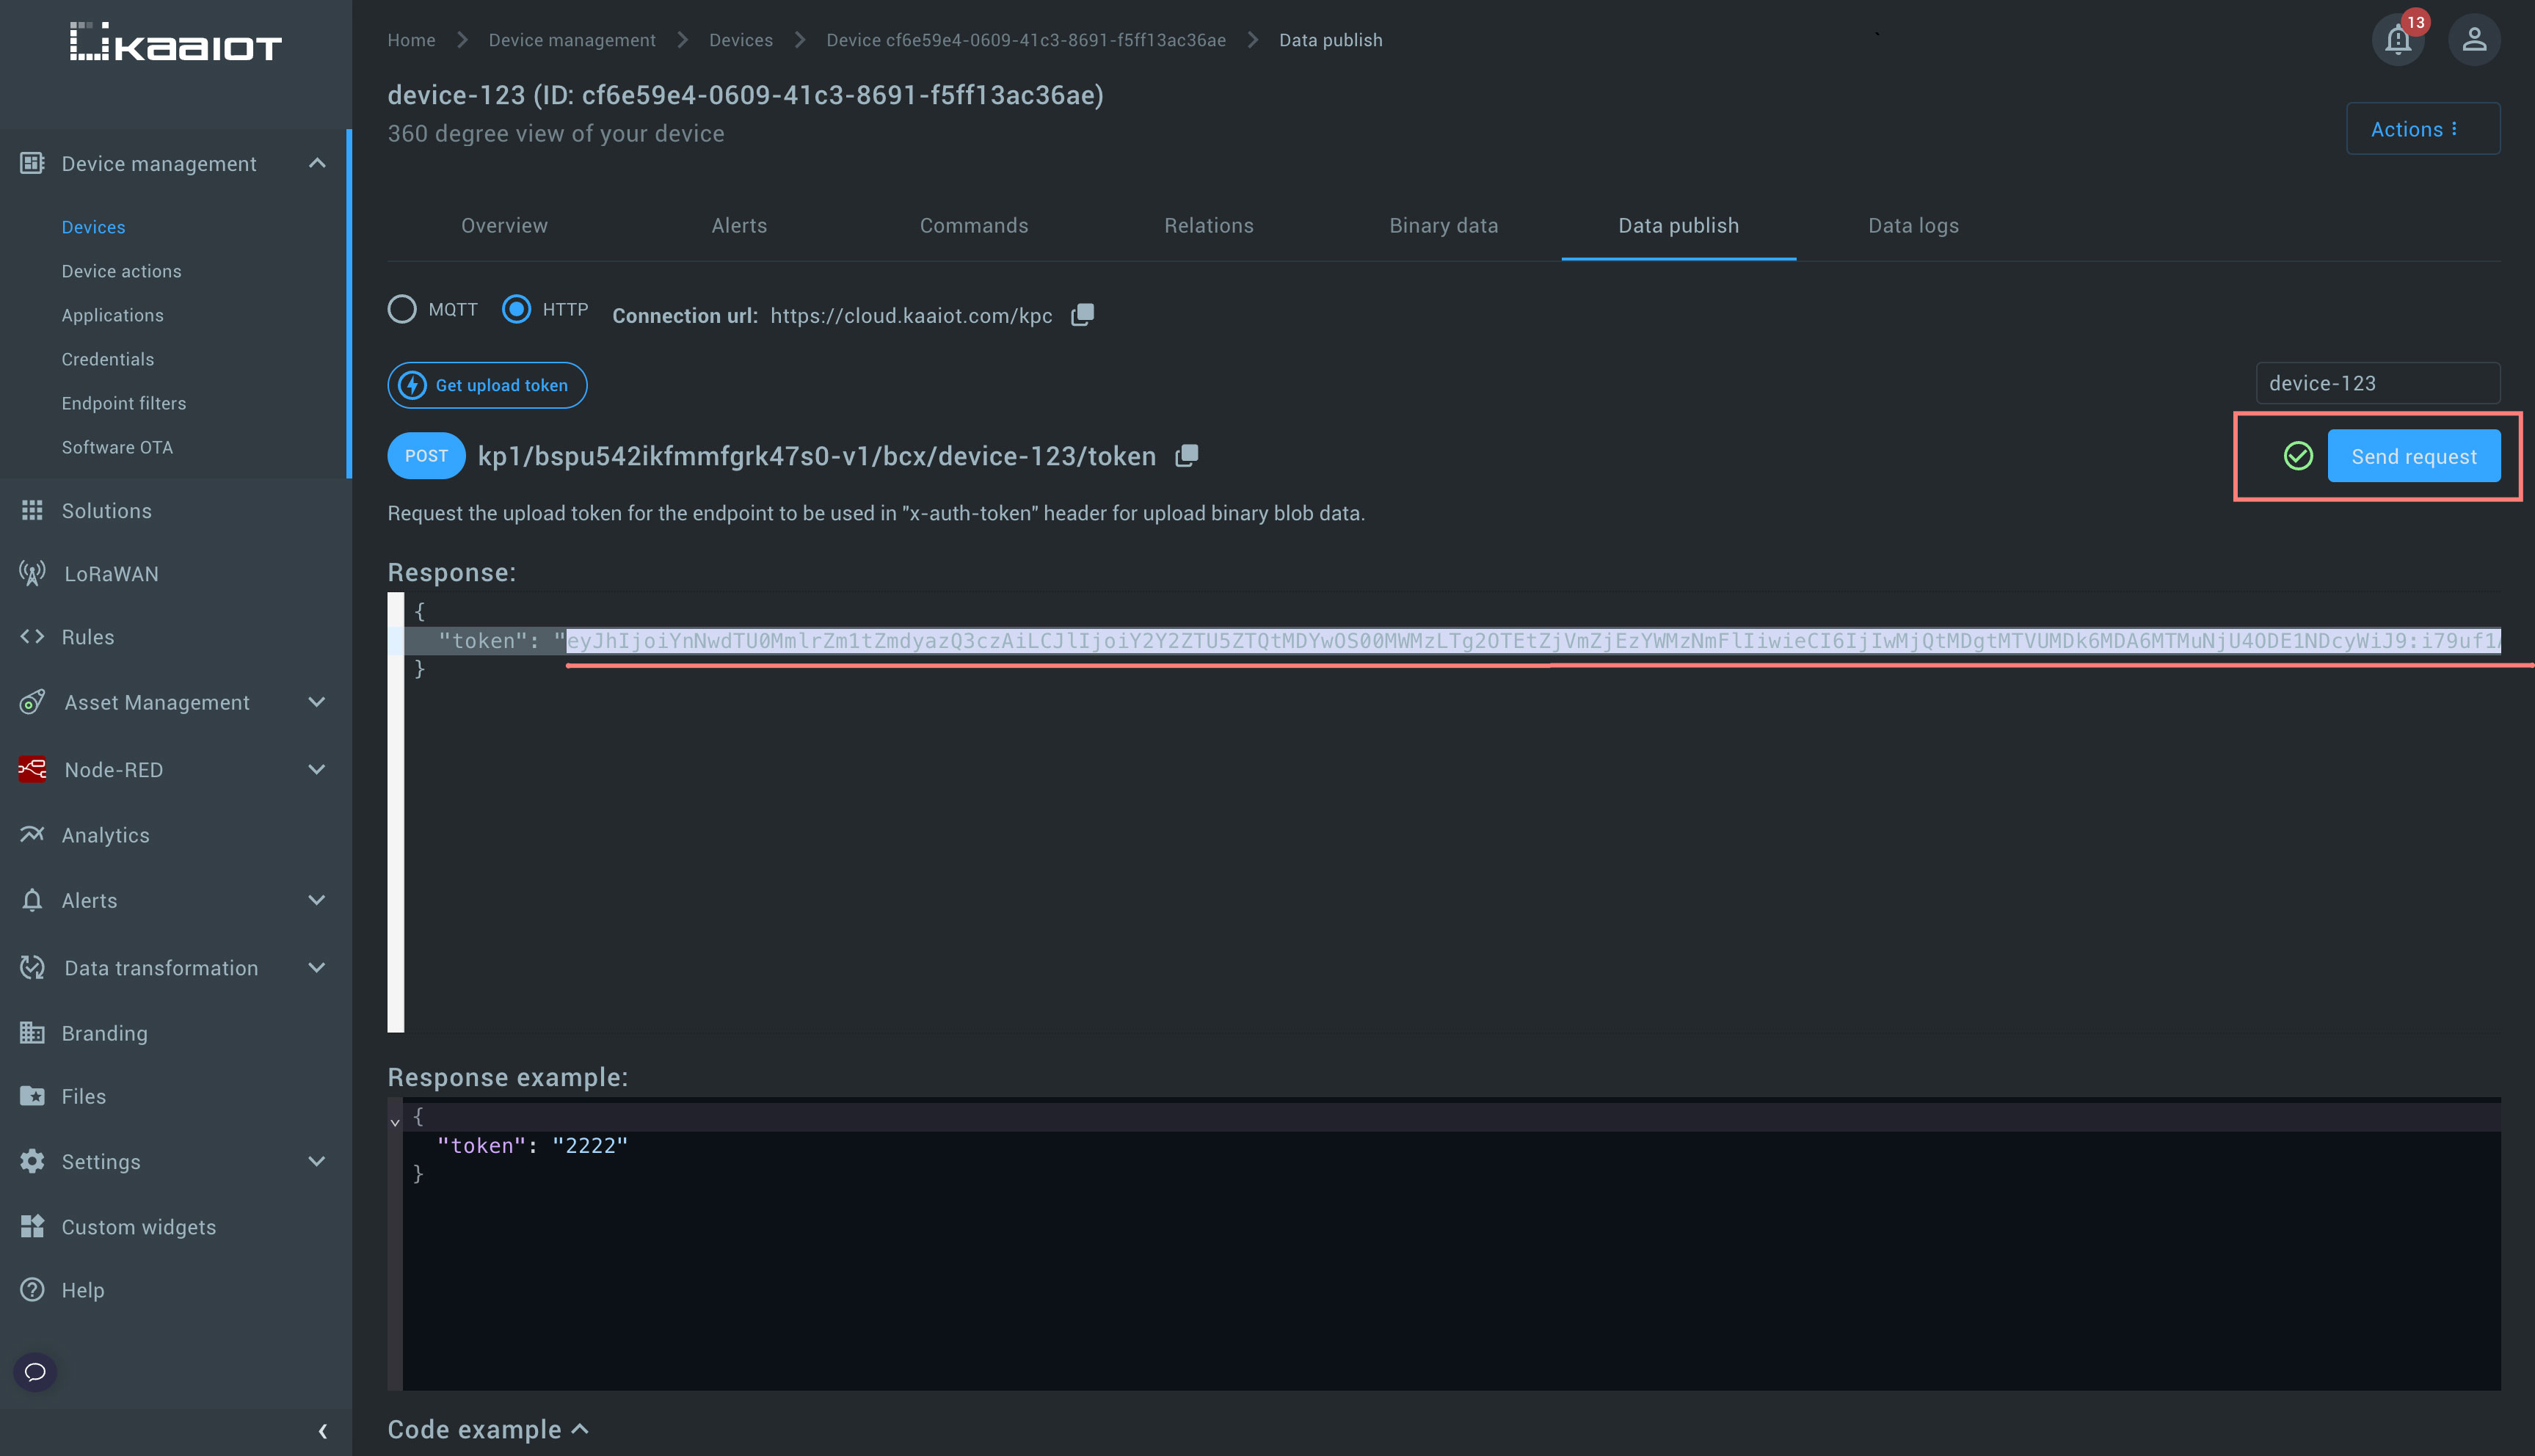
3. Copy the token:
- Copy the token from the response.
- Ensure the token is copied correctly (all characters between “ ”), as it will be needed in the next steps.
Step 2: Upload blob
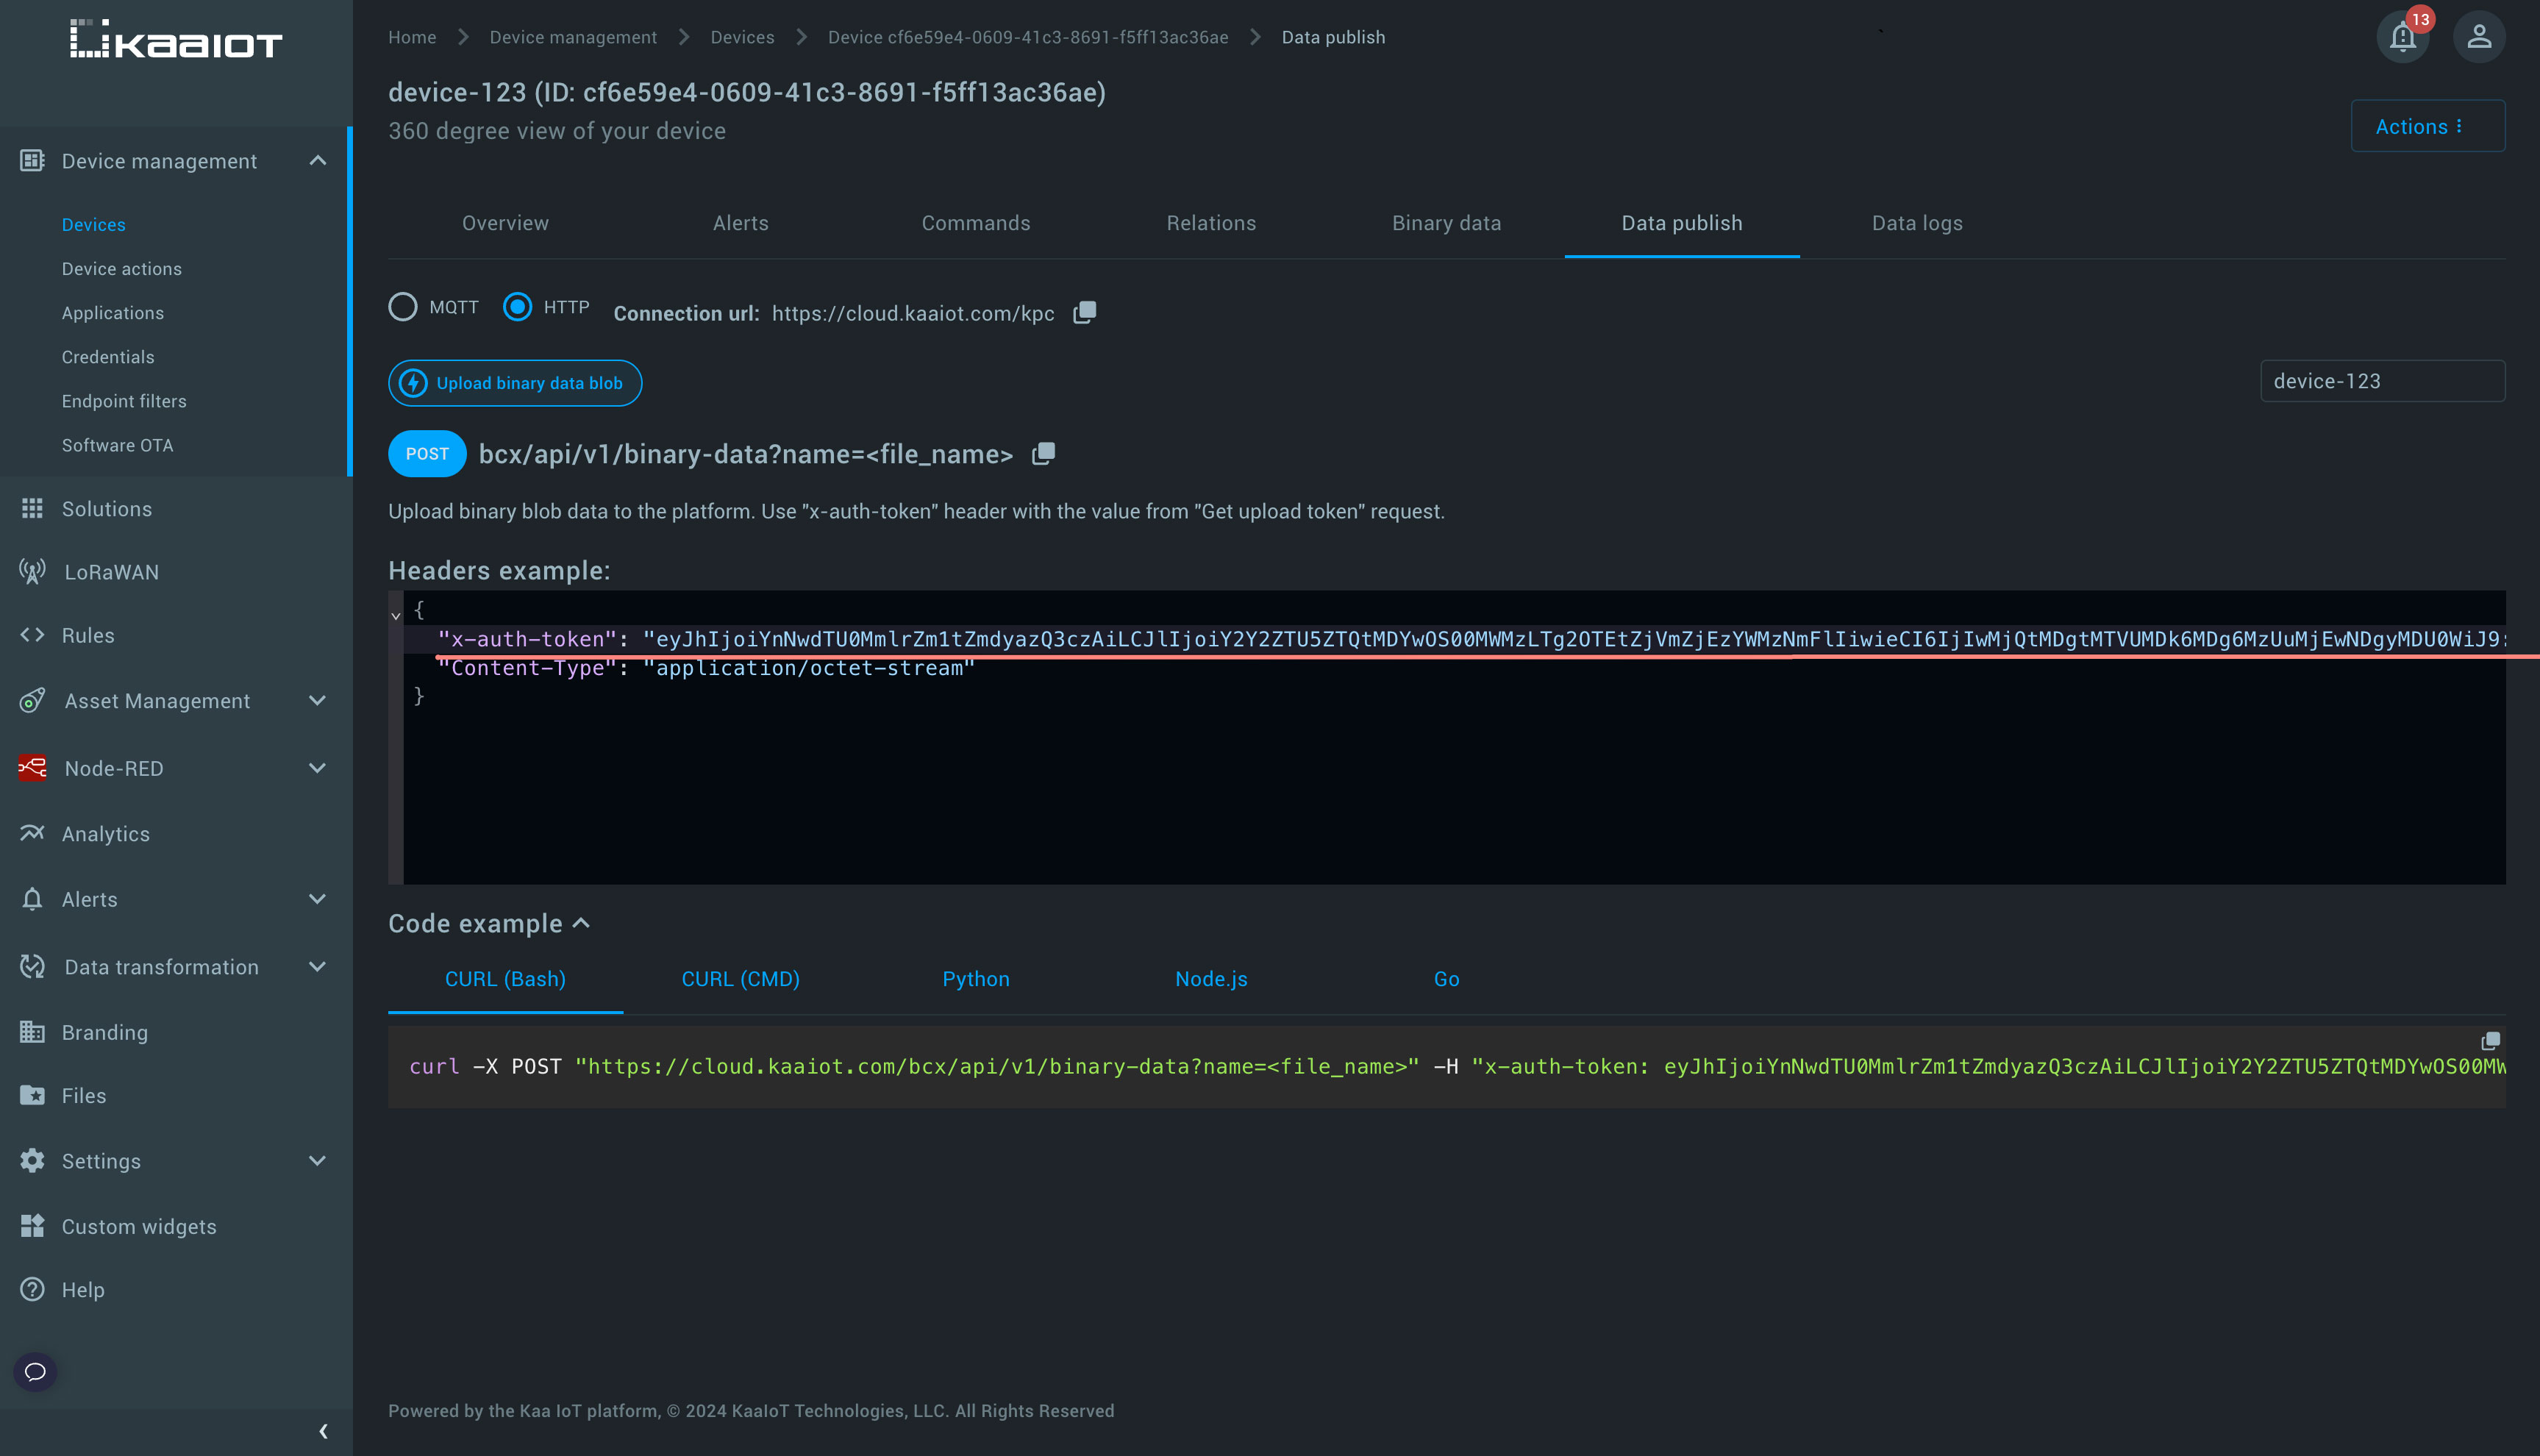
Now that you have your token, you can proceed to upload the file as a blob. Binary blob upload can be performed only over HTTP using the REST API call POST bcx/api/v1/binary-data?name=<file_name>. This REST API is secured and requires you to specify the token value in the x-auth-token header key.
Note: Binary data blobs are useful for uploading data that doesn't need to be overwritten.
1. Open the "Upload Binary Data Blob" request:
- Choose the "Upload Binary Data Blob" request option.
2. Insert the token:
- Replace Get value from \"Get upload token\" with the token you copied into the x-auth token header field.
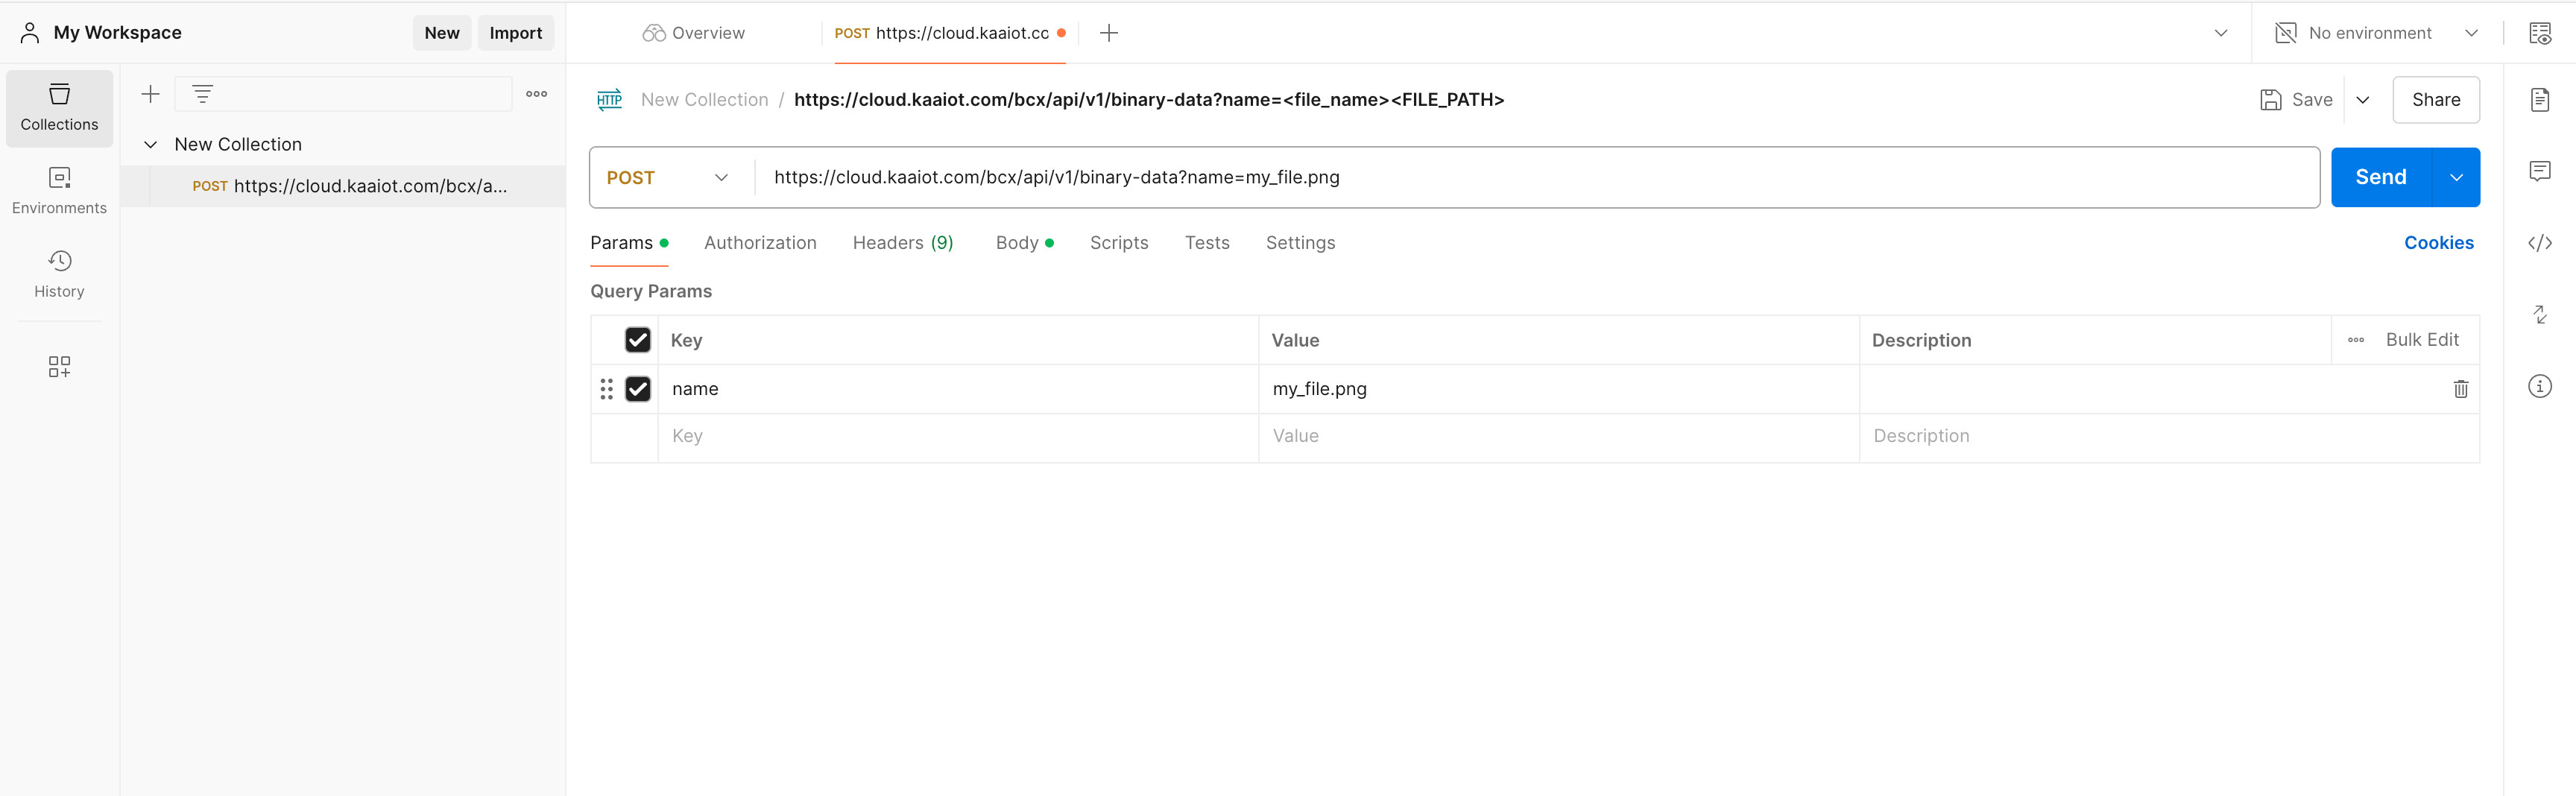
3. Input the file name and select the binary file:
- Copy the curl from the Code example section.
- Open a tool like Postman and import a copied request.
- Specify the file name in the Params.
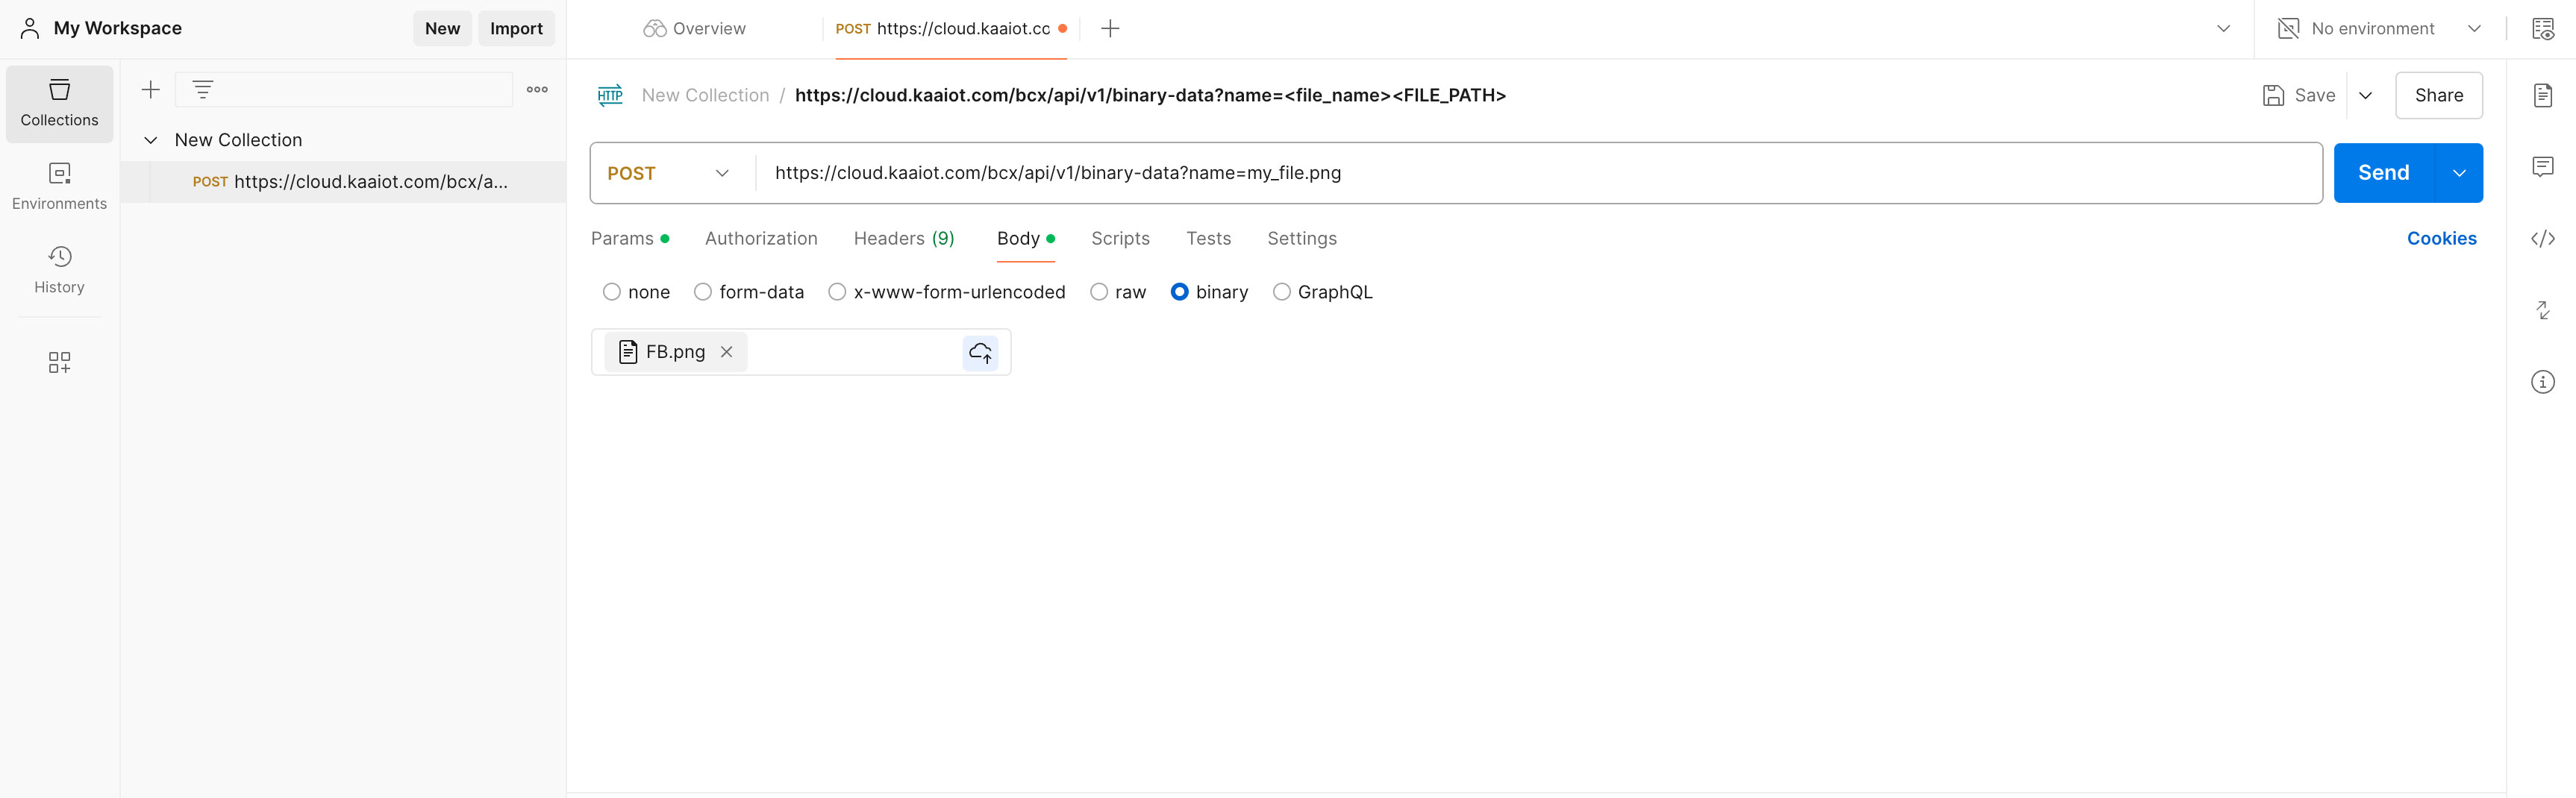
- Select the binary file you want to upload in the Body -> binary.
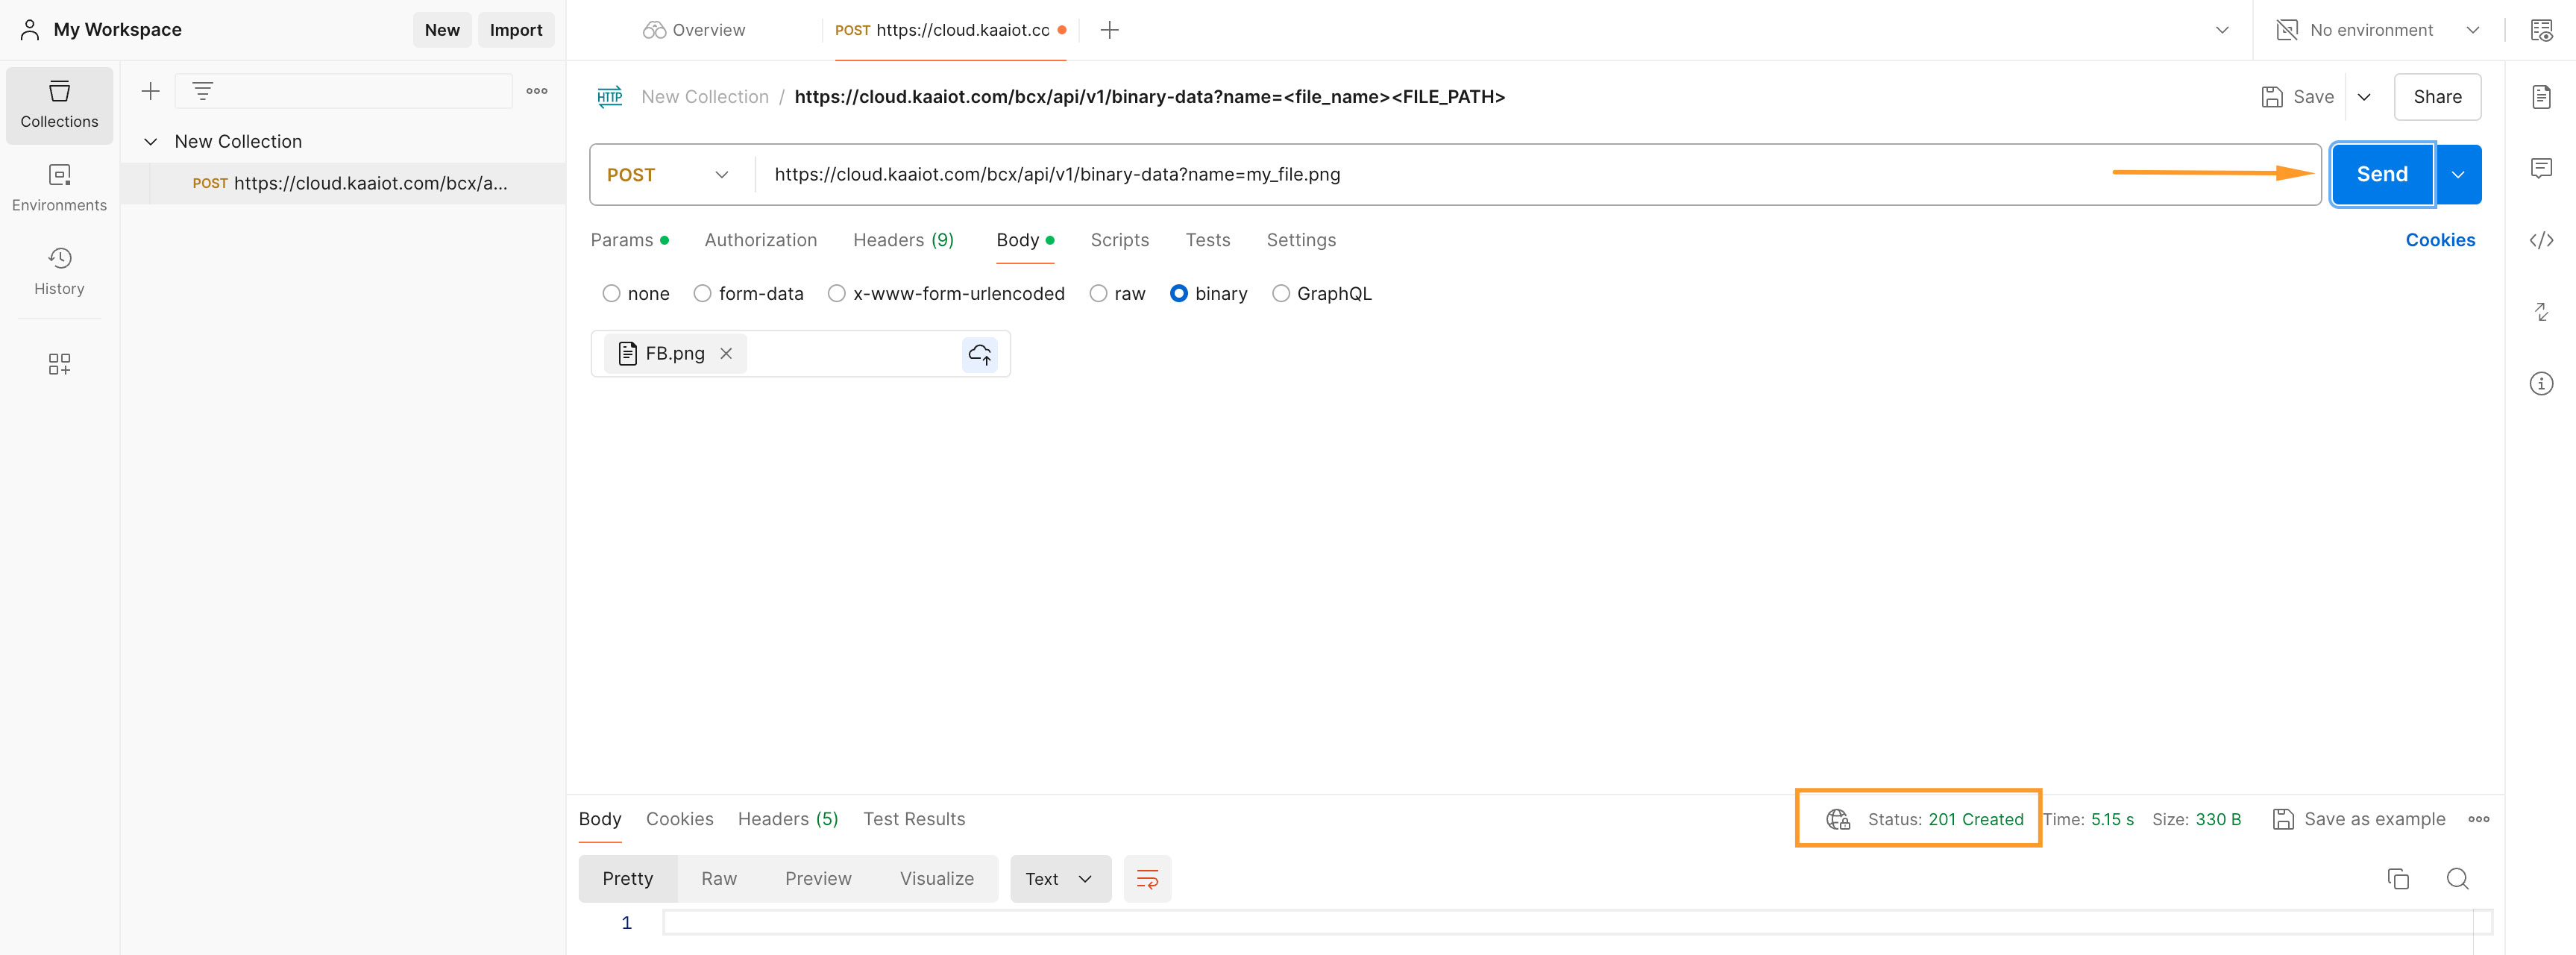
4. Submit the request:
- Once everything is set, submit the request by clicking on Send.
- Ensure you receive a 201 Created status, indicating a successful upload.
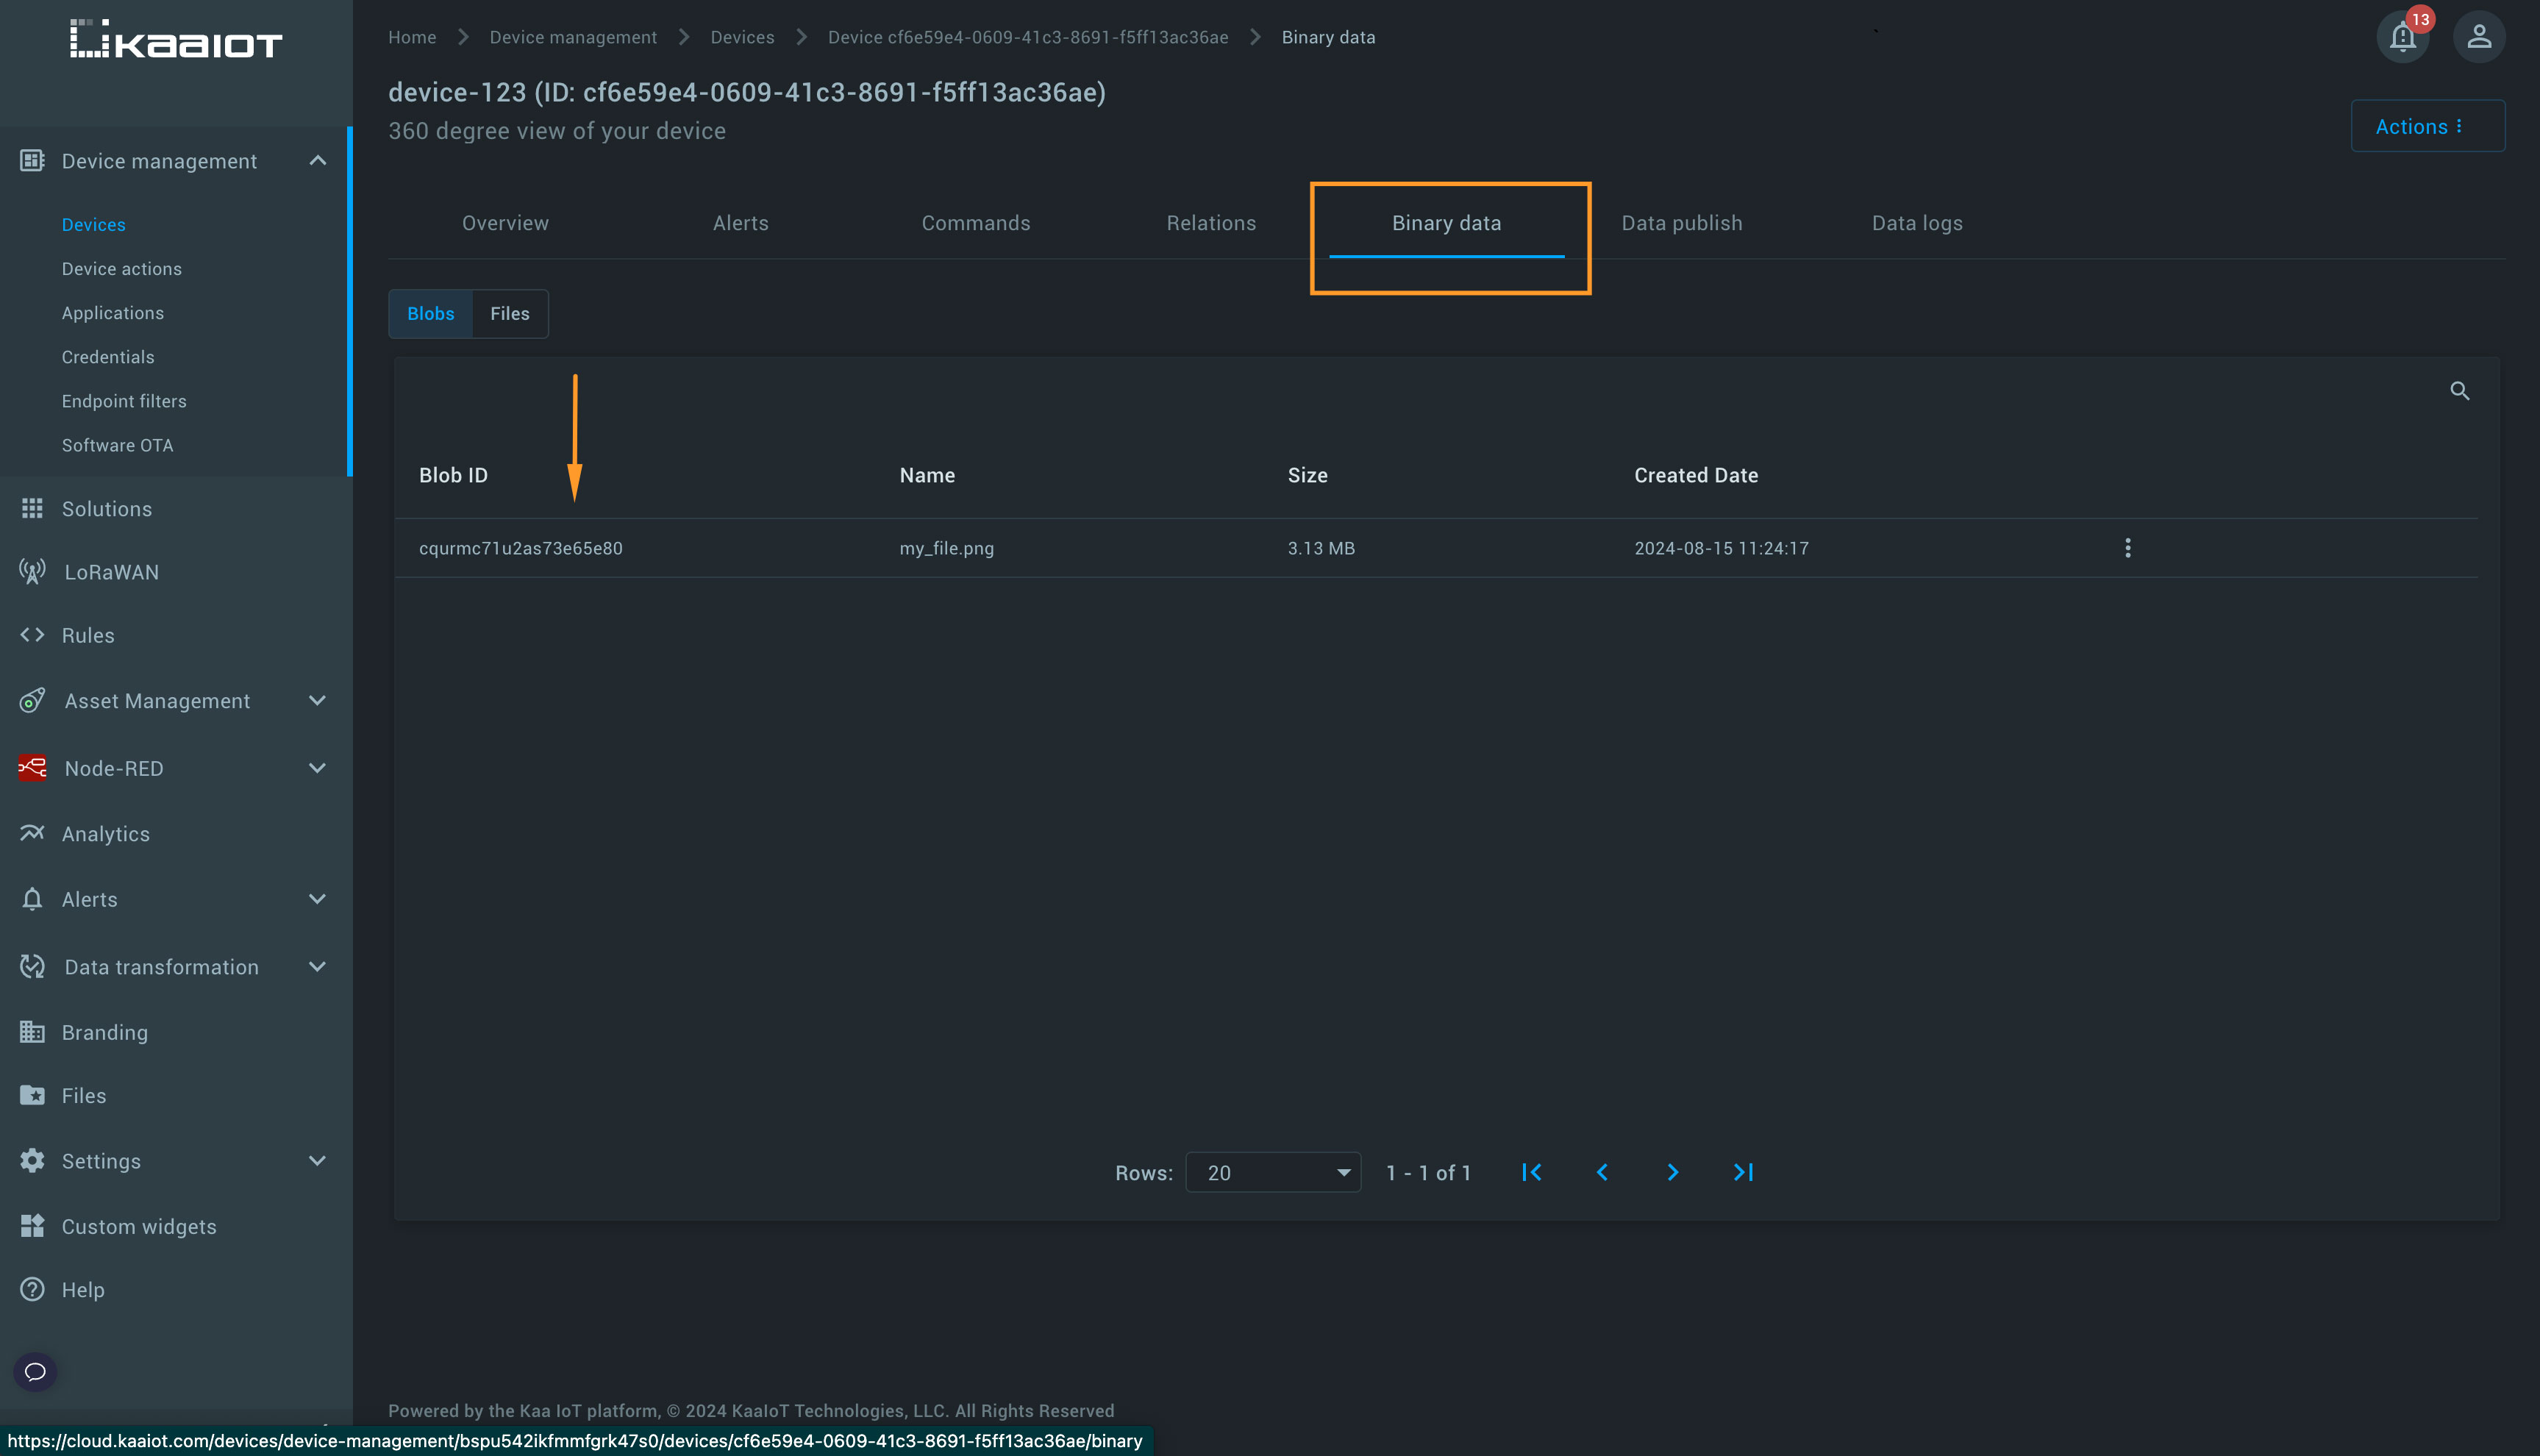
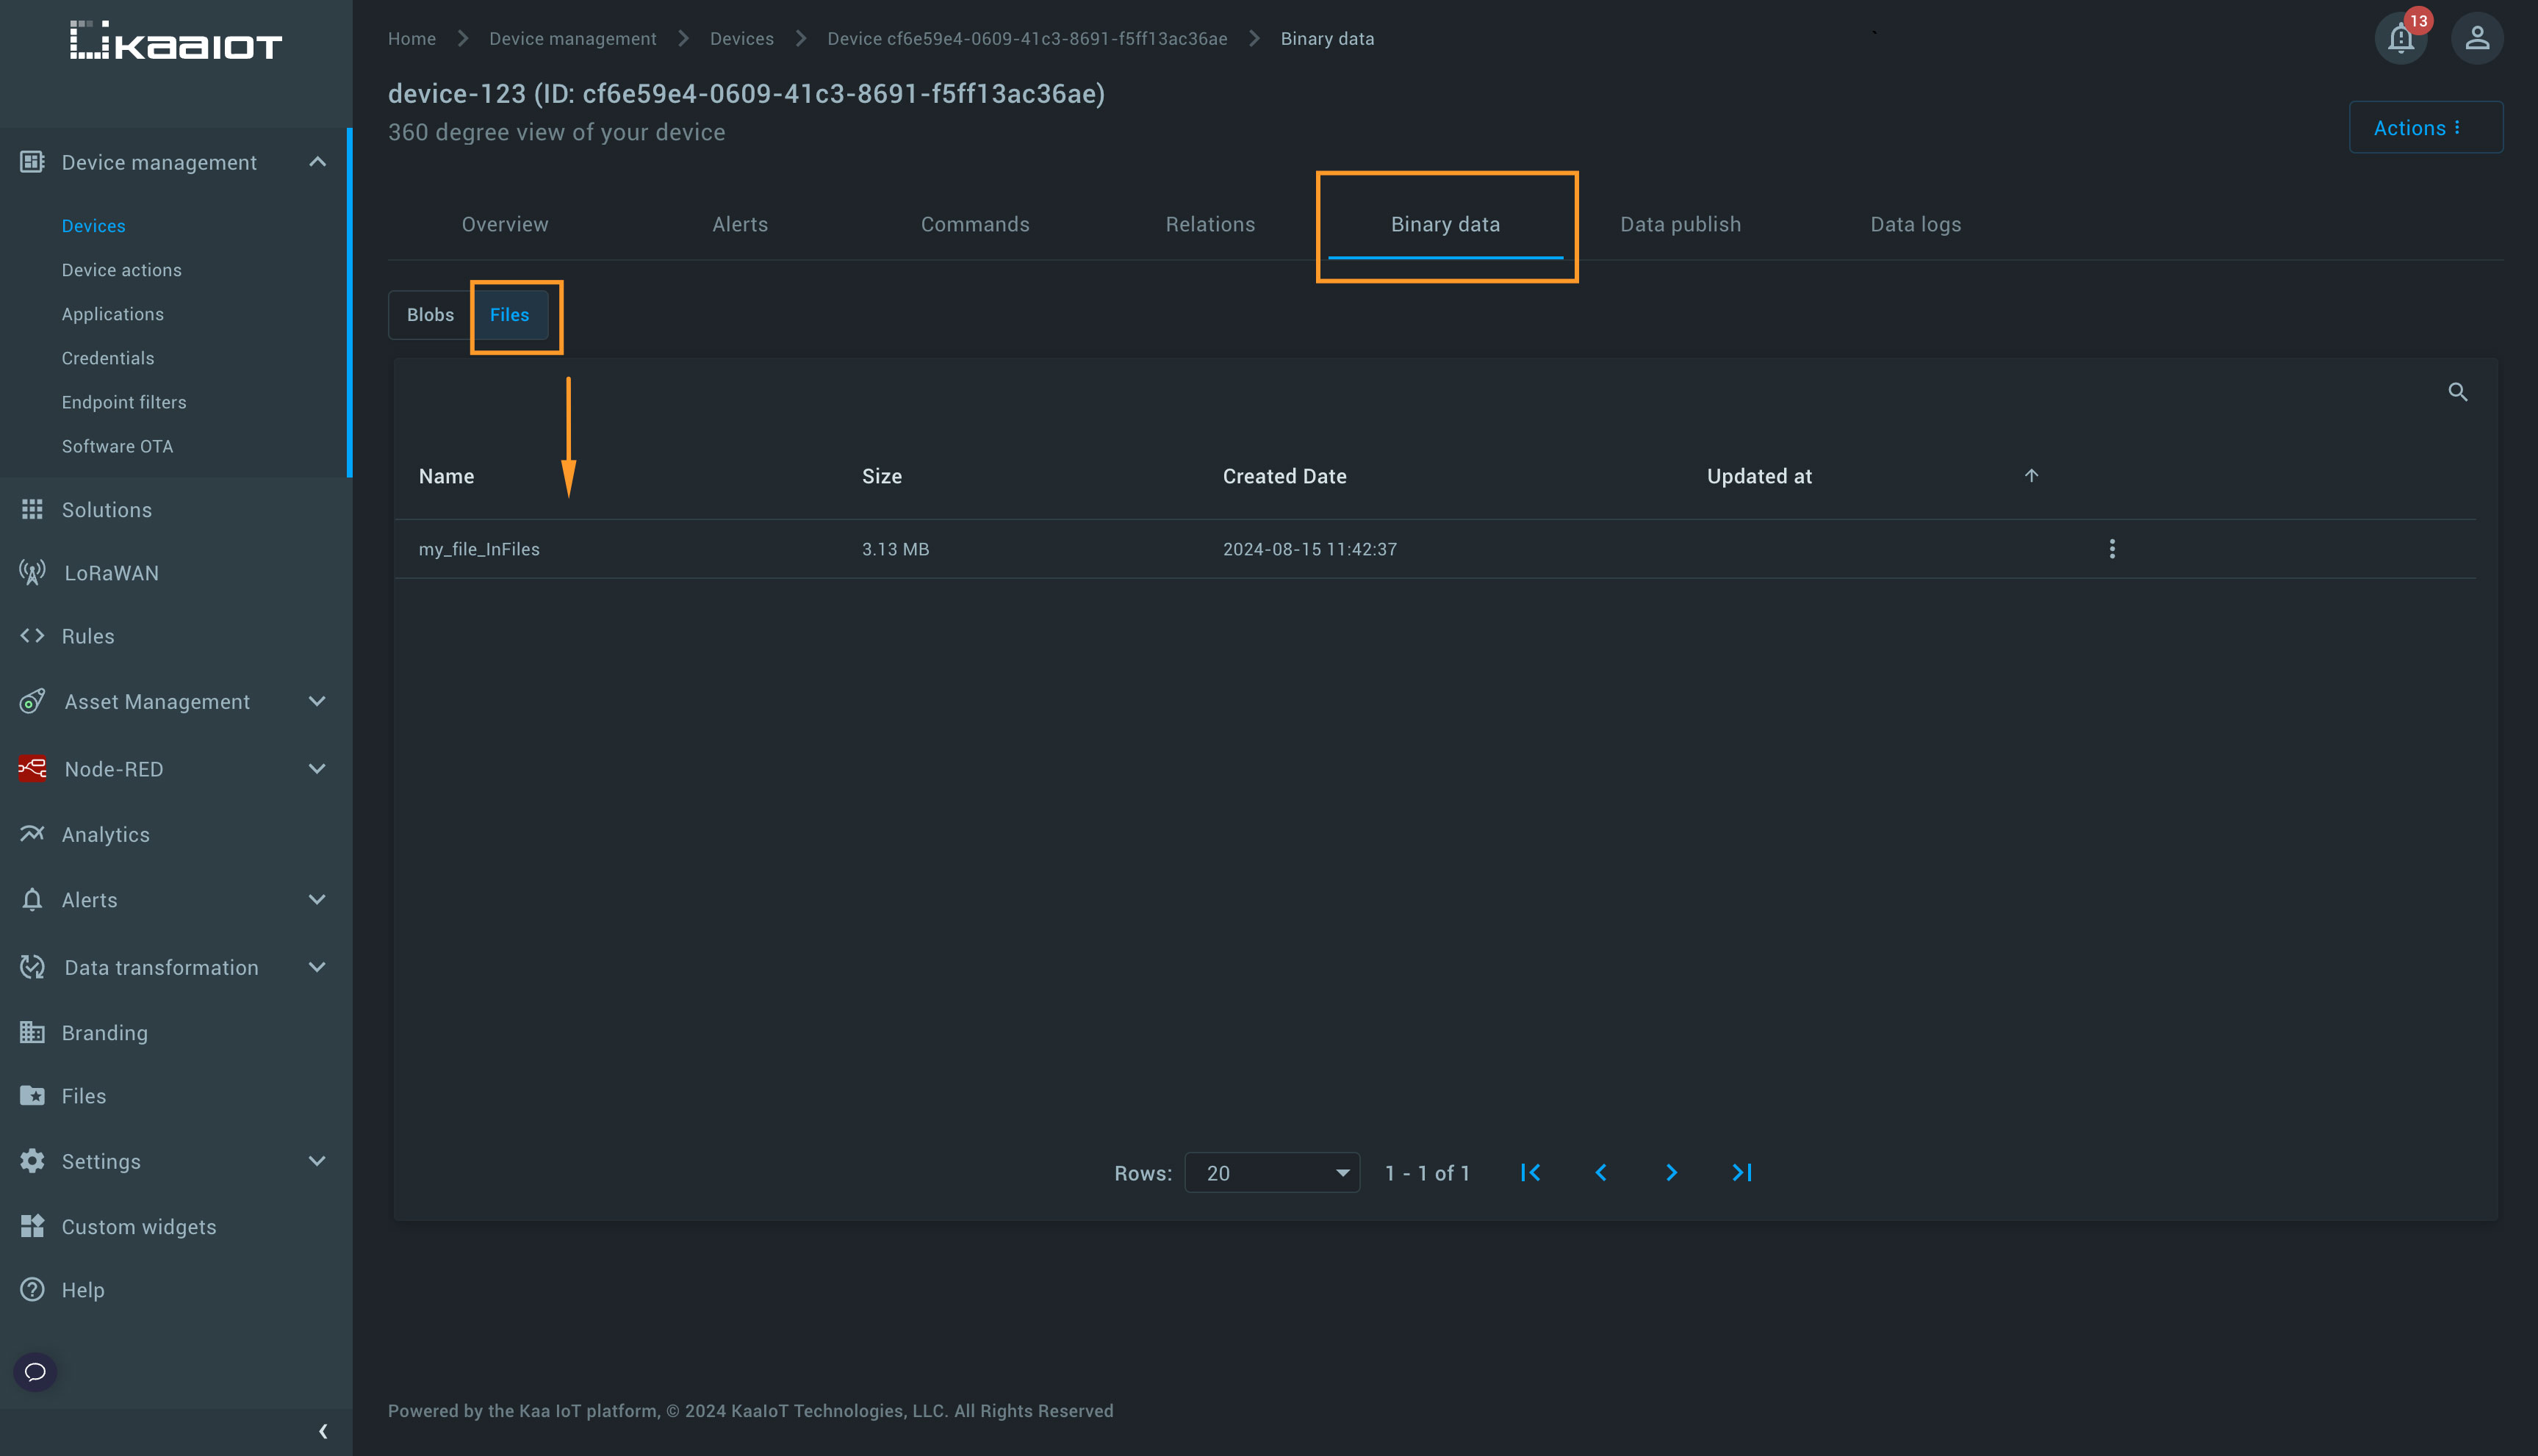
- Check the upload status in your Kaa Cloud in Binary Data.
Step 3: Upload files
Files differ from binary data blobs in that they can be overwritten and can be downloaded using the original file name and extension, whereas the blobs are always downloadable with a .bin extension. File upload can be performed only over HTTP using the REST API call PUT bcx/api/v1/files/<file_name>. This REST API is secured and requires specifying the token value in the x-auth-token header key. You can find an example in the Data publish tab by selecting HTTP -> Binary data collection -> Upload / update file.
1. Choose the "Upload / Update File" request option.
2. Insert the token:
- Replace Get value from \"Get upload token\" with the token you copied into the x-auth token header field.

3. Input the file name and select the file:
- Copy the curl from the Code example section.
- Open a tool like Postman and import a copied request.
- Specify the file name in the Params.
- Select the file you want to upload in the Body.
4. Use the PUT method:
- Unlike binary data, file uploads require using the PUT method instead of POST.

5. Update the file name:
- Change the file name in the request body as needed.
- Submit the request, ensuring that the status returned is 204 No Content, which means the file has been uploaded successfully.
6. Check the uploaded file in the Kaa Cloud
Step 4: Overwrite files
One powerful feature is the ability to replace existing files.
1. Replace a file:
- You can replace a file by using the same file name in the request.
- Simply upload a different file with the same name, and the existing file will be overwritten.
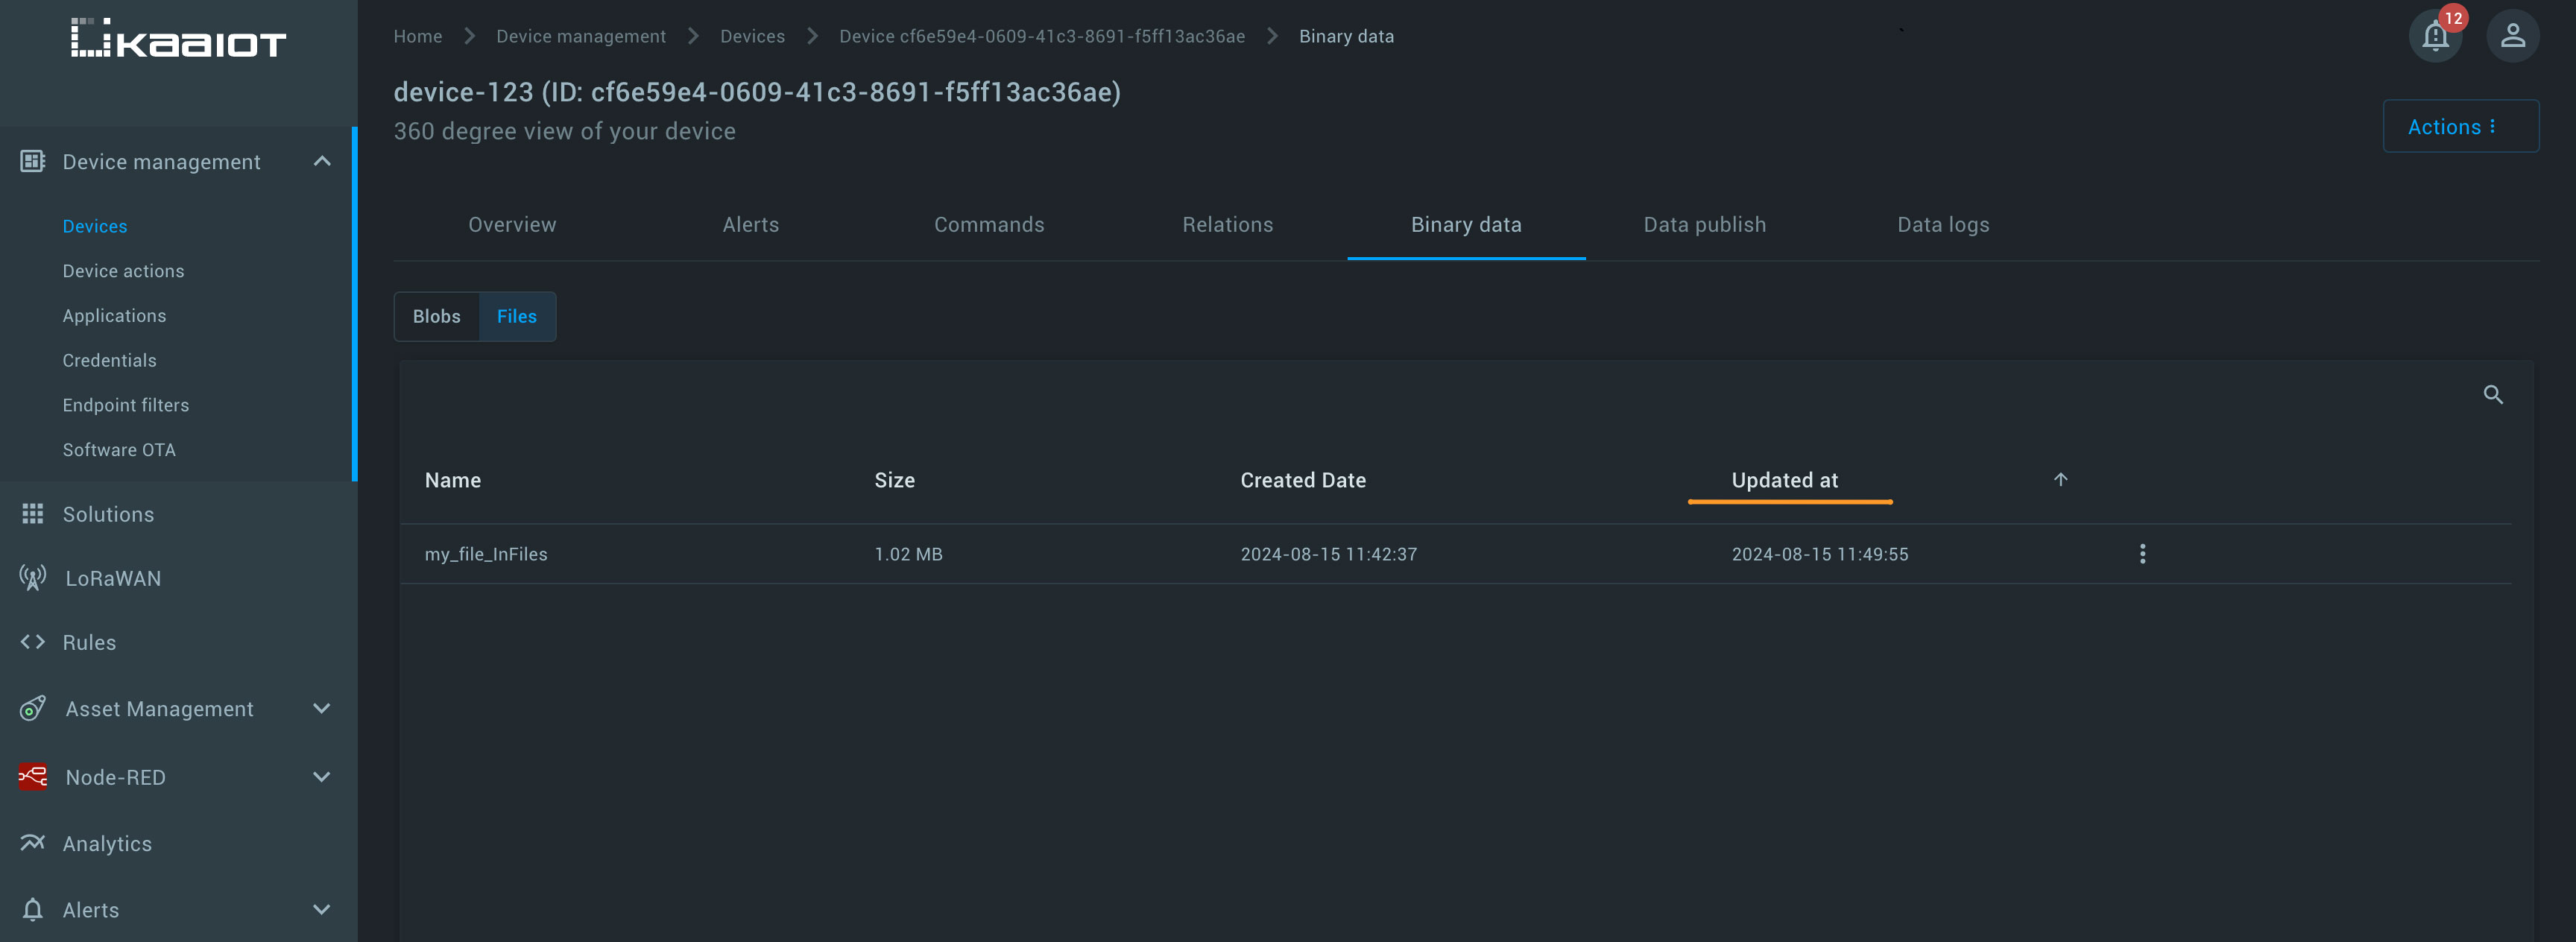
2. Check the updated date:
- After replacing the file, check the file’s metadata.
- You should see an updated date indicating the file was successfully overwritten.
Step 5: Access uploaded files via REST API
Files uploaded to Kaa Cloud can be accessed through the REST API.
1. Use the Binary Data Collection Extension:
- The Binary Data Collection Extension manages the storage and retrieval of files.
2. Access files via REST API:
- Use the REST API to retrieve or manage your files.
- Refer to the Kaa REST API documentation for detailed instructions.
Summary
In this tutorial, we’ve covered the essential steps to upload and manage files on the Kaa Cloud:
- Obtaining an upload token to authenticate your requests.
- Uploading binary data using the POST method.
- Uploading files using the PUT method and the correct URL.
- Replacing existing files by uploading new files with the same name.
This process is critical for managing IoT data effectively. By following these steps, you’ll ensure that your files are uploaded and managed correctly, keeping your IoT operations running smoothly.
Related Stories
In this guide, we will connect the TEKTELIC VIVID LORAWAN® SMART ROOM & OCCUPANCY SENSOR...
Explore the features of the TEKTELIC COMFORT LoRaWAN Smart Room sensor in this tutorial...
TEKTELIC BREEZE and Kaa integration provides actionable insights...
In this tutorial, we will go over the steps to set up alerts in the Kaa IoT platform...