
Managing Assets on Solution Dashboard
Overview
In this tutorial, we’ll walk you through using “Assets” and “Asset Types” in Kaa.
As described in the Assets Overview, an “Asset” is an entity that may have relations with other entities. For instance, a “Vehicle Asset” can hold “endpoints” or even other assets. This structure enables the “Solution Dashboard” to display detailed information about specific assets, including their associated endpoints or sub-assets.
By the end of this tutorial, you’ll know how to apply assets to your solutions and manage endpoints more effectively.
Prerequisites
- You have a Kaa Cloud account.
- You should already know how to connect a device to the Kaa Platform. If not, refer to Getting Started.
- Make sure you’ve read Assets Overview and completed all the steps there, since this tutorial is a continuation of that overview.
Vehicle Solution Dashboard
Continuing from the Assets Overview, we’ll create a Solution using “Vehicle Assets” and configure them in the “Solution Dashboard”. As a result, each vehicle will have its own dedicated page to display its unique endpoints and contents.
Create a Solution
Follow these steps:
-
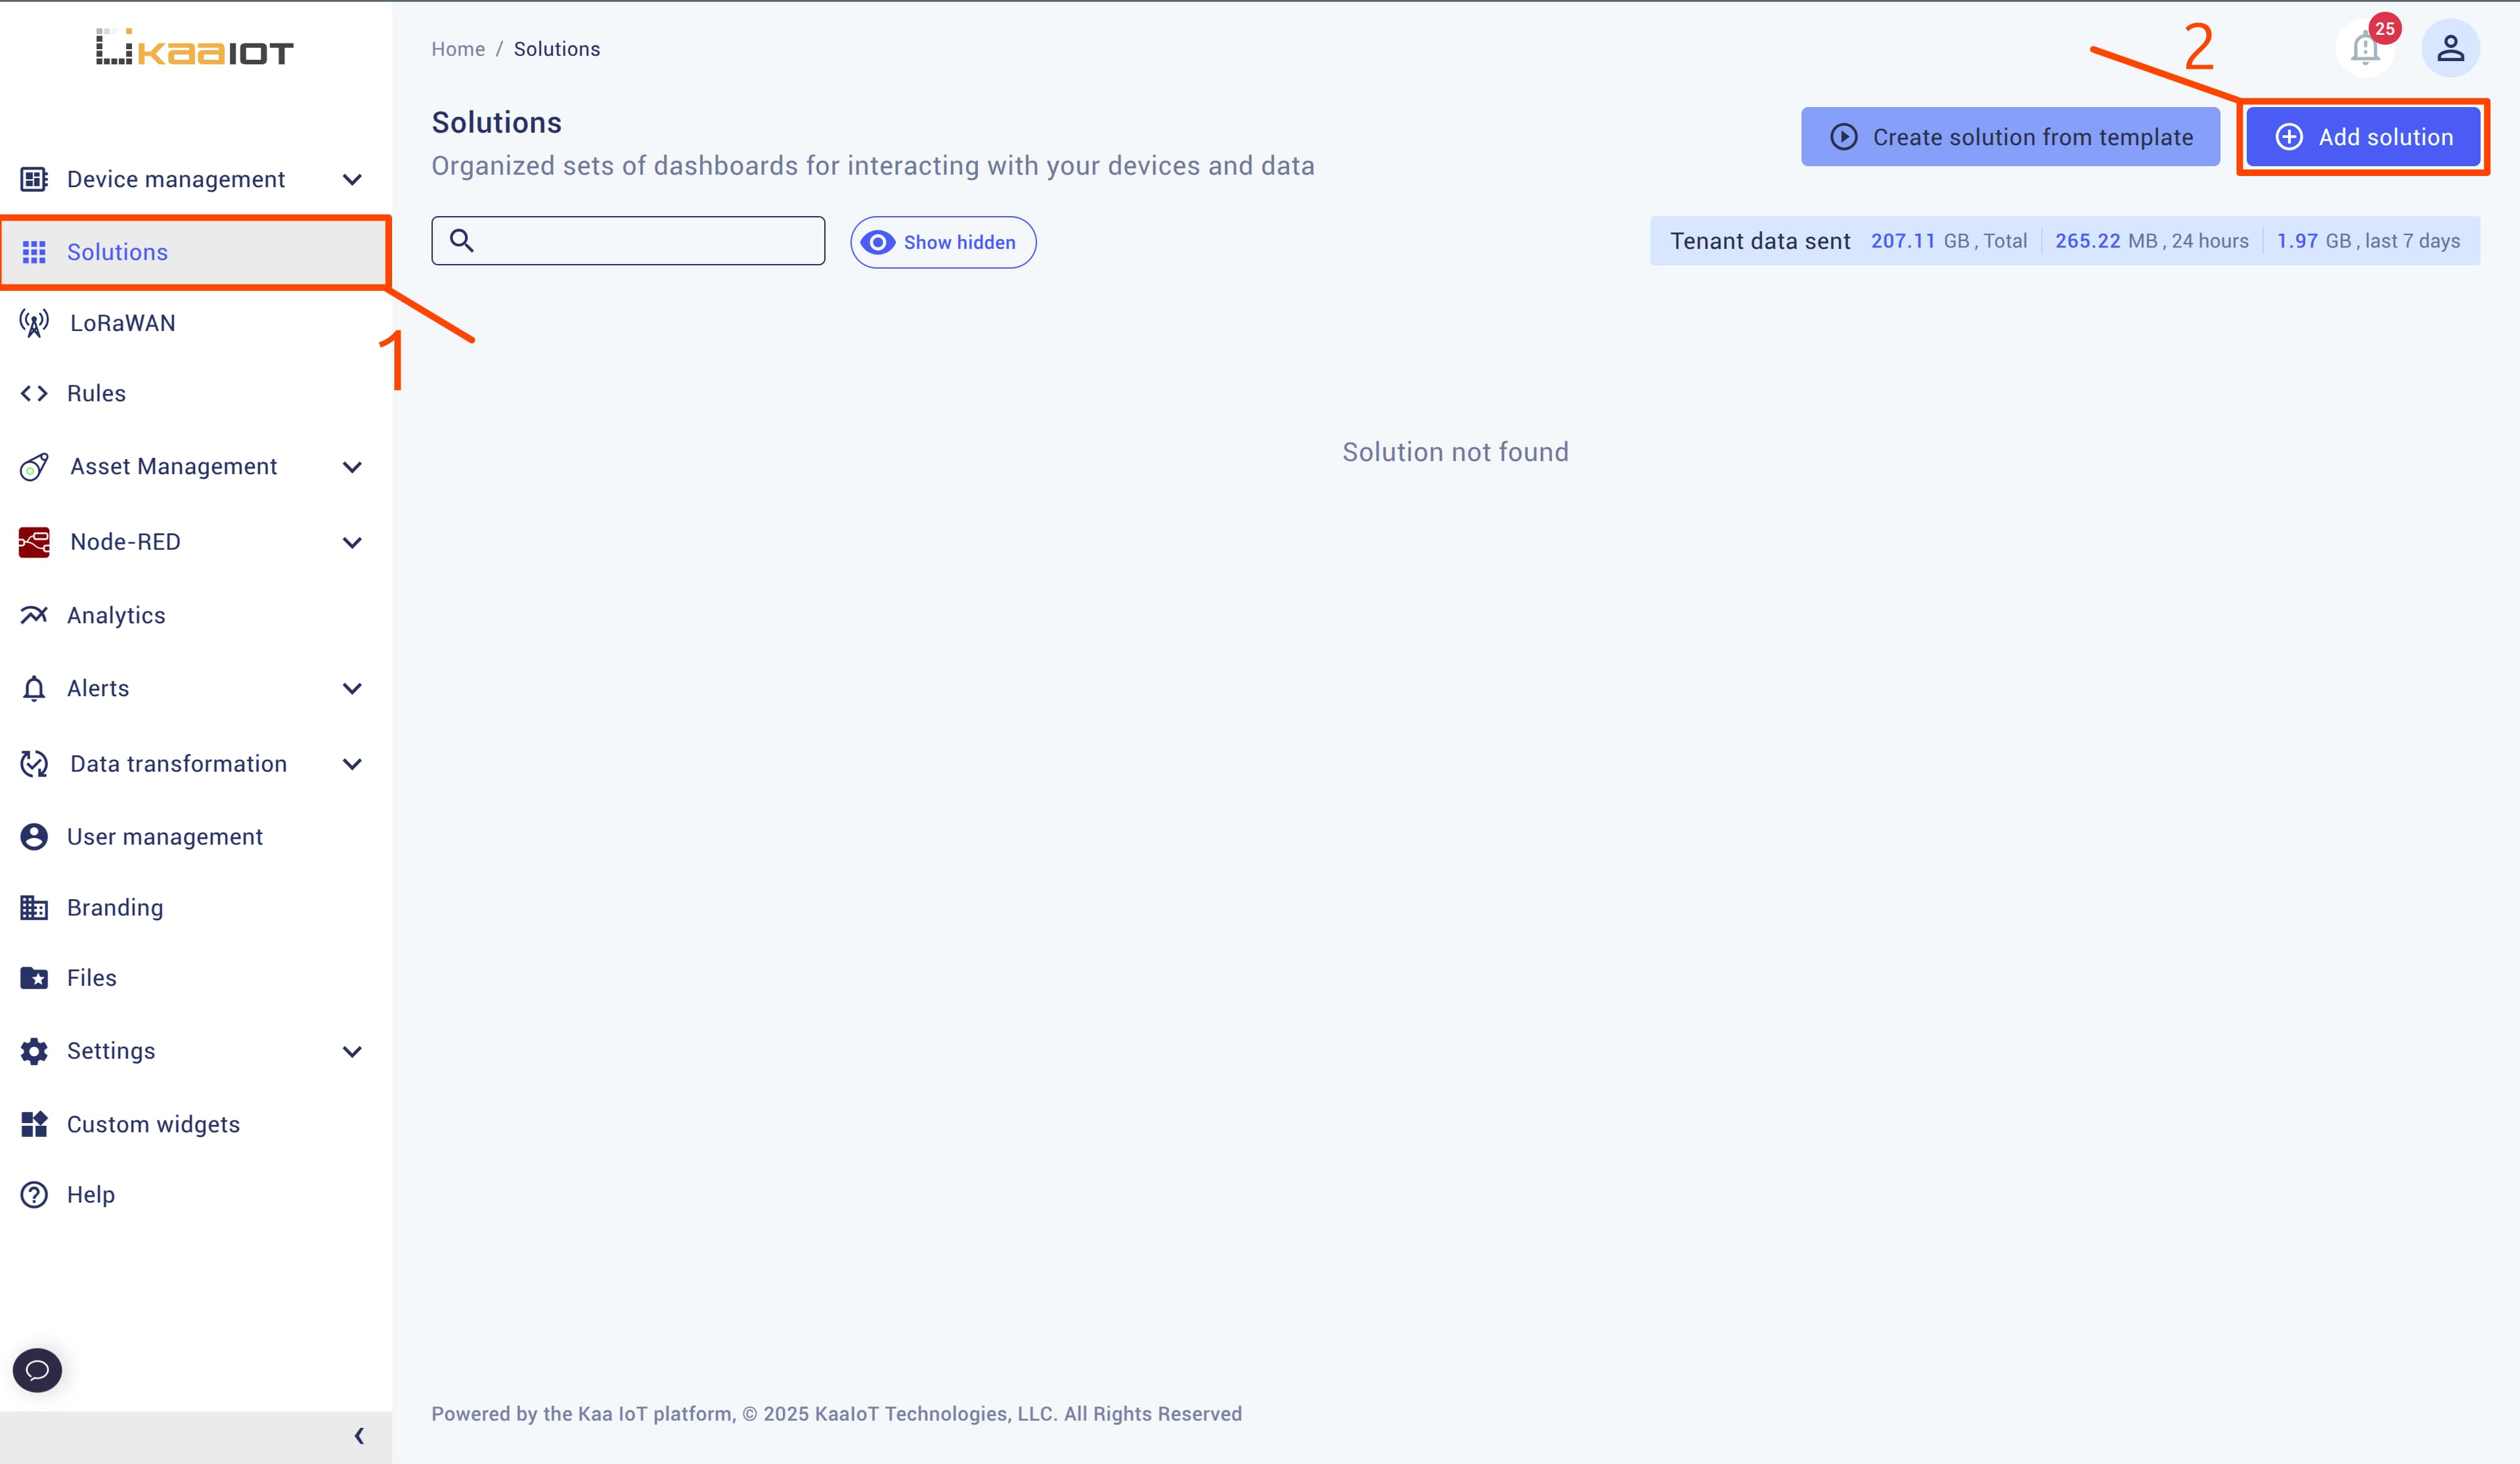
Navigate to the “Solution” tab and create a new solution.
-
Open the newly created solution, then access the “Home Dashboard”.
Create an Asset List
-
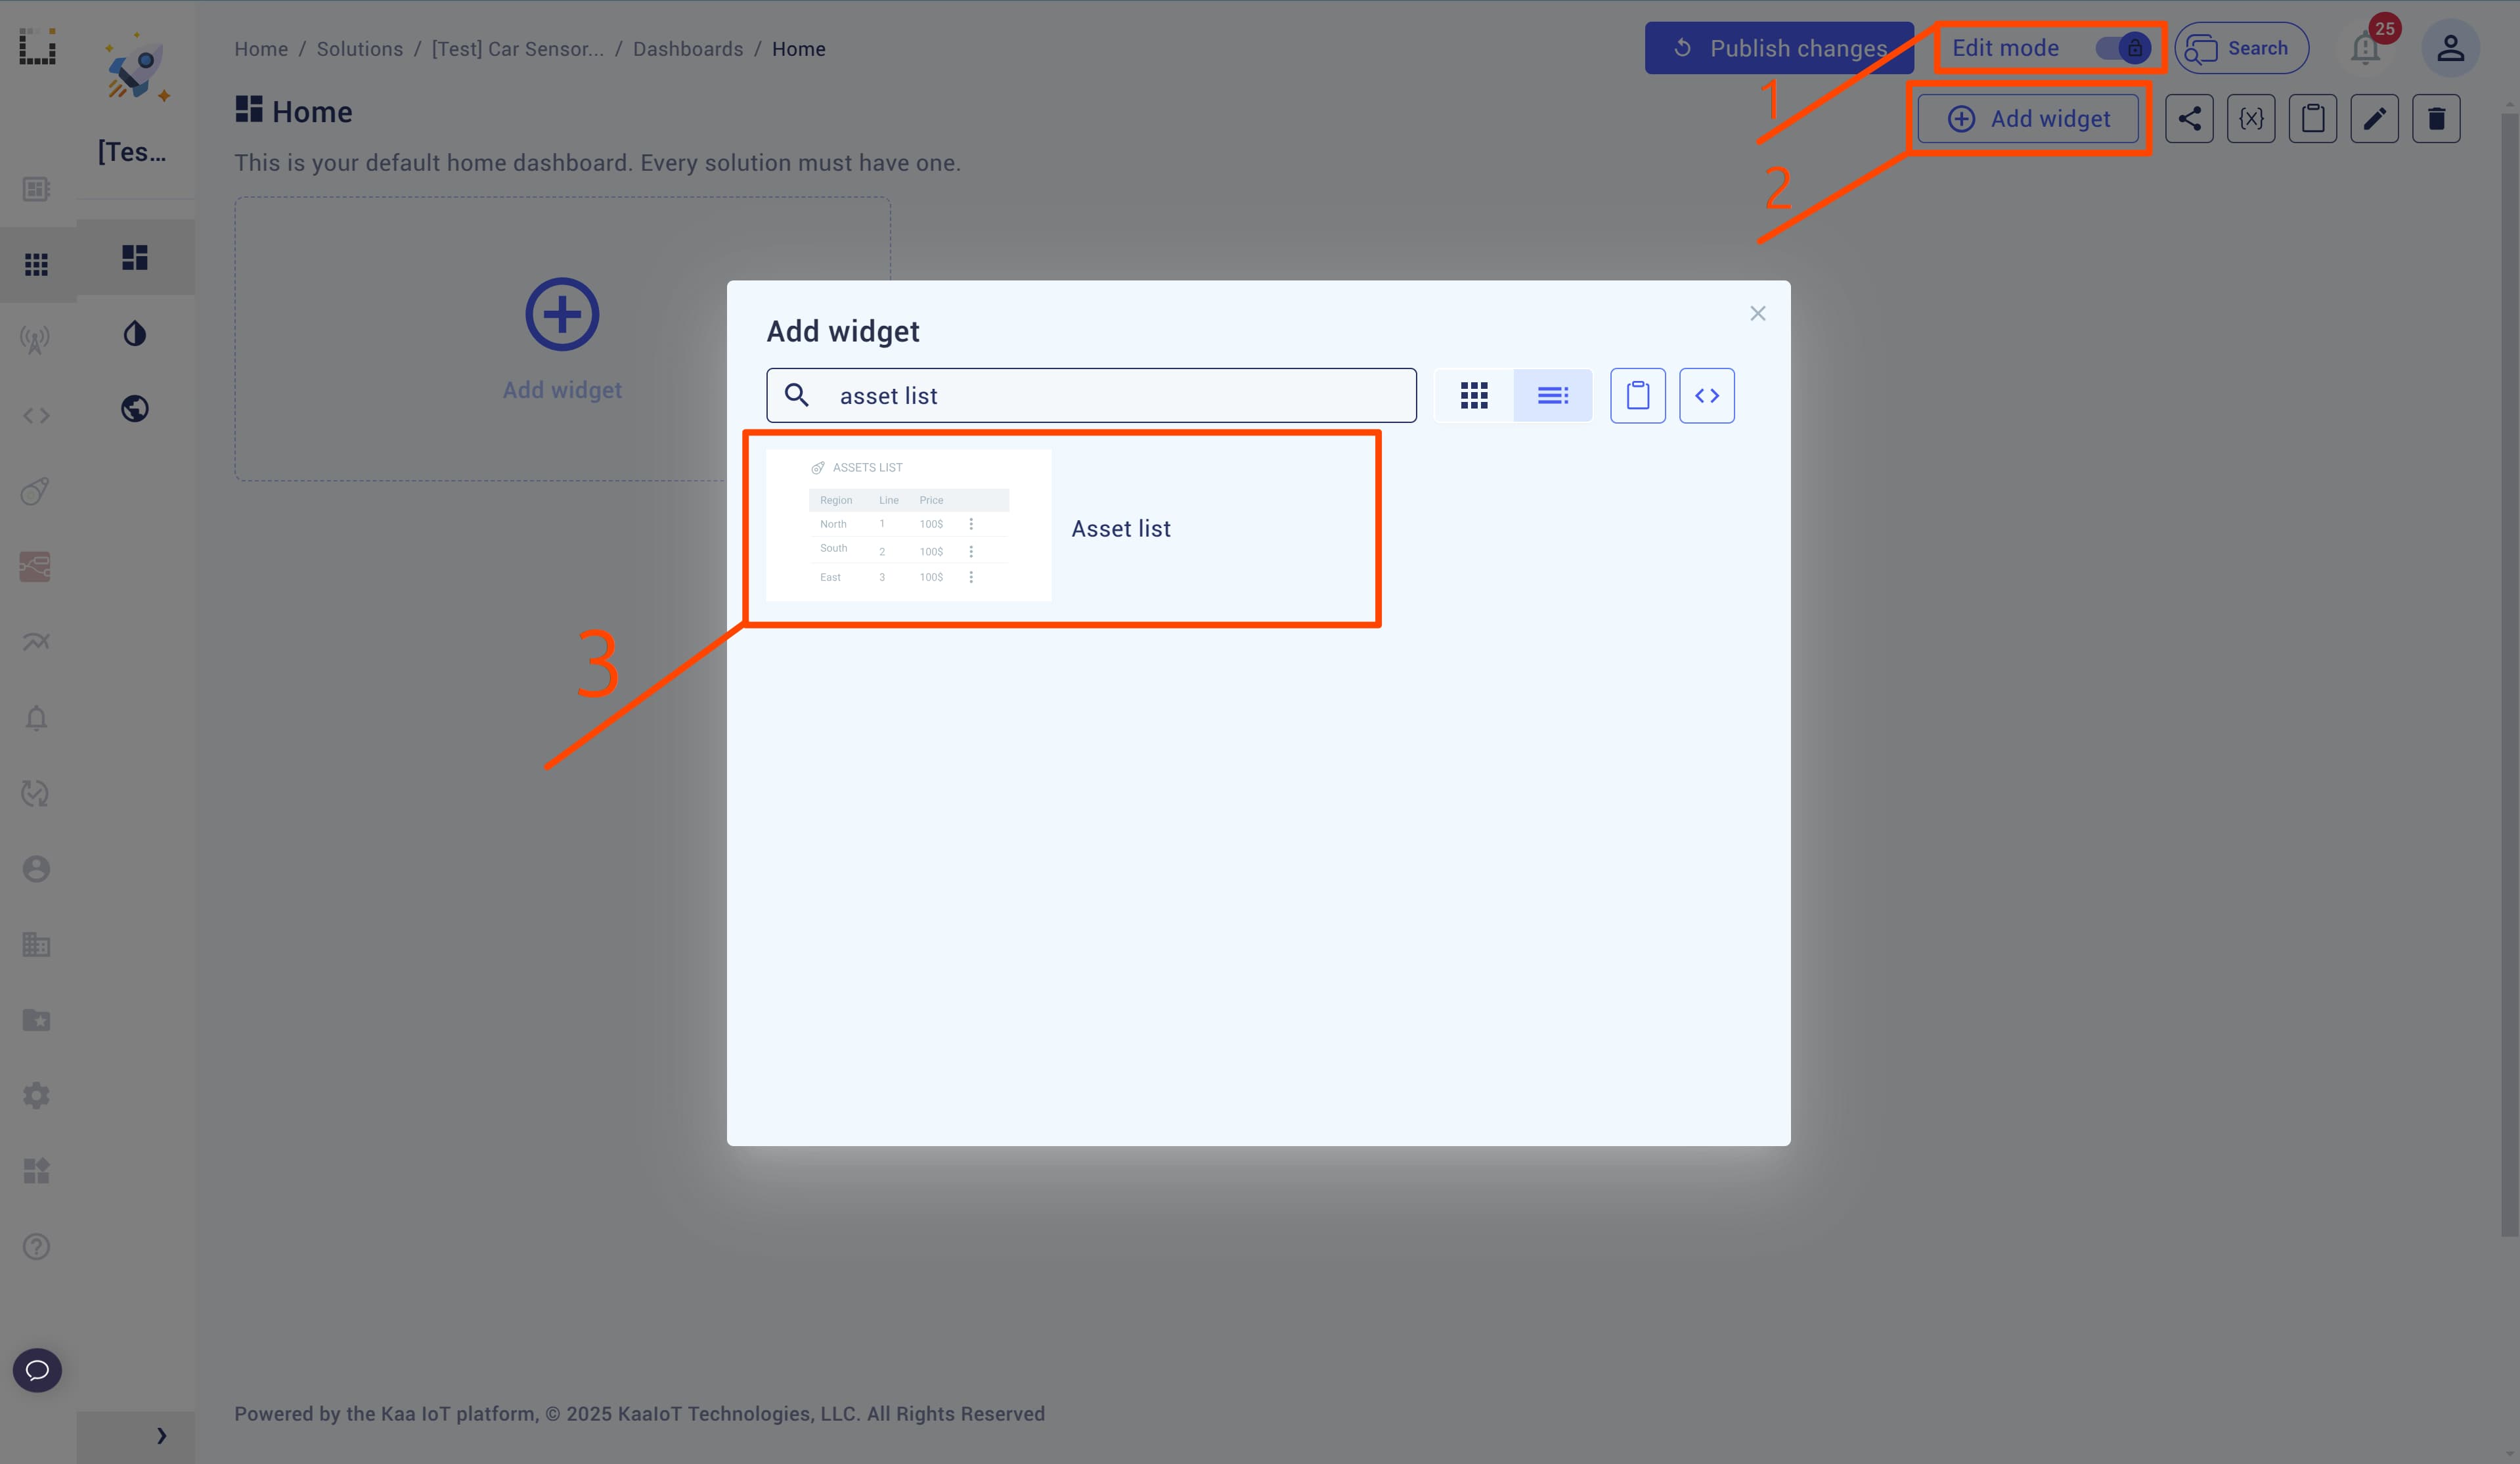
Enter “Edit Mode” and add an “Asset List” widget.
-
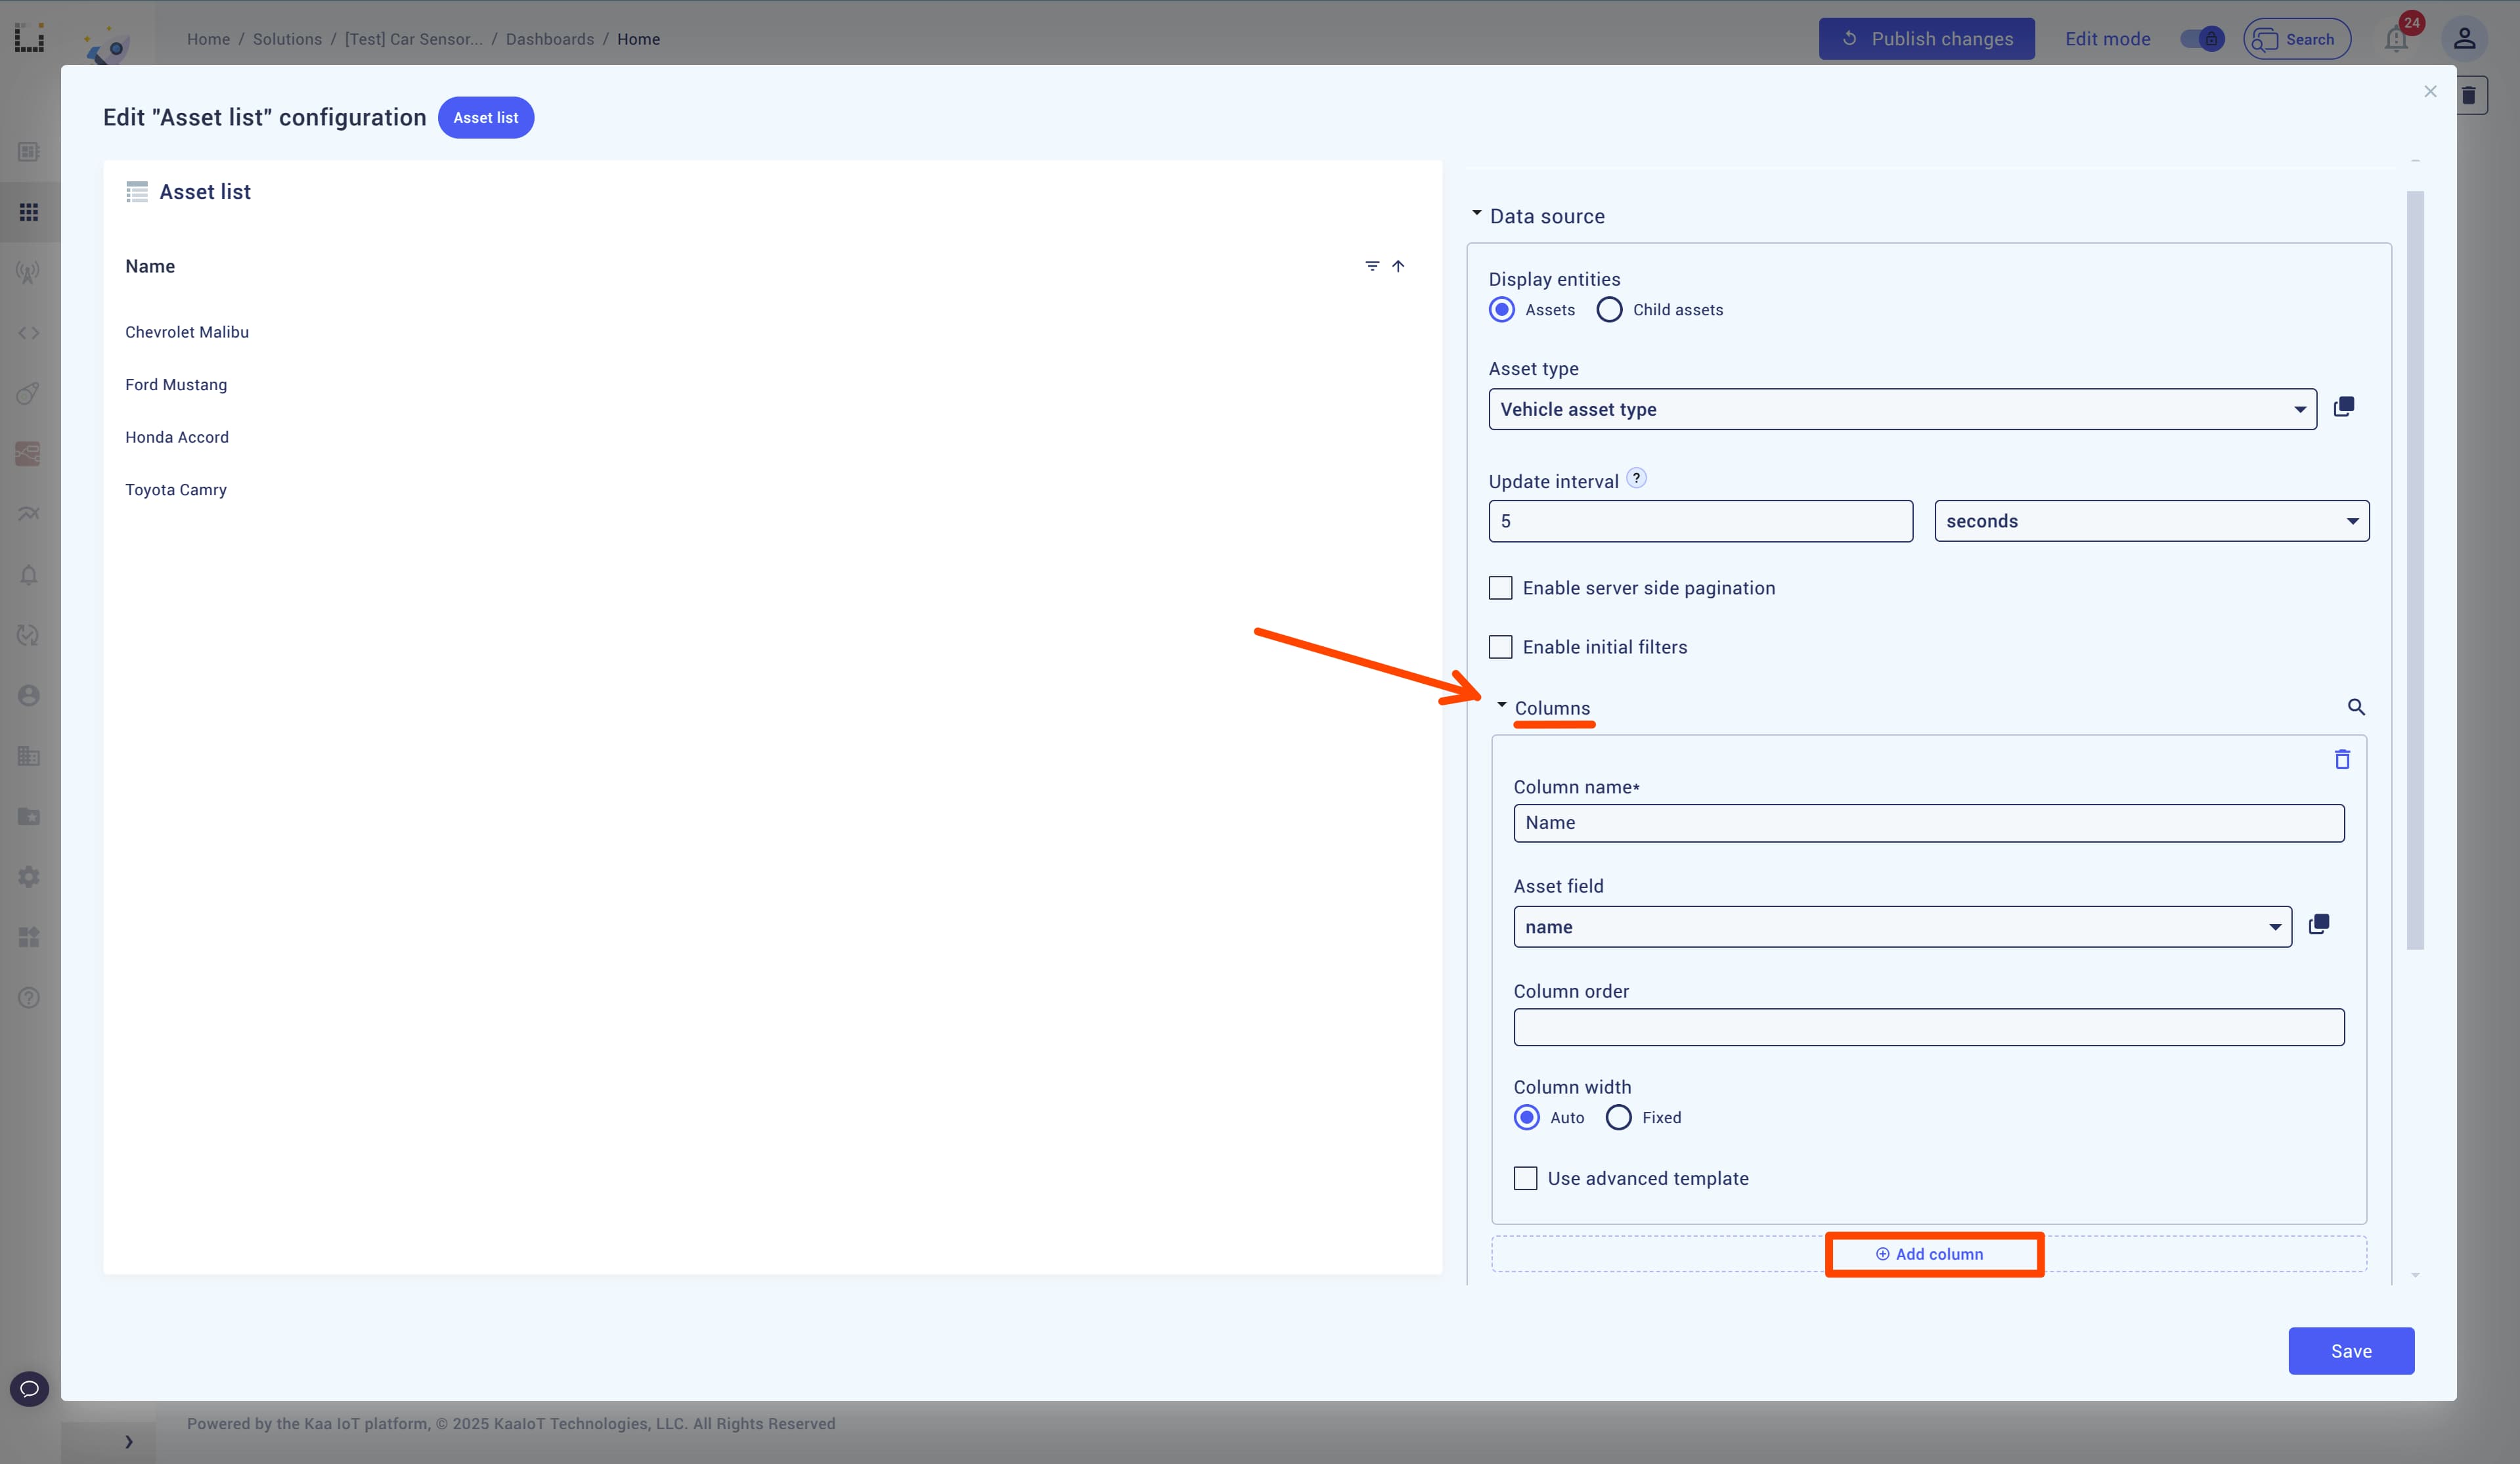
In the “Data Source” menu, scroll down and set the “Asset Type” field to display the vehicle data.

-
By default, only the “Name” field will be displayed. To show additional fields, specify them in the “Columns” section.
Note: Remember to publish your changes after each update, or they won’t be saved upon page reload.
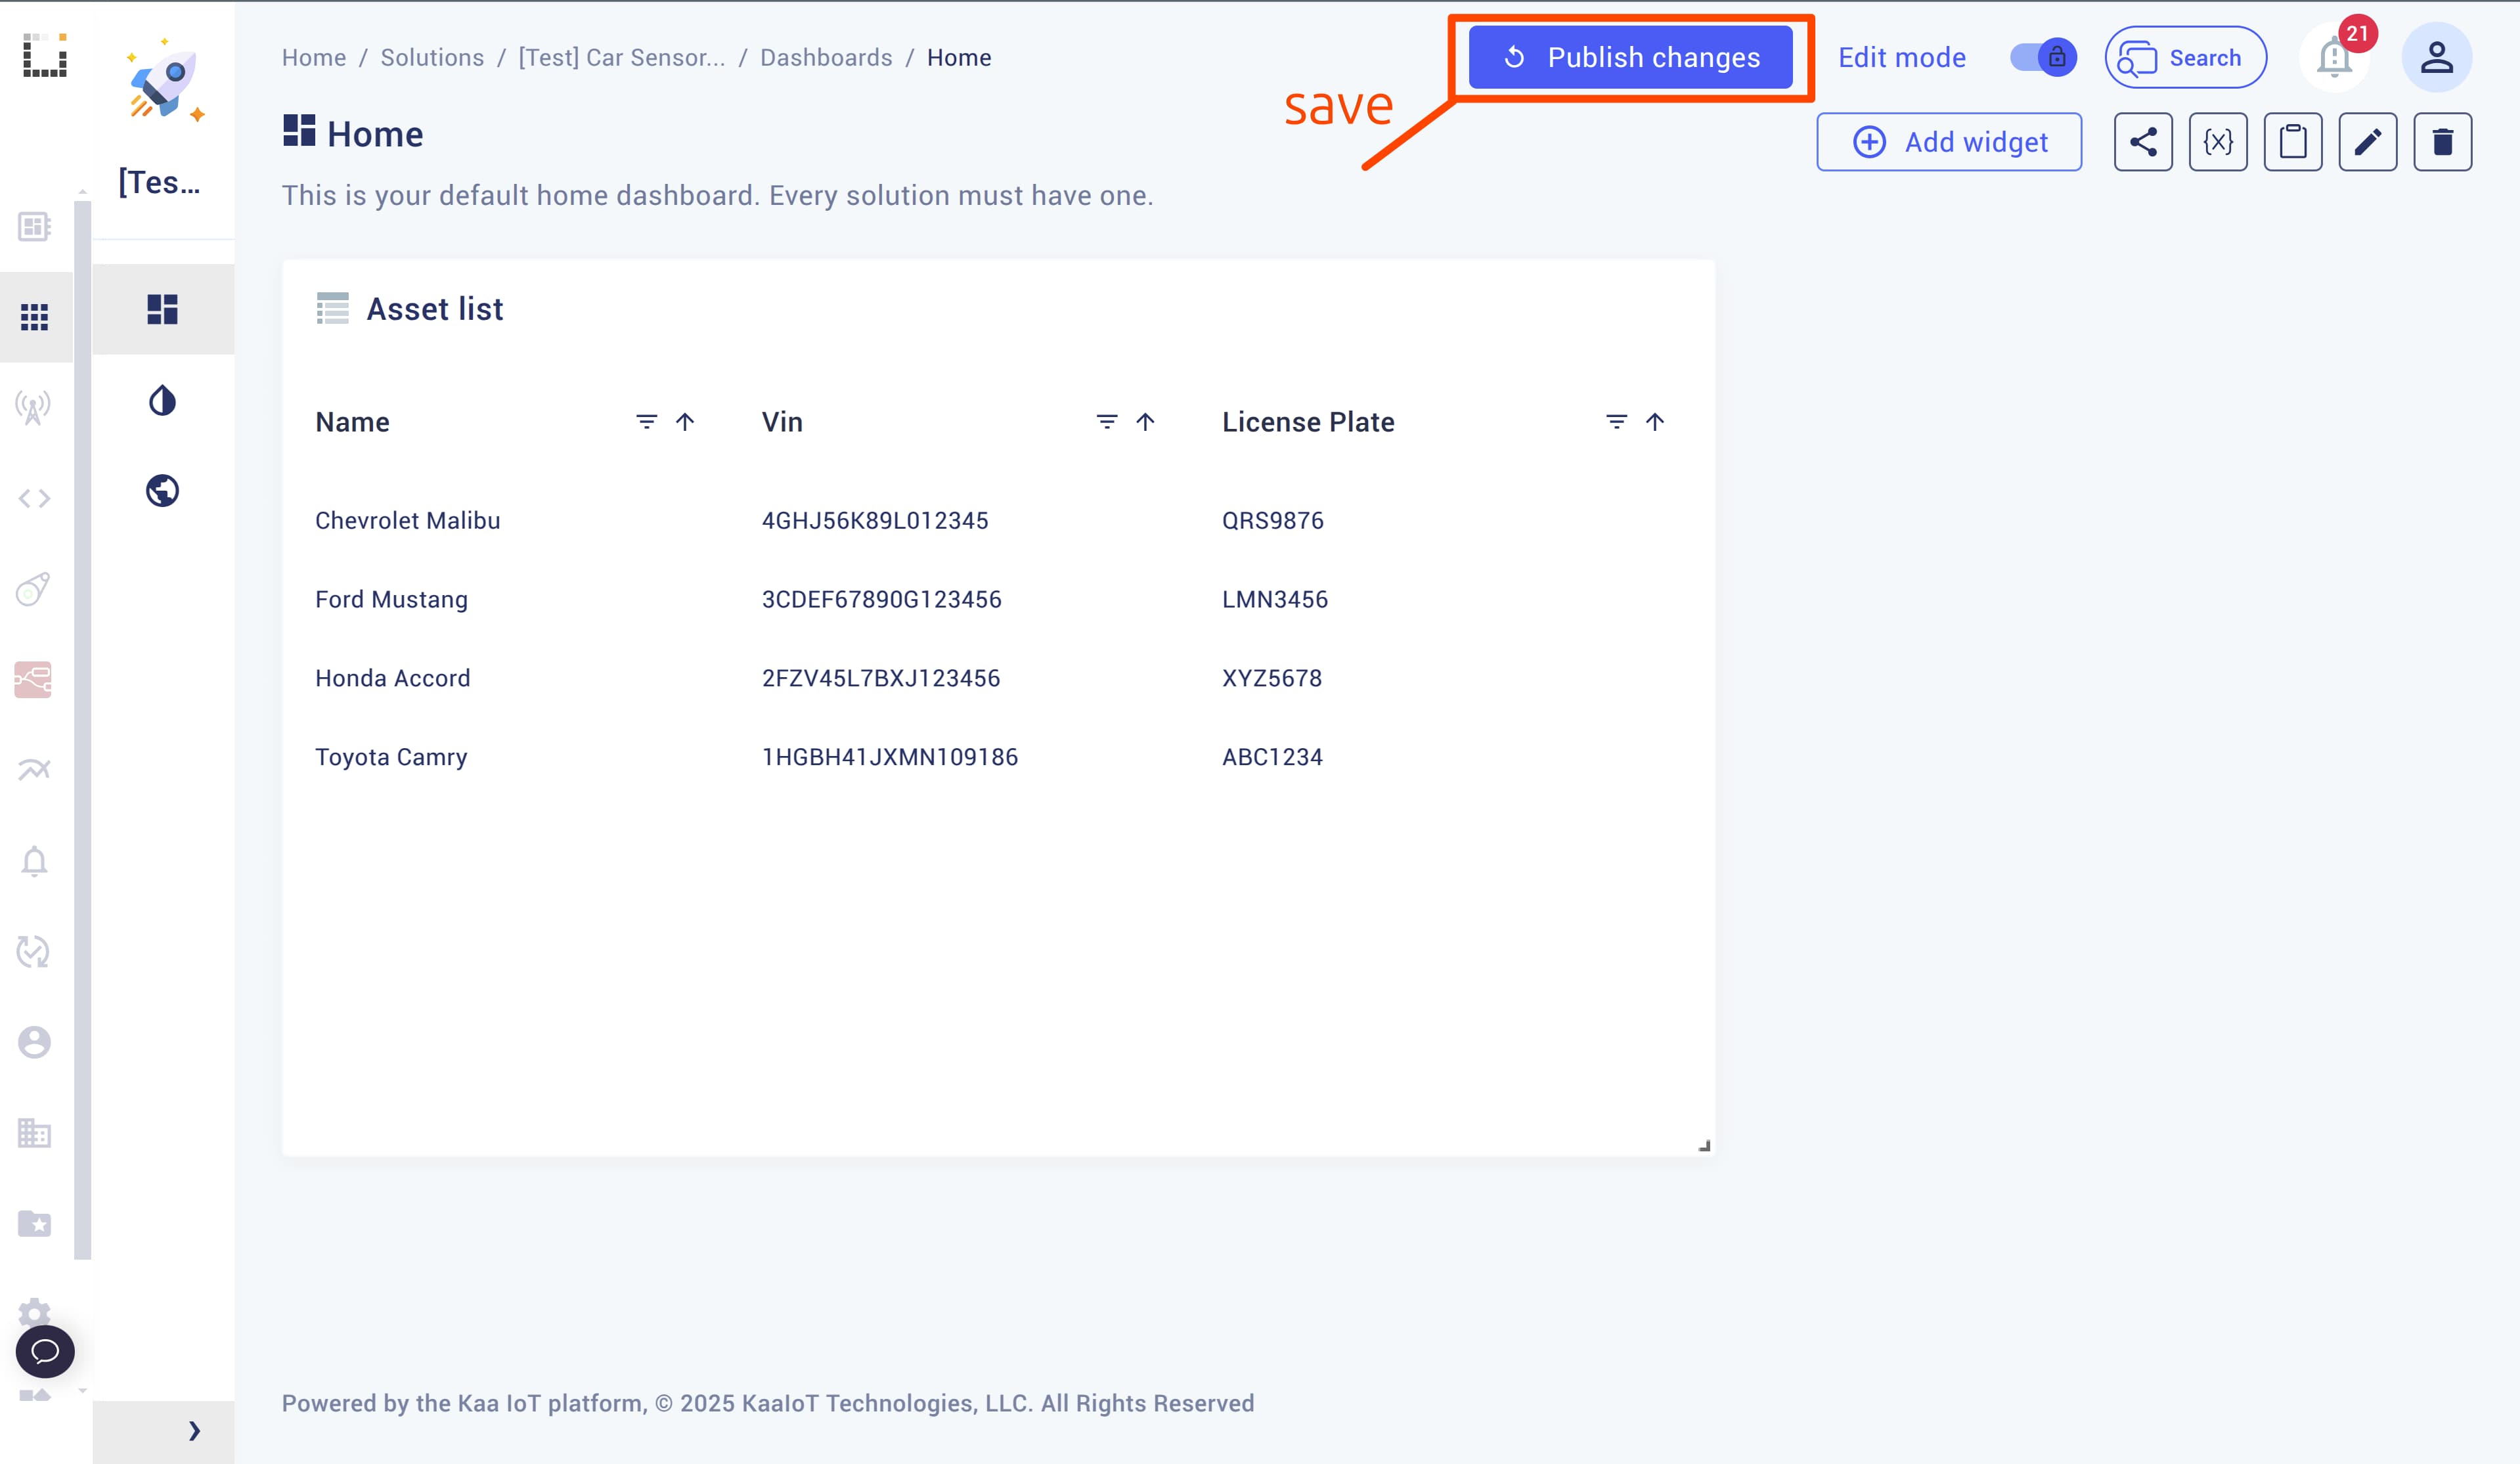
This “Asset List” will display all available vehicles and allow navigation to each vehicle’s dedicated page, where you can view its related endpoints and other attached resources. However, before we can navigate to the vehicle page, we first need to create it.
Create Vehicle Dashboard
To display detailed information about individual vehicles, we need to create a dedicated Dashboard that will automatically populate with data from whichever vehicle asset is selected.
Navigate back to the “Dashboards” page and create a new “Vehicle Details” dashboard.

Once the dashboard is created, you should see the vehicle’s name displayed in the top-left corner, indicating that it is related to a specific vehicle. Currently, the “Vehicle Details Dashboard” refers only to the first available vehicle asset, but we’ll change that later.
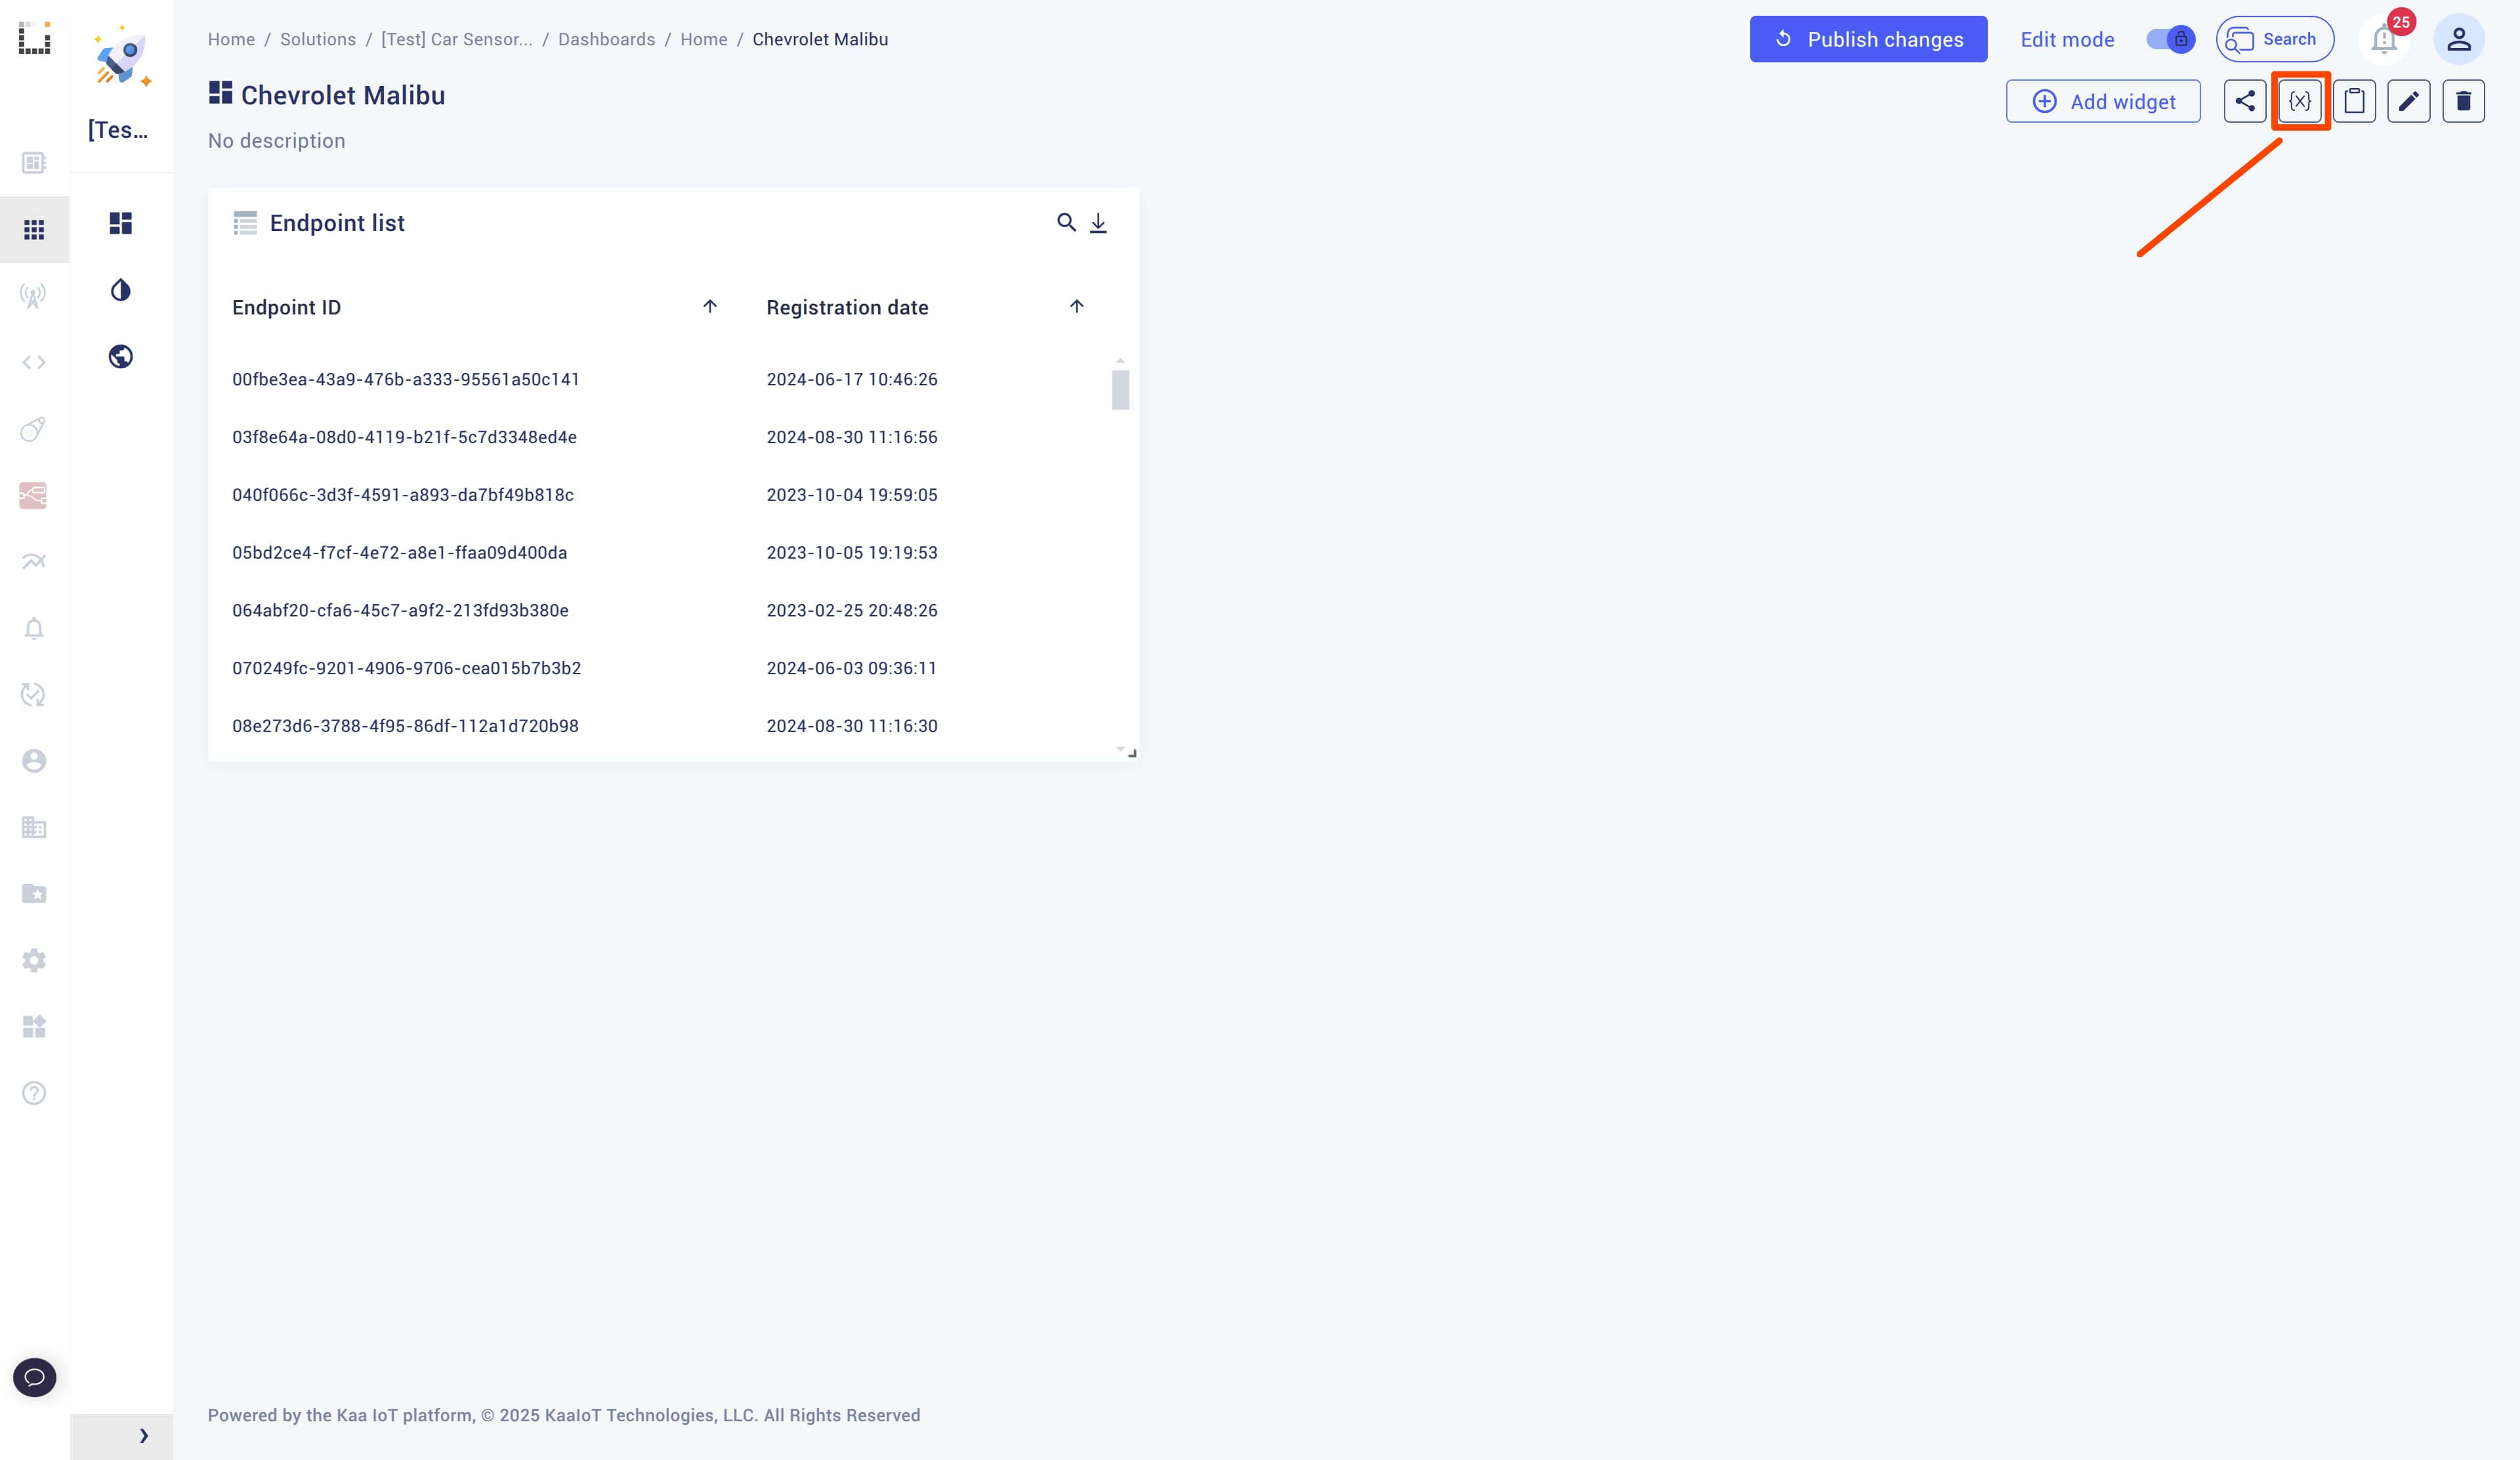
In the “Vehicle Details Dashboard”, create an “Endpoint List” to display the endpoints. By default, all endpoints will be shown, so we’ll need to apply a filter to display only the relevant ones.
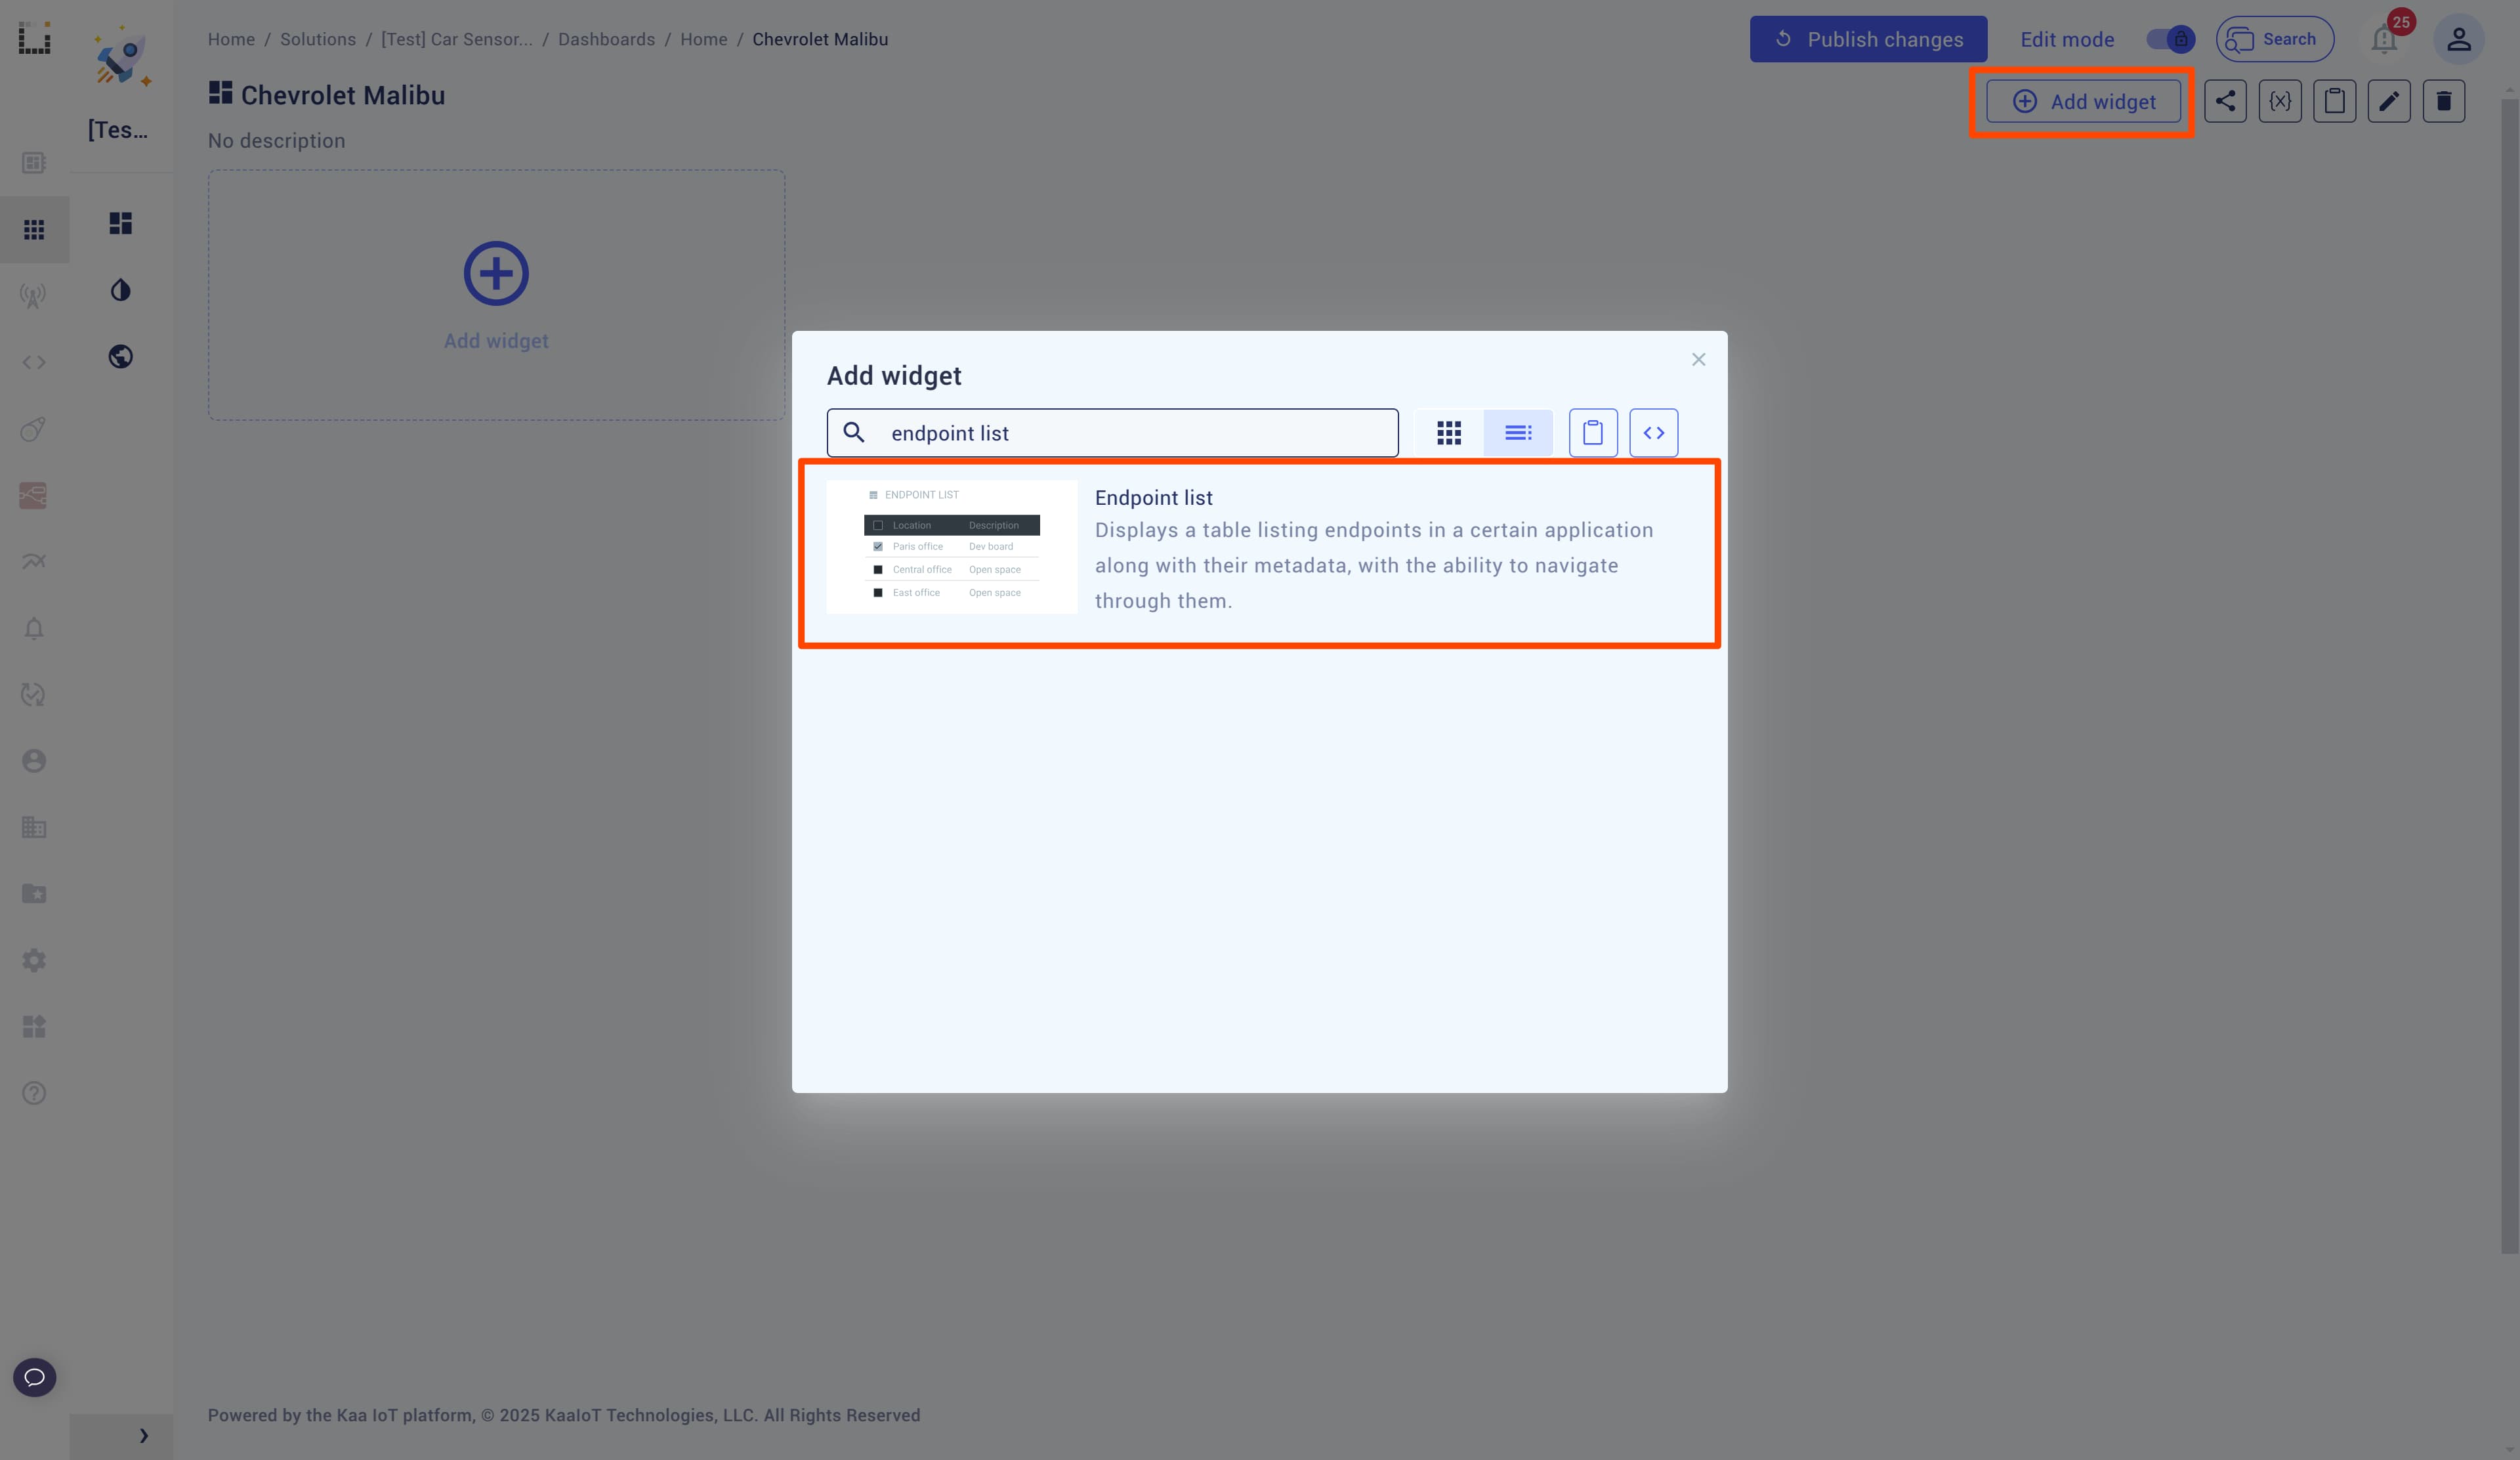
Filter Endpoints
To filter the endpoints and display only those related to the current asset, we need to create a variable containing the necessary endpoint IDs. Click the “Setup Variables” button to begin.
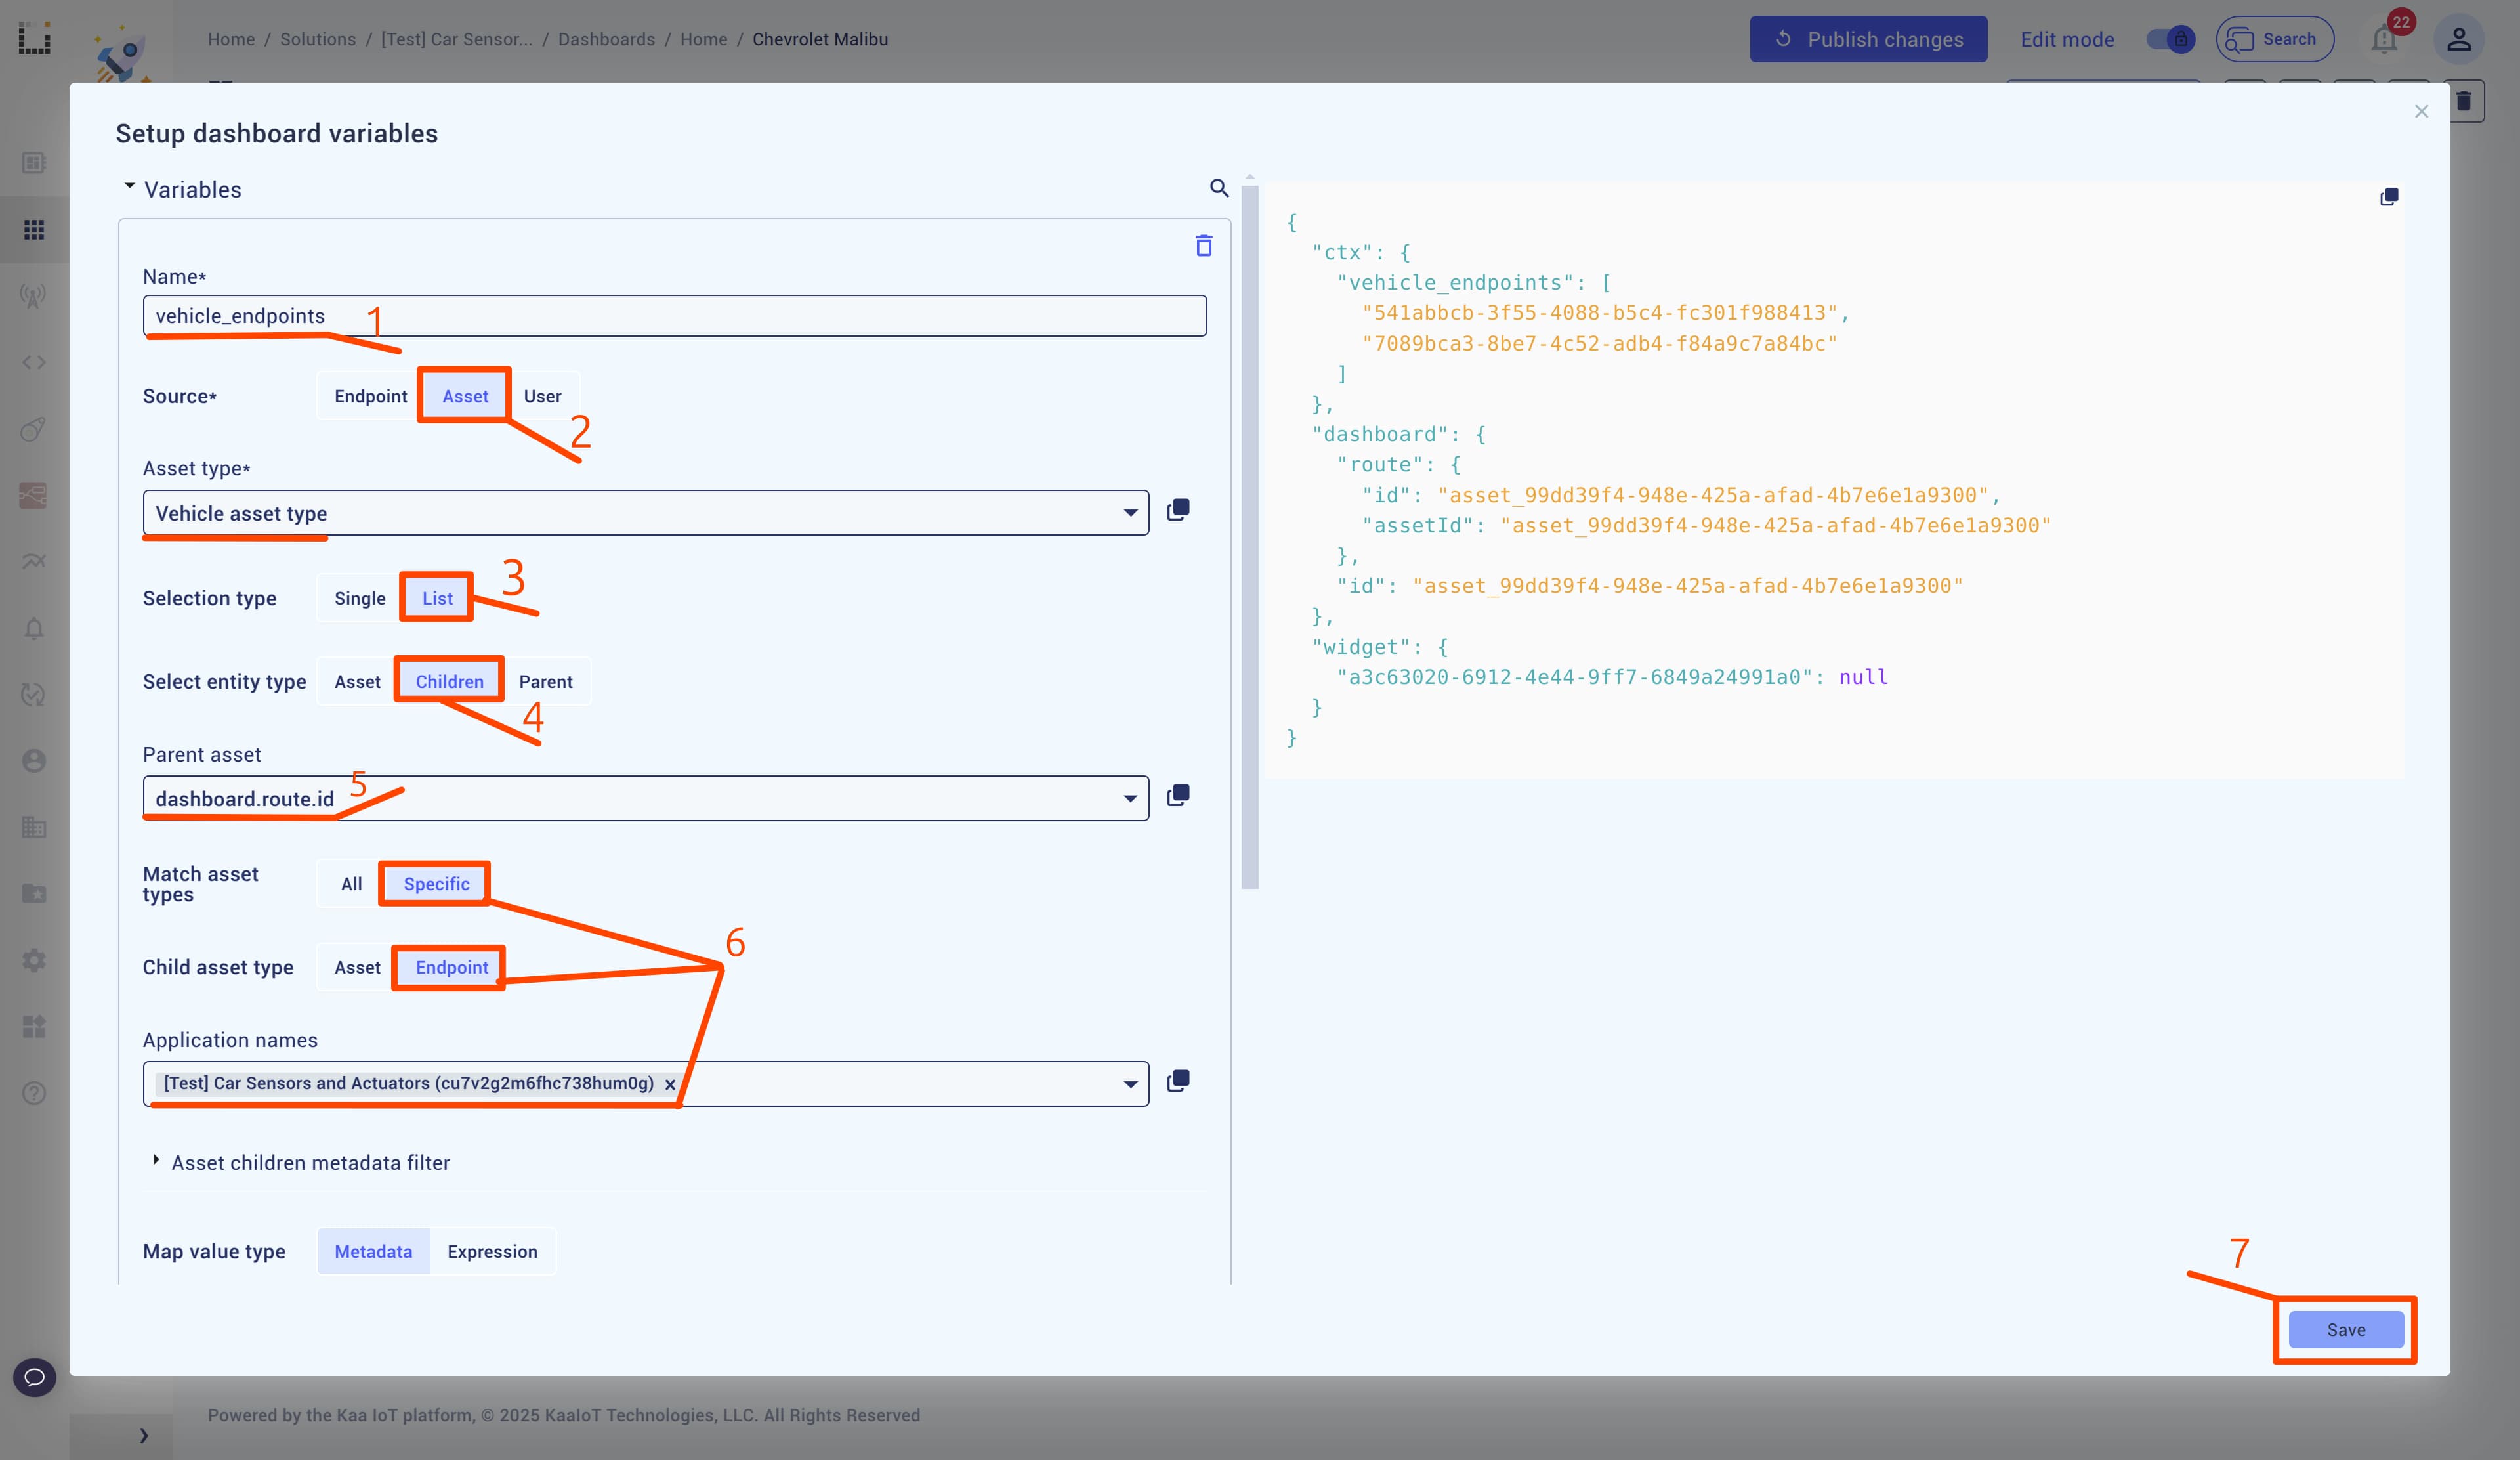
- Set the name to
vehicle_endpoints, or choose a custom name. - Specify the source and asset type, as these will provide the related endpoint IDs.
- Set the “Selection Type” to
List, since there might be multiple endpoints. - Set the “Entity Type” to
Children, because in asset management, we defined the Vehicle Type to contain endpoints as children. - Set the “Parent Asset” to
dashboard.route.id. This value dynamically references the ID of the currently displayed vehicle asset, allowing the dashboard to show data specific to each vehicle. - Set the “Match Asset Types” to
Specific, and the “Child Asset Type” toEndpointwith a Vehicle’s application. - Click save.
The vehicle_endpoints variable is an array of endpoint IDs related to the asset, and it can be passed to other widgets to display their information.
To apply the variable, go to the “Endpoint List” widget. Scroll down to the “Data Source” section and select the vehicle_endpoints variable in the “Endpoint IDs” field.
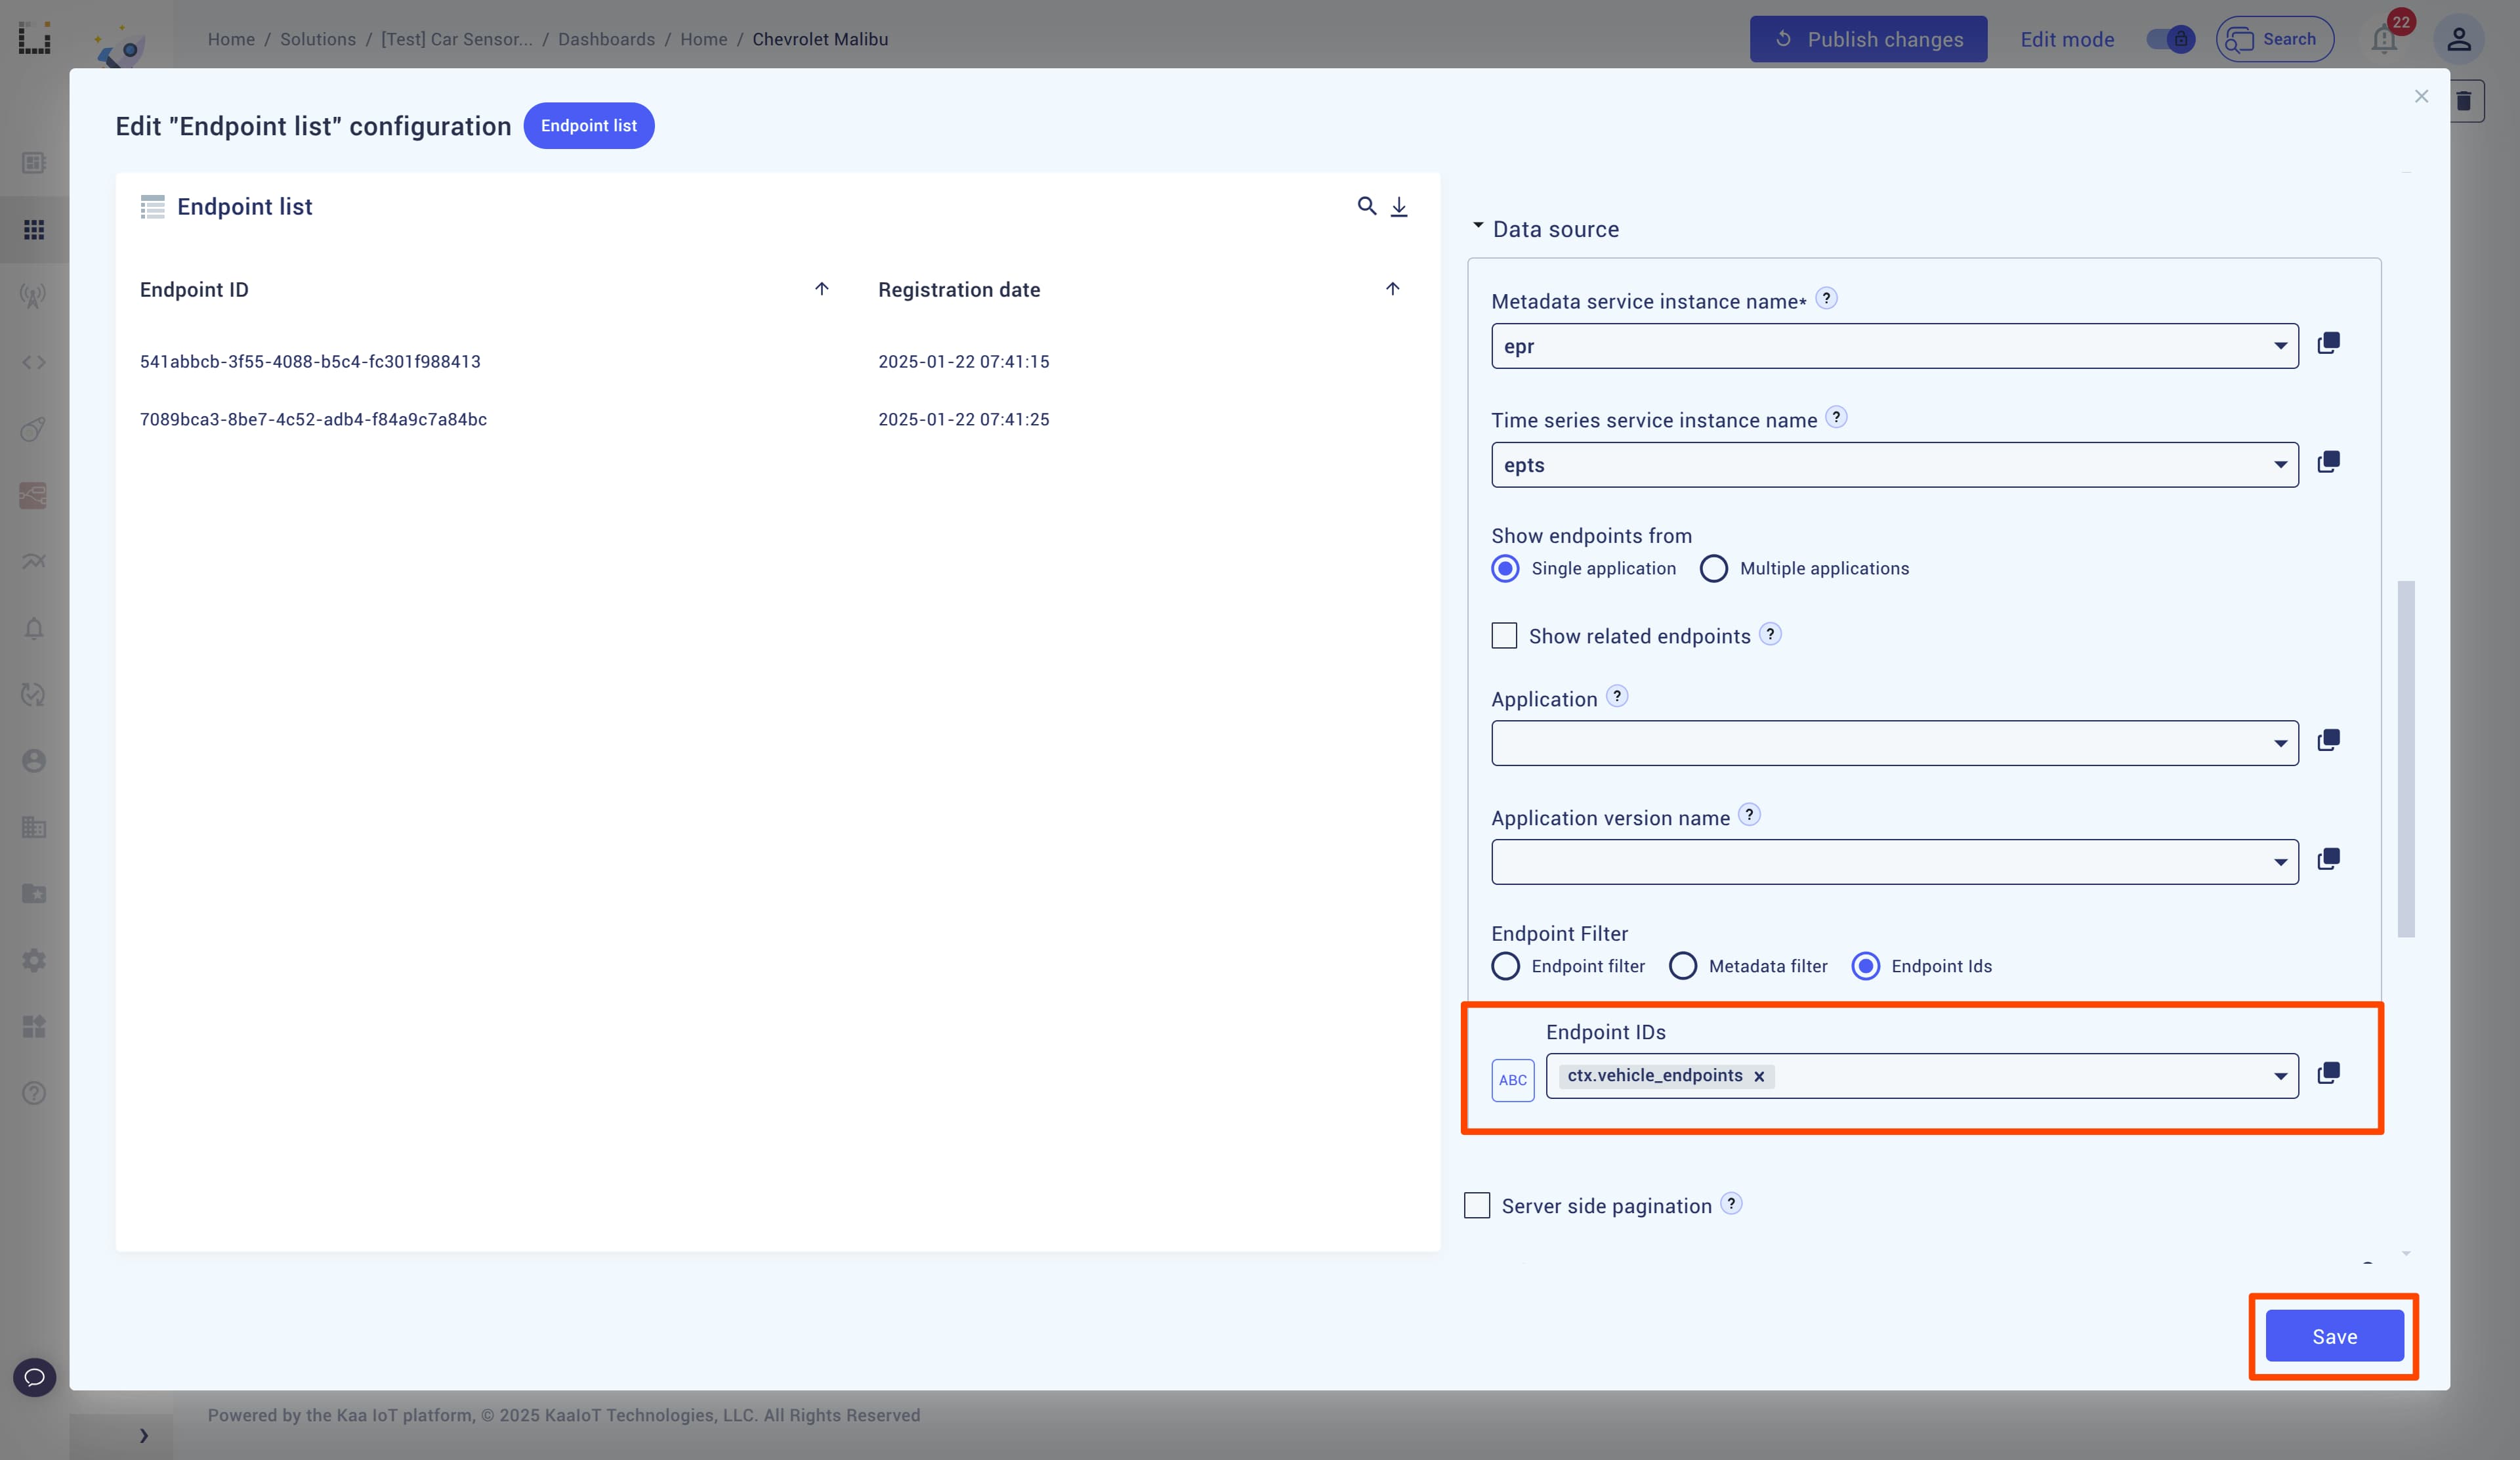
You should now see a list of endpoints related to the specific vehicle.
Configure Asset List
Navigate back to the “Home Dashboard” and edit the “Vehicles List”.
In the “Row Settings”, enable the Redirect option and specify the path to the vehicle details dashboard.
This allows us to view each vehicle individually.
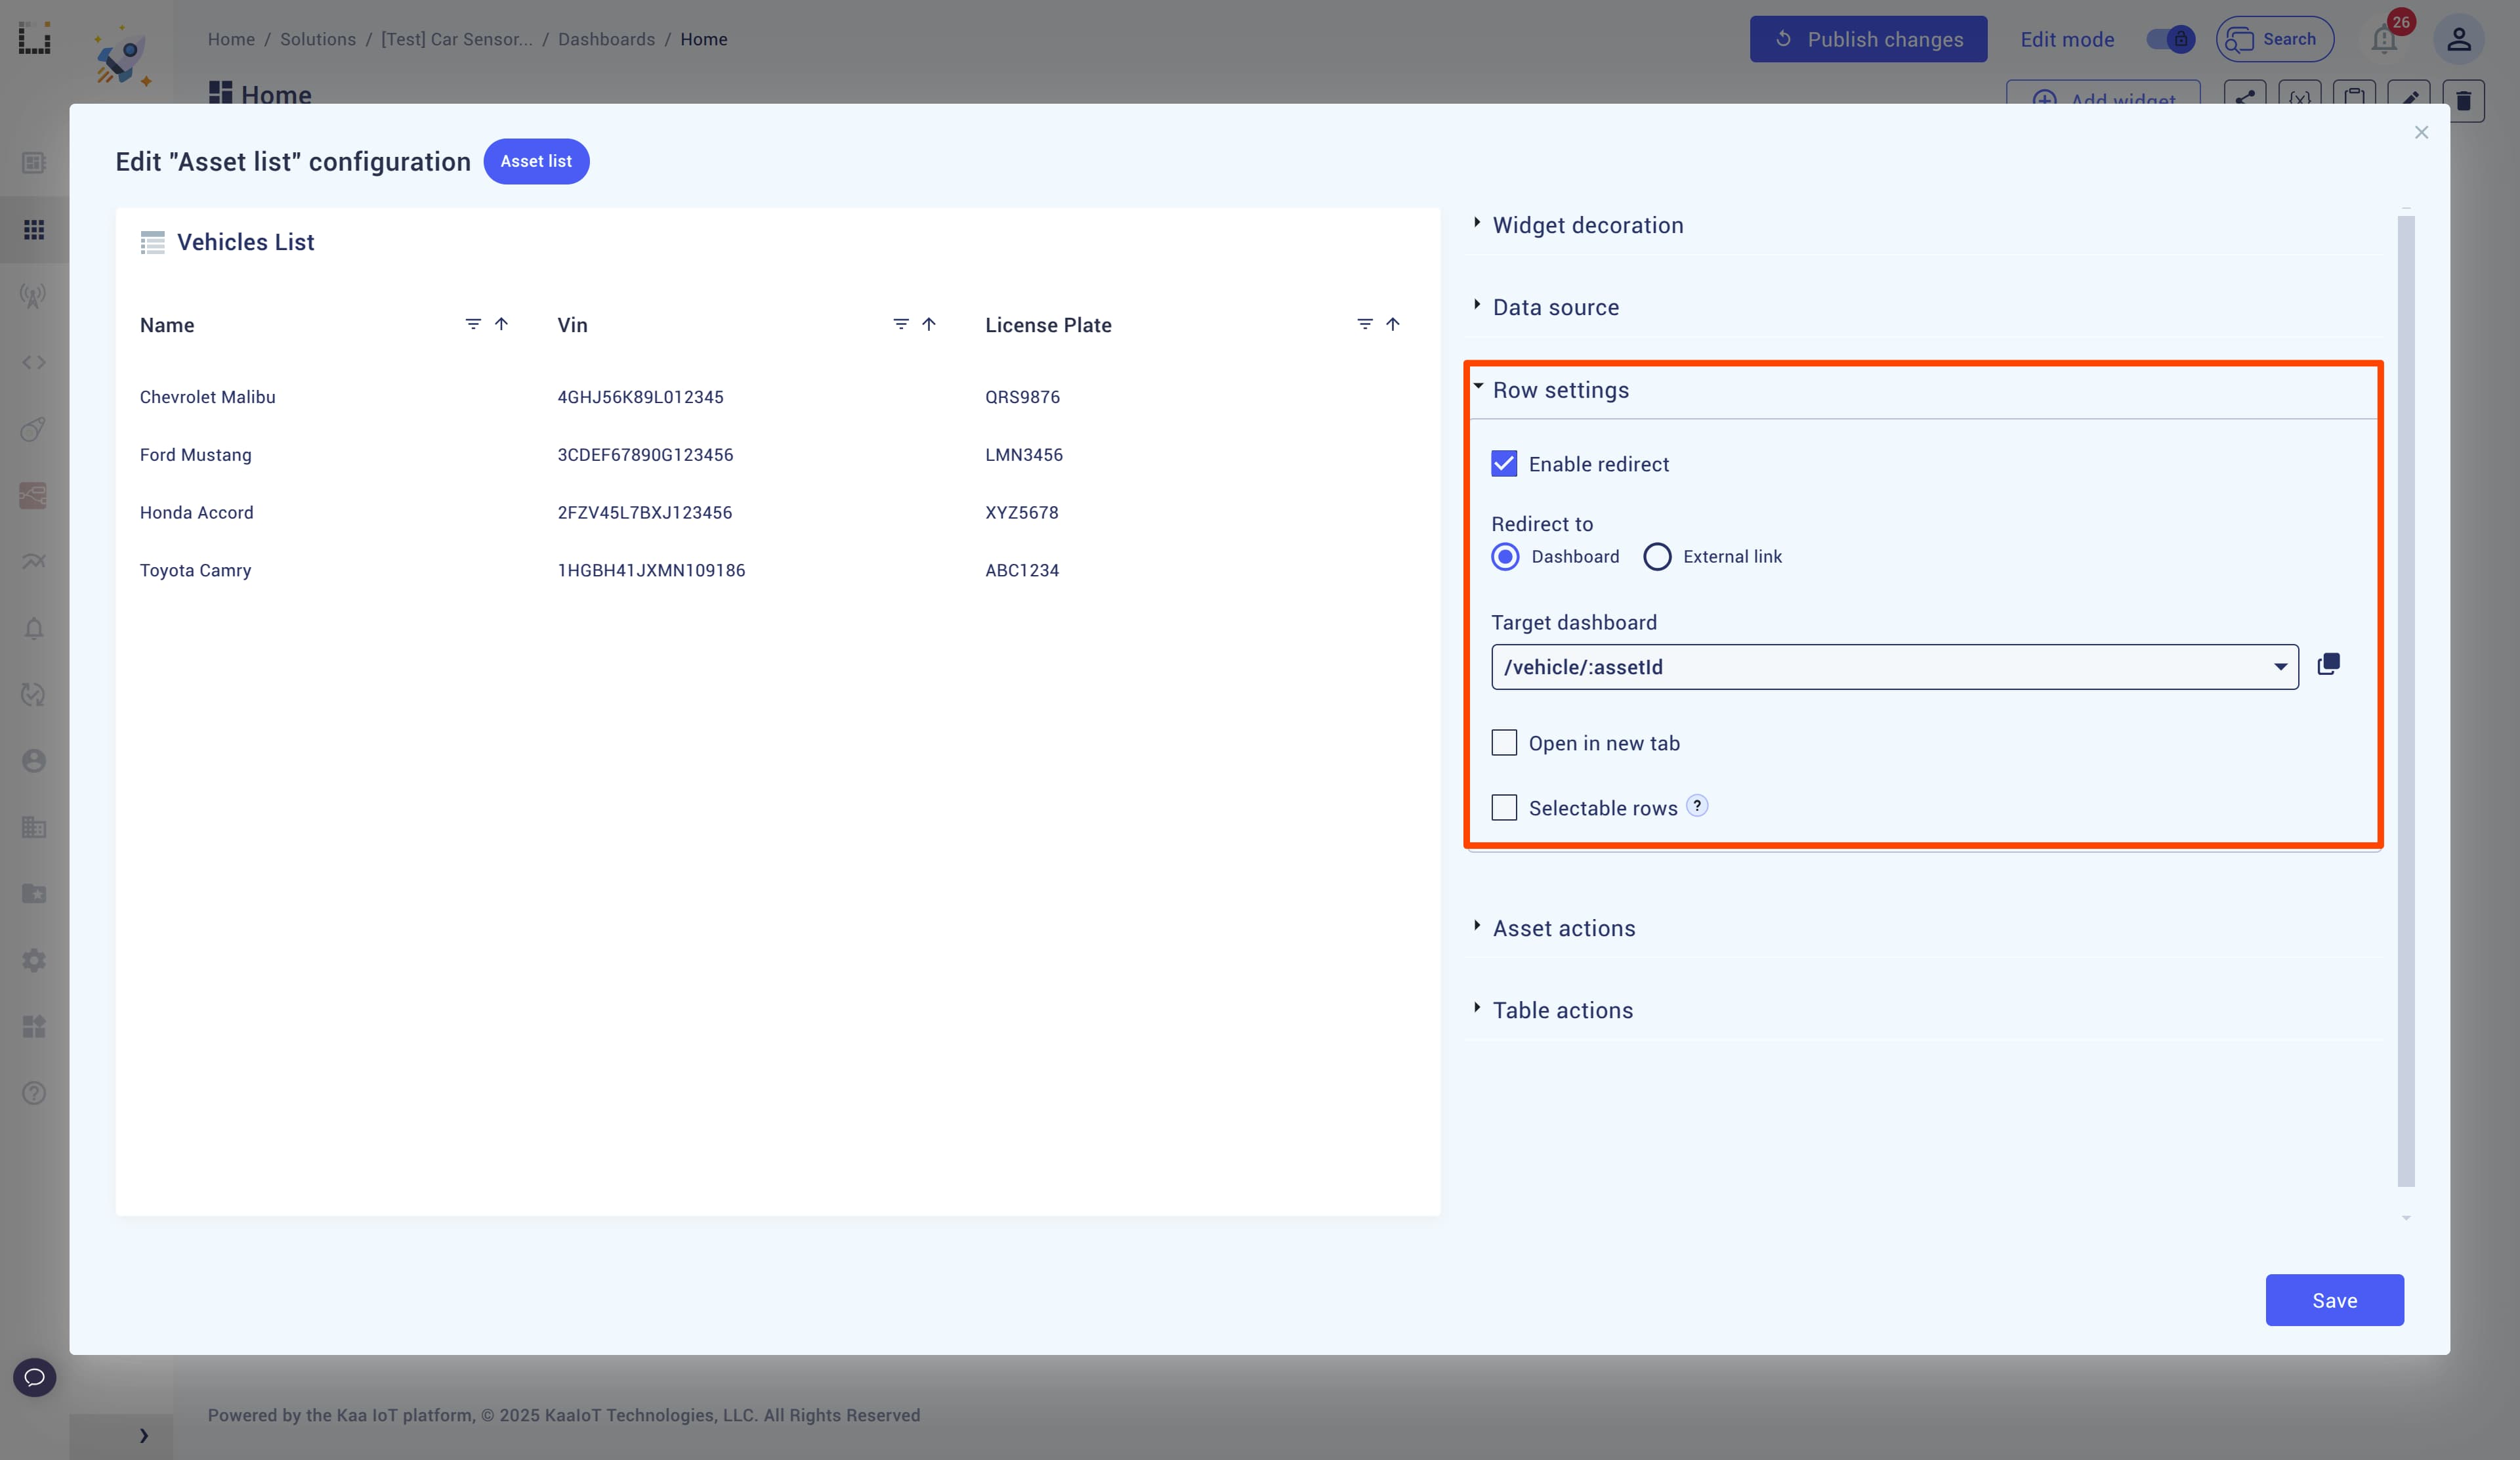
Save and publish your changes, then click on any item in the “Vehicles List” to confirm that it works as intended.
Add New Assets and Endpoints
You can use “Asset Management” to add new assets and establish relationships with other entities. The changes will be reflected in the dashboard.
Conclusion
Congratulations on making it this far! Hopefully, you now see that Assets are a valuable tool for representing entities that contain other components and can’t be easily showcased as endpoints.