How to connect the UP Squared Series MicroPC
- Overview
- Prerequisites
- Resources
- Installation
- Launch the Project
- Setting Up Environment Variables
- Provisioning Your Python Script
- Executing Commands
- Viewing Your Data with Kaa Dashboard (Optional)
In this tutorial, we’ll connect the UP Squared Series MicroPC to the Kaa platform. This setup allows you to monitor your device’s status and execute terminal commands remotely via MQTT, without the need for a static IP.
Overview
The UP Squared Series MicroPC will act as an endpoint in the Kaa platform. We’ll use a Python-based system scanner to fetch system data and integrate it with Kaa via MQTT. This setup also allows us to execute Kaa commands and run terminal commands remotely. Note that the System Scanner requires a Linux environment to operate.
Prerequisites
- You have the UP Squared Series MicroPC with a Linux distribution installed.
- You have a Kaa Cloud account.
Resources
- All tutorial resources are located on GitHub.
Installation
To get started with the project, follow these steps:
-
Ensure Python is installed on your system:
sudo apt install python3.12-venv pip install setuptools -
Install the project using the following commands:
git clone https://github.com/kaaproject/mqtt-client-python
cd mqtt-client-python
python3 -m venv env
source env/bin/activate
cd examples/linux_sys_scan/
pip install -r requirements.txt
Launch the Project
Start the project by running:
python3 main.py
Upon your first launch, you may encounter a several errors:

The program scans your system and attempts to send the data, but it doesn’t know where to send it due to missing environment variables such as DEFAULT_KPC_HOST, APPLICATION_VERSION, APPLICATION_NAME, TENANT_ID and ENDPOINT_TOKEN.
Here’s how to get them.
Setting Up Environment Variables
To resolve the issue, you need to create a new application and an endpoint. The application acts as a storage for your Linux servers, providing default settings for each one. Within this application, you will create an endpoint to receive and view generated data, as well as to execute commands remotely.
Steps to Create an Application
-
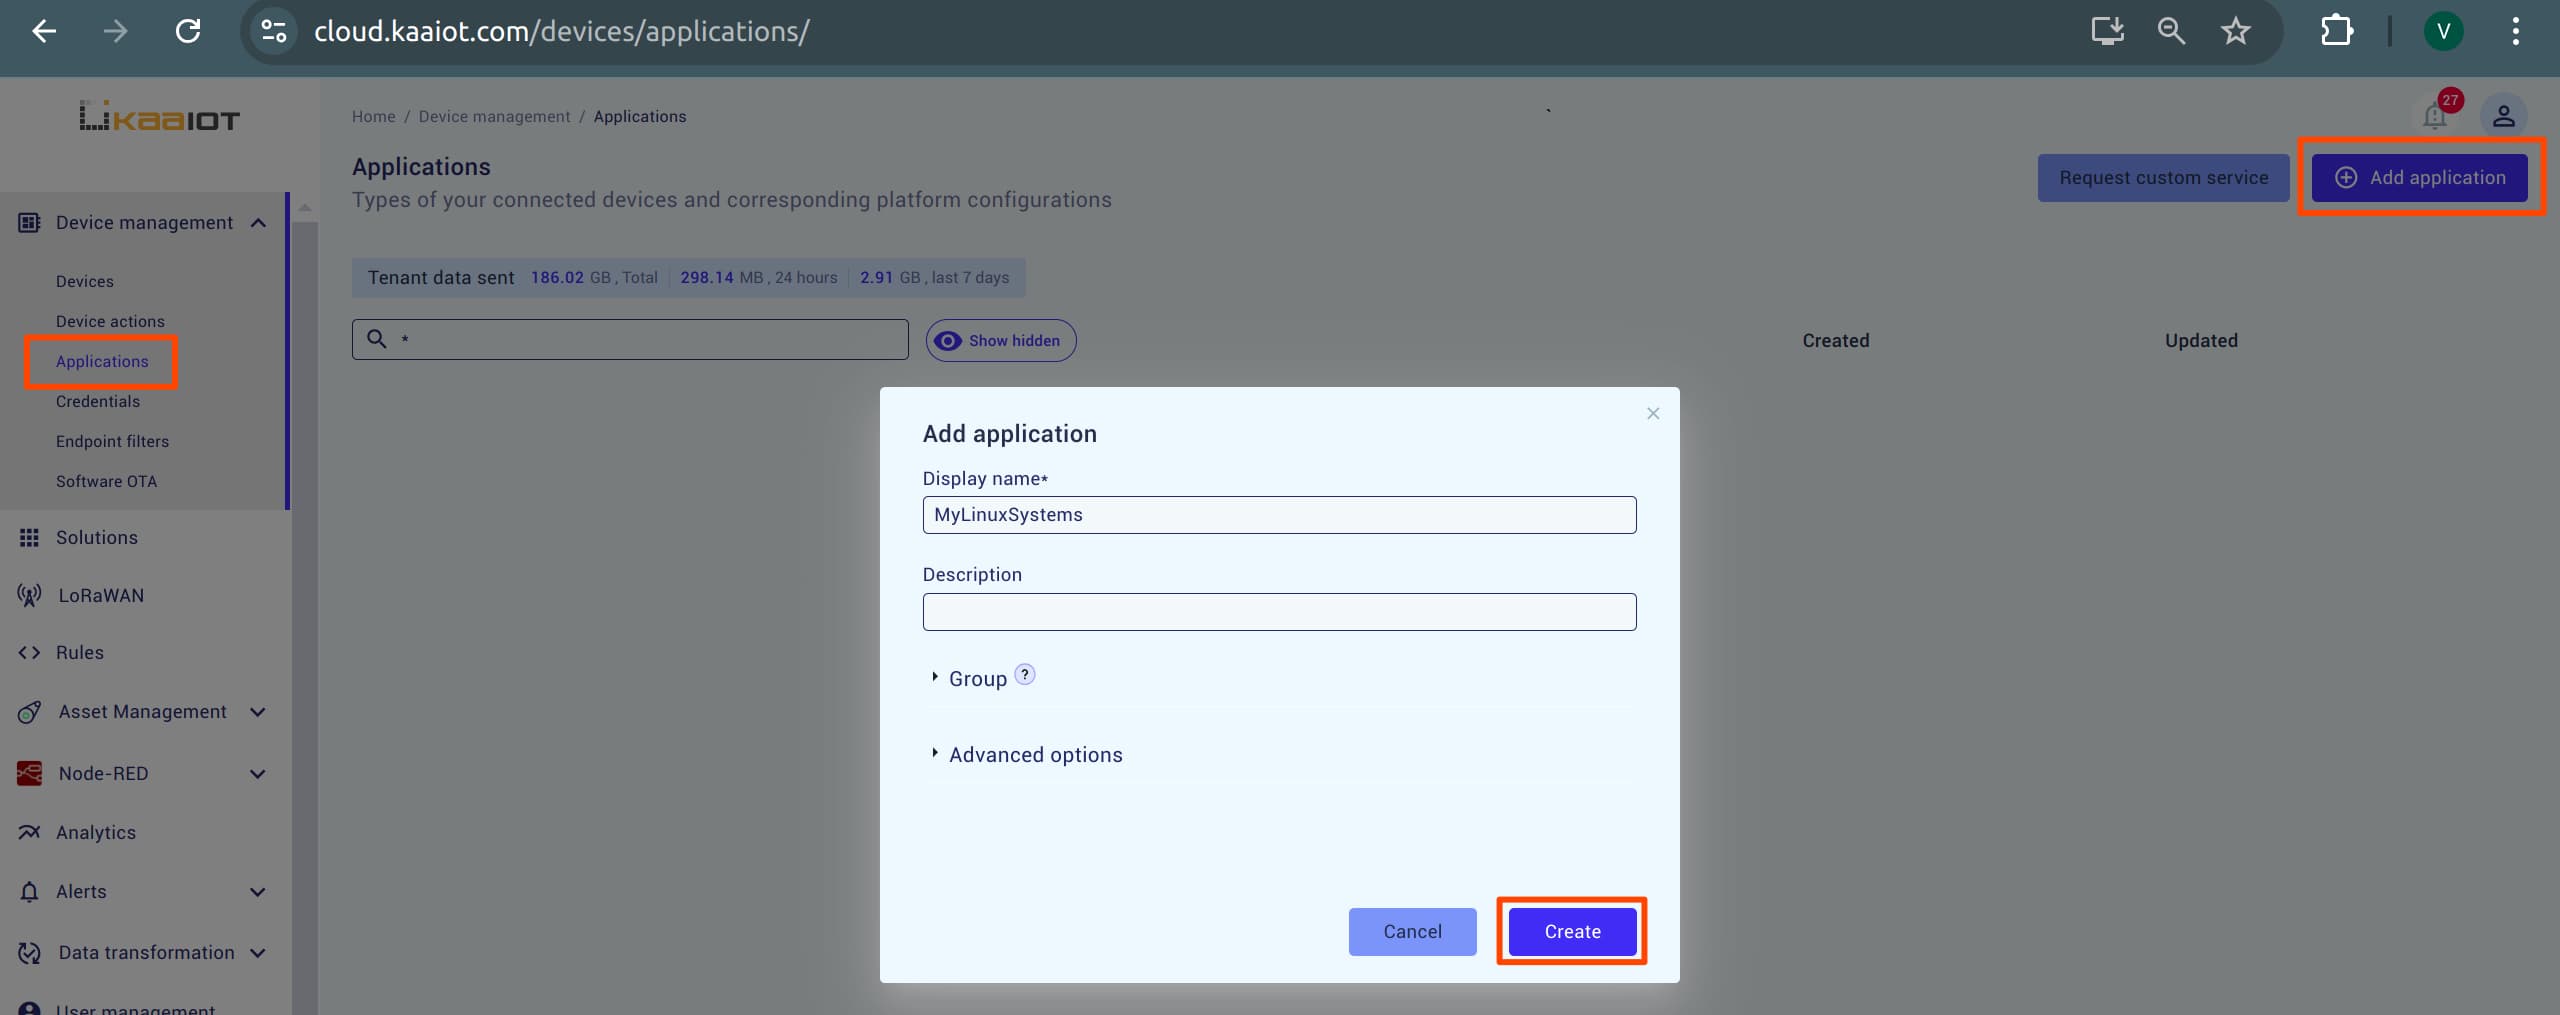
Open Kaa console: Navigate to the Applications tab, choose a name for your application, and create it.
-
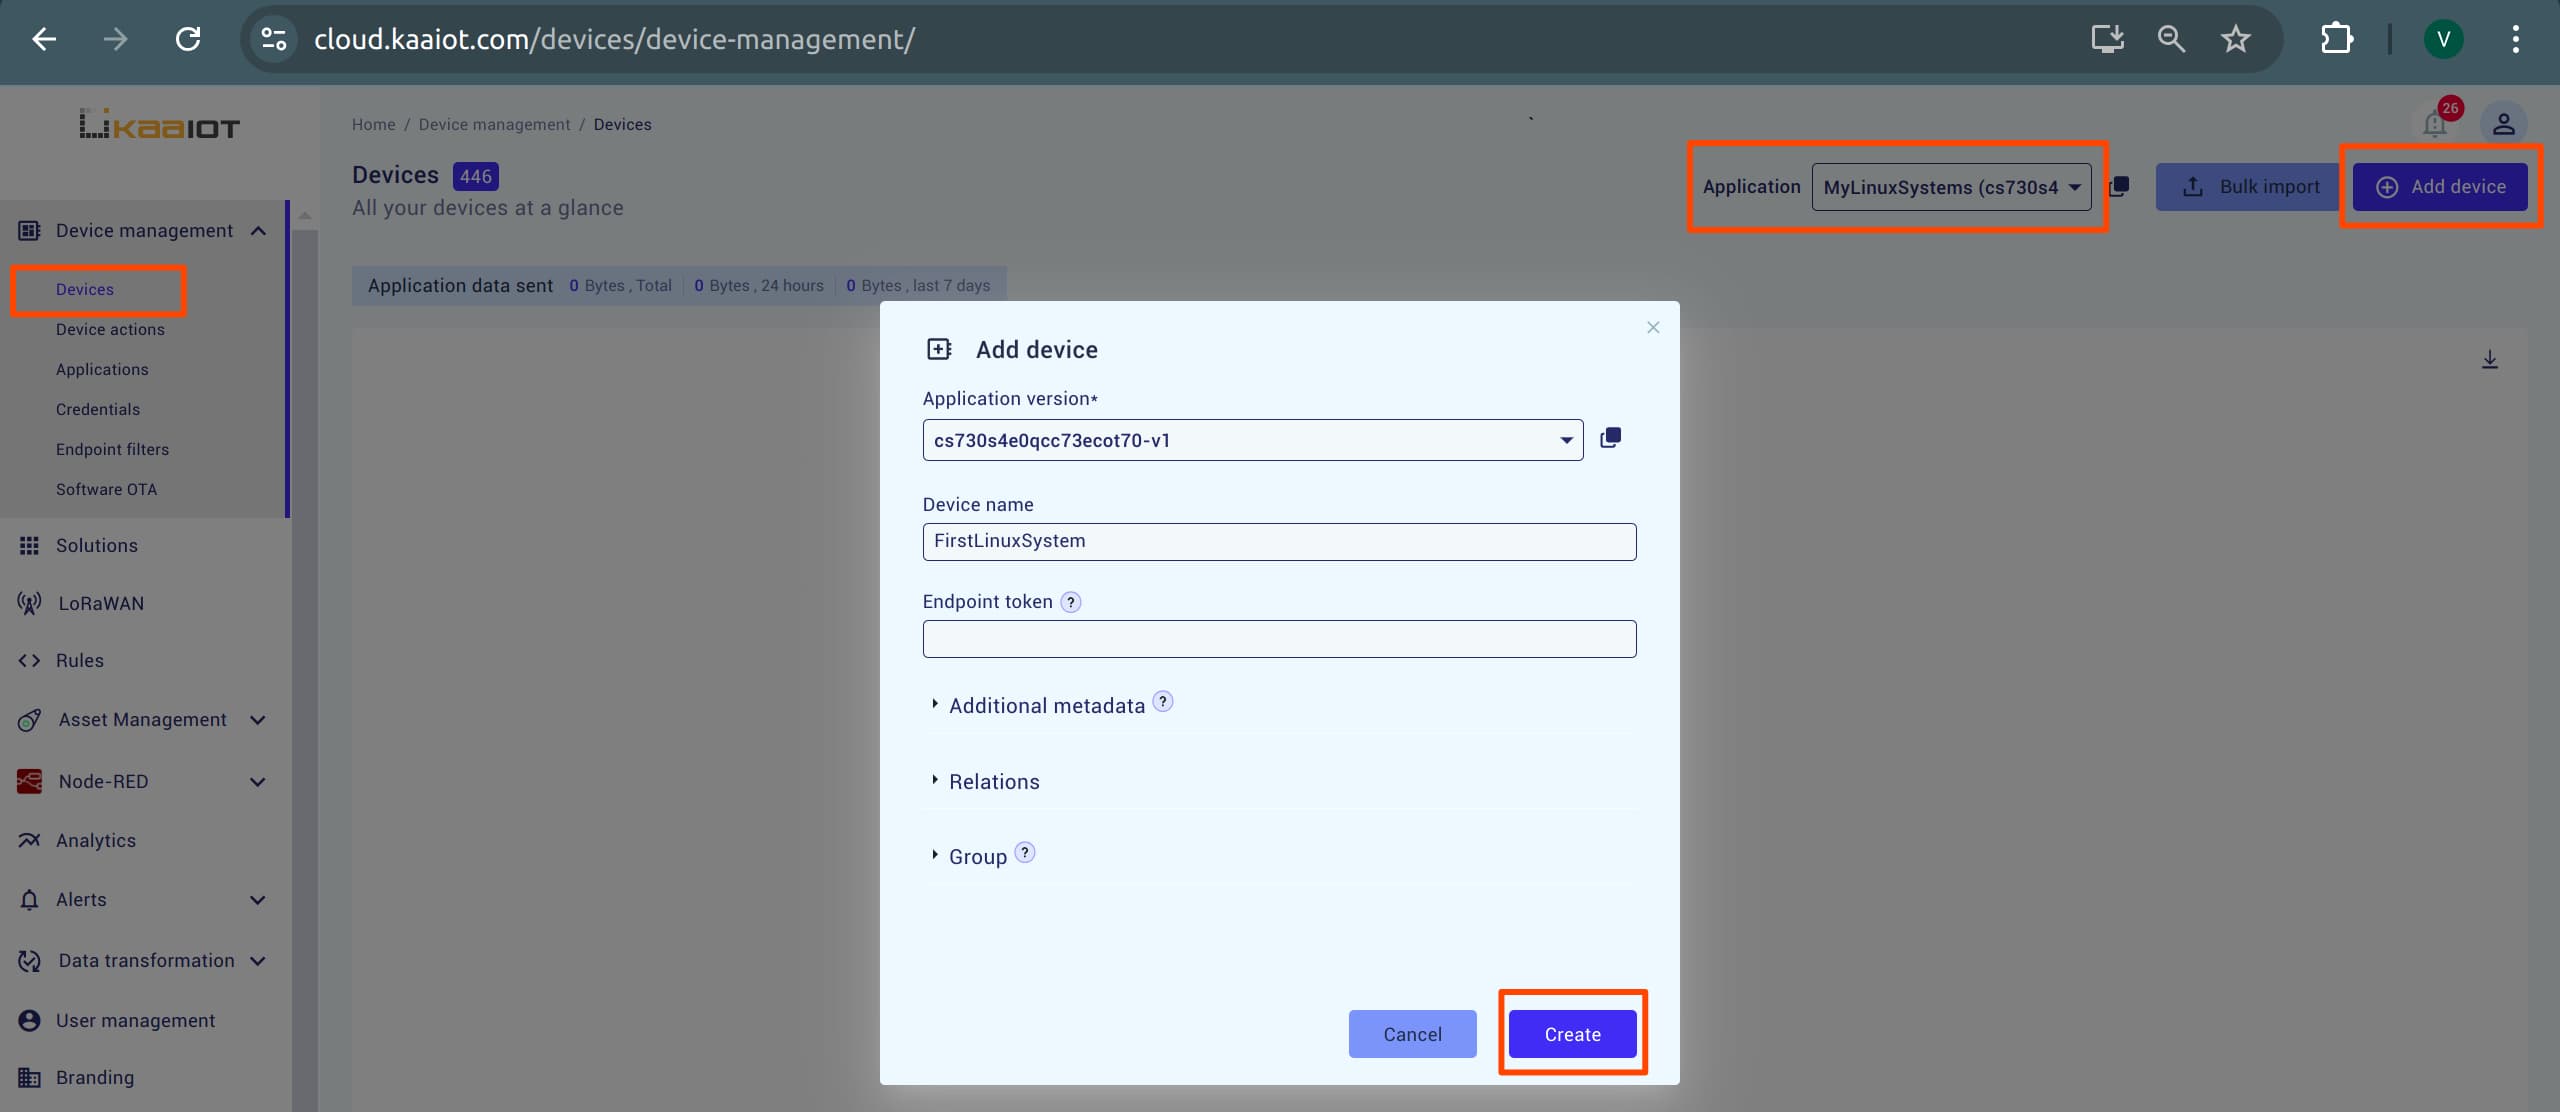
Add a Device: In the Devices tab, select your application from the dropdown and click “Add device”. Choose a name for the device and create it.
-
Copy the Token: You will be greeted with a token. Copy it. That is
ENDPOINT_TOKEN, 1 out of the 5 required variables.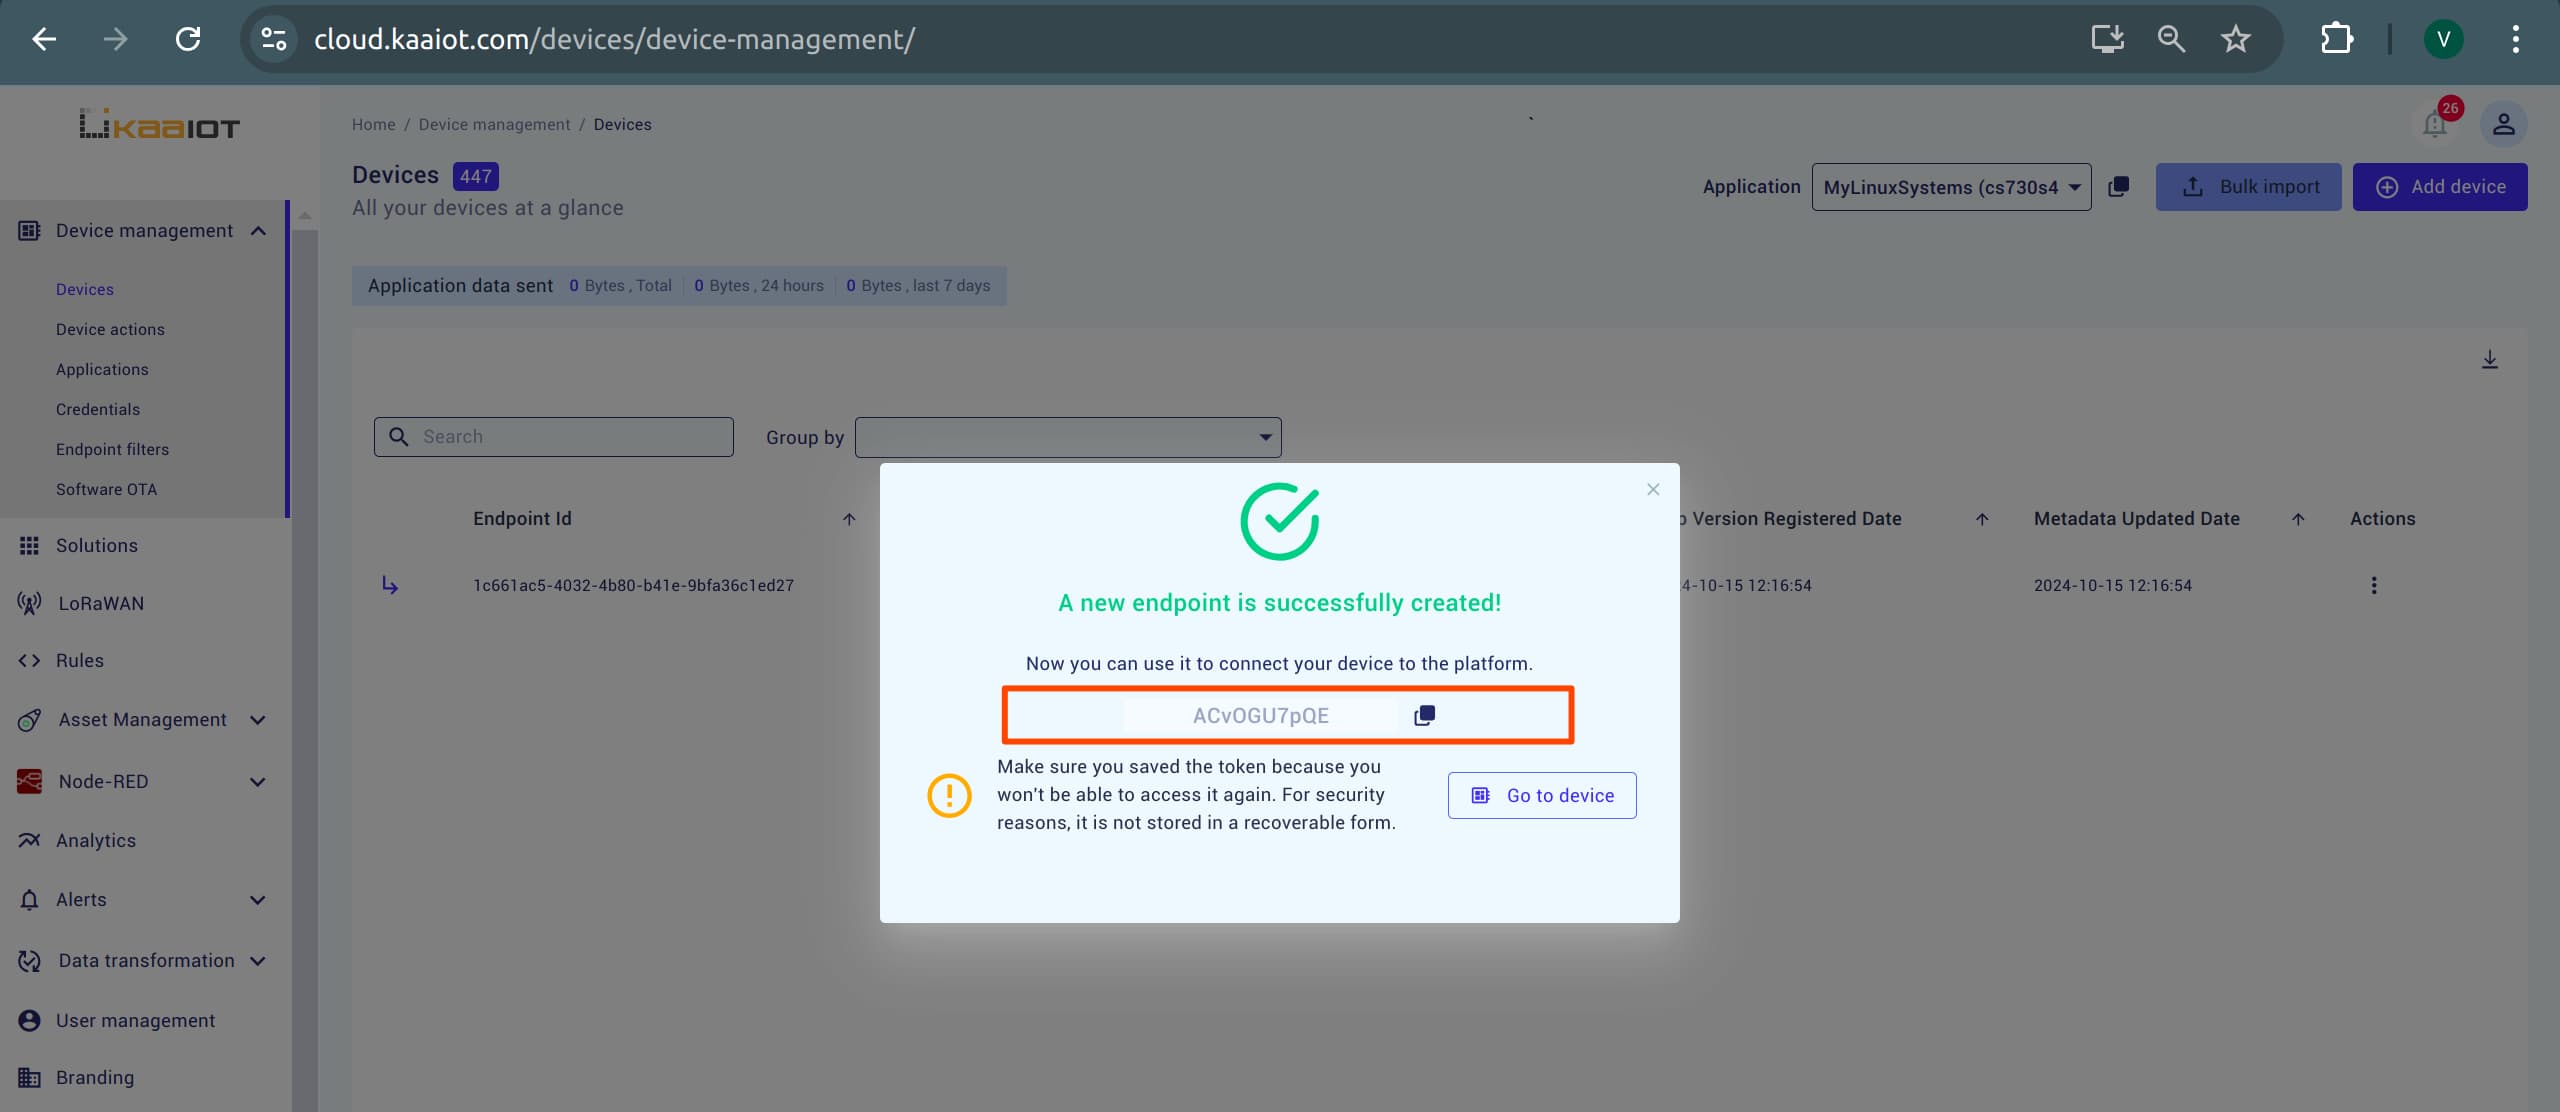
-
Get Application Version: Open your newly created device and copy the
appVersion.nameandappName. This will beAPPLICATION_VERSIONandAPPLICATION_NAME, which are the 3 out of 5 variables.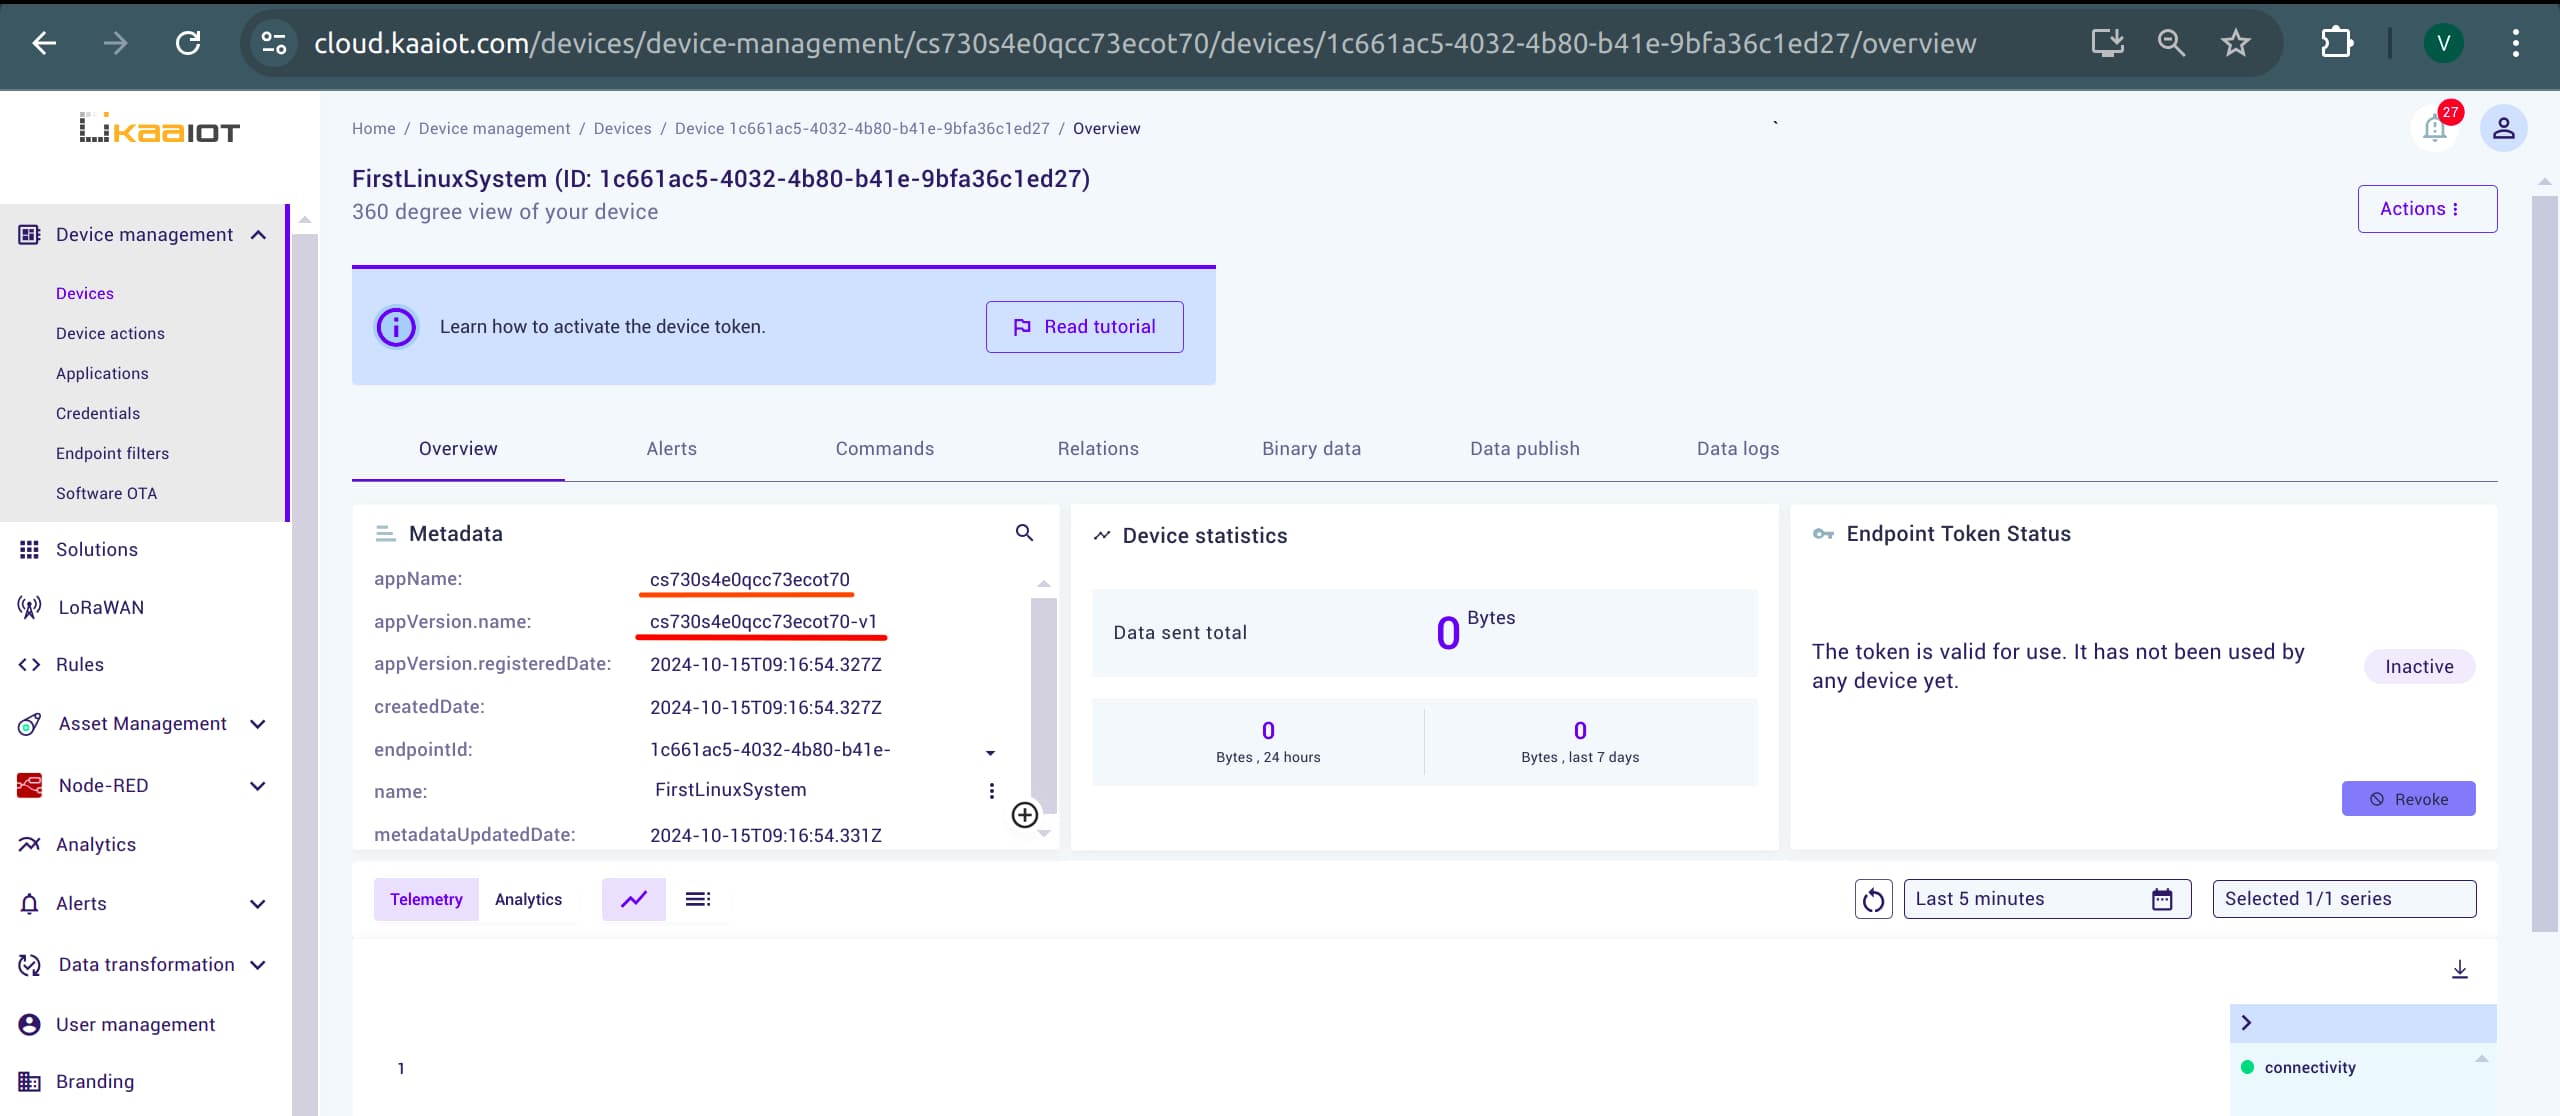
-
Get Tenant ID: In the top right corner, click on
profile iconand copyTenant ID. That’s 4 out of 5.
-
Get Default KPC Host: Finally, on the device page, navigate to “Data Publish”, check the MQTT option, and copy the resulting URL. This is the
DEFAULT_KPC_HOST, the last variable.
Provisioning Your Python Script
Here’s an example of the credentials you should provide. Replace the placeholder values with your own and copy the result into your terminal:
export DEFAULT_KPC_HOST="mqtt://mqtt.cloud.kaaiot.com"
export DEFAULT_KPC_PORT="1883"
export APPLICATION_NAME="{your-application-name}"
export APPLICATION_VERSION="{your-application-version}"
export ENDPOINT_TOKEN="{your-endpoint-token}"
export TENANT_ID="{your-tenant-id}"
Now you can launch the program with python3 main.py, and hopefully, you will start receiving data.
Executing Commands
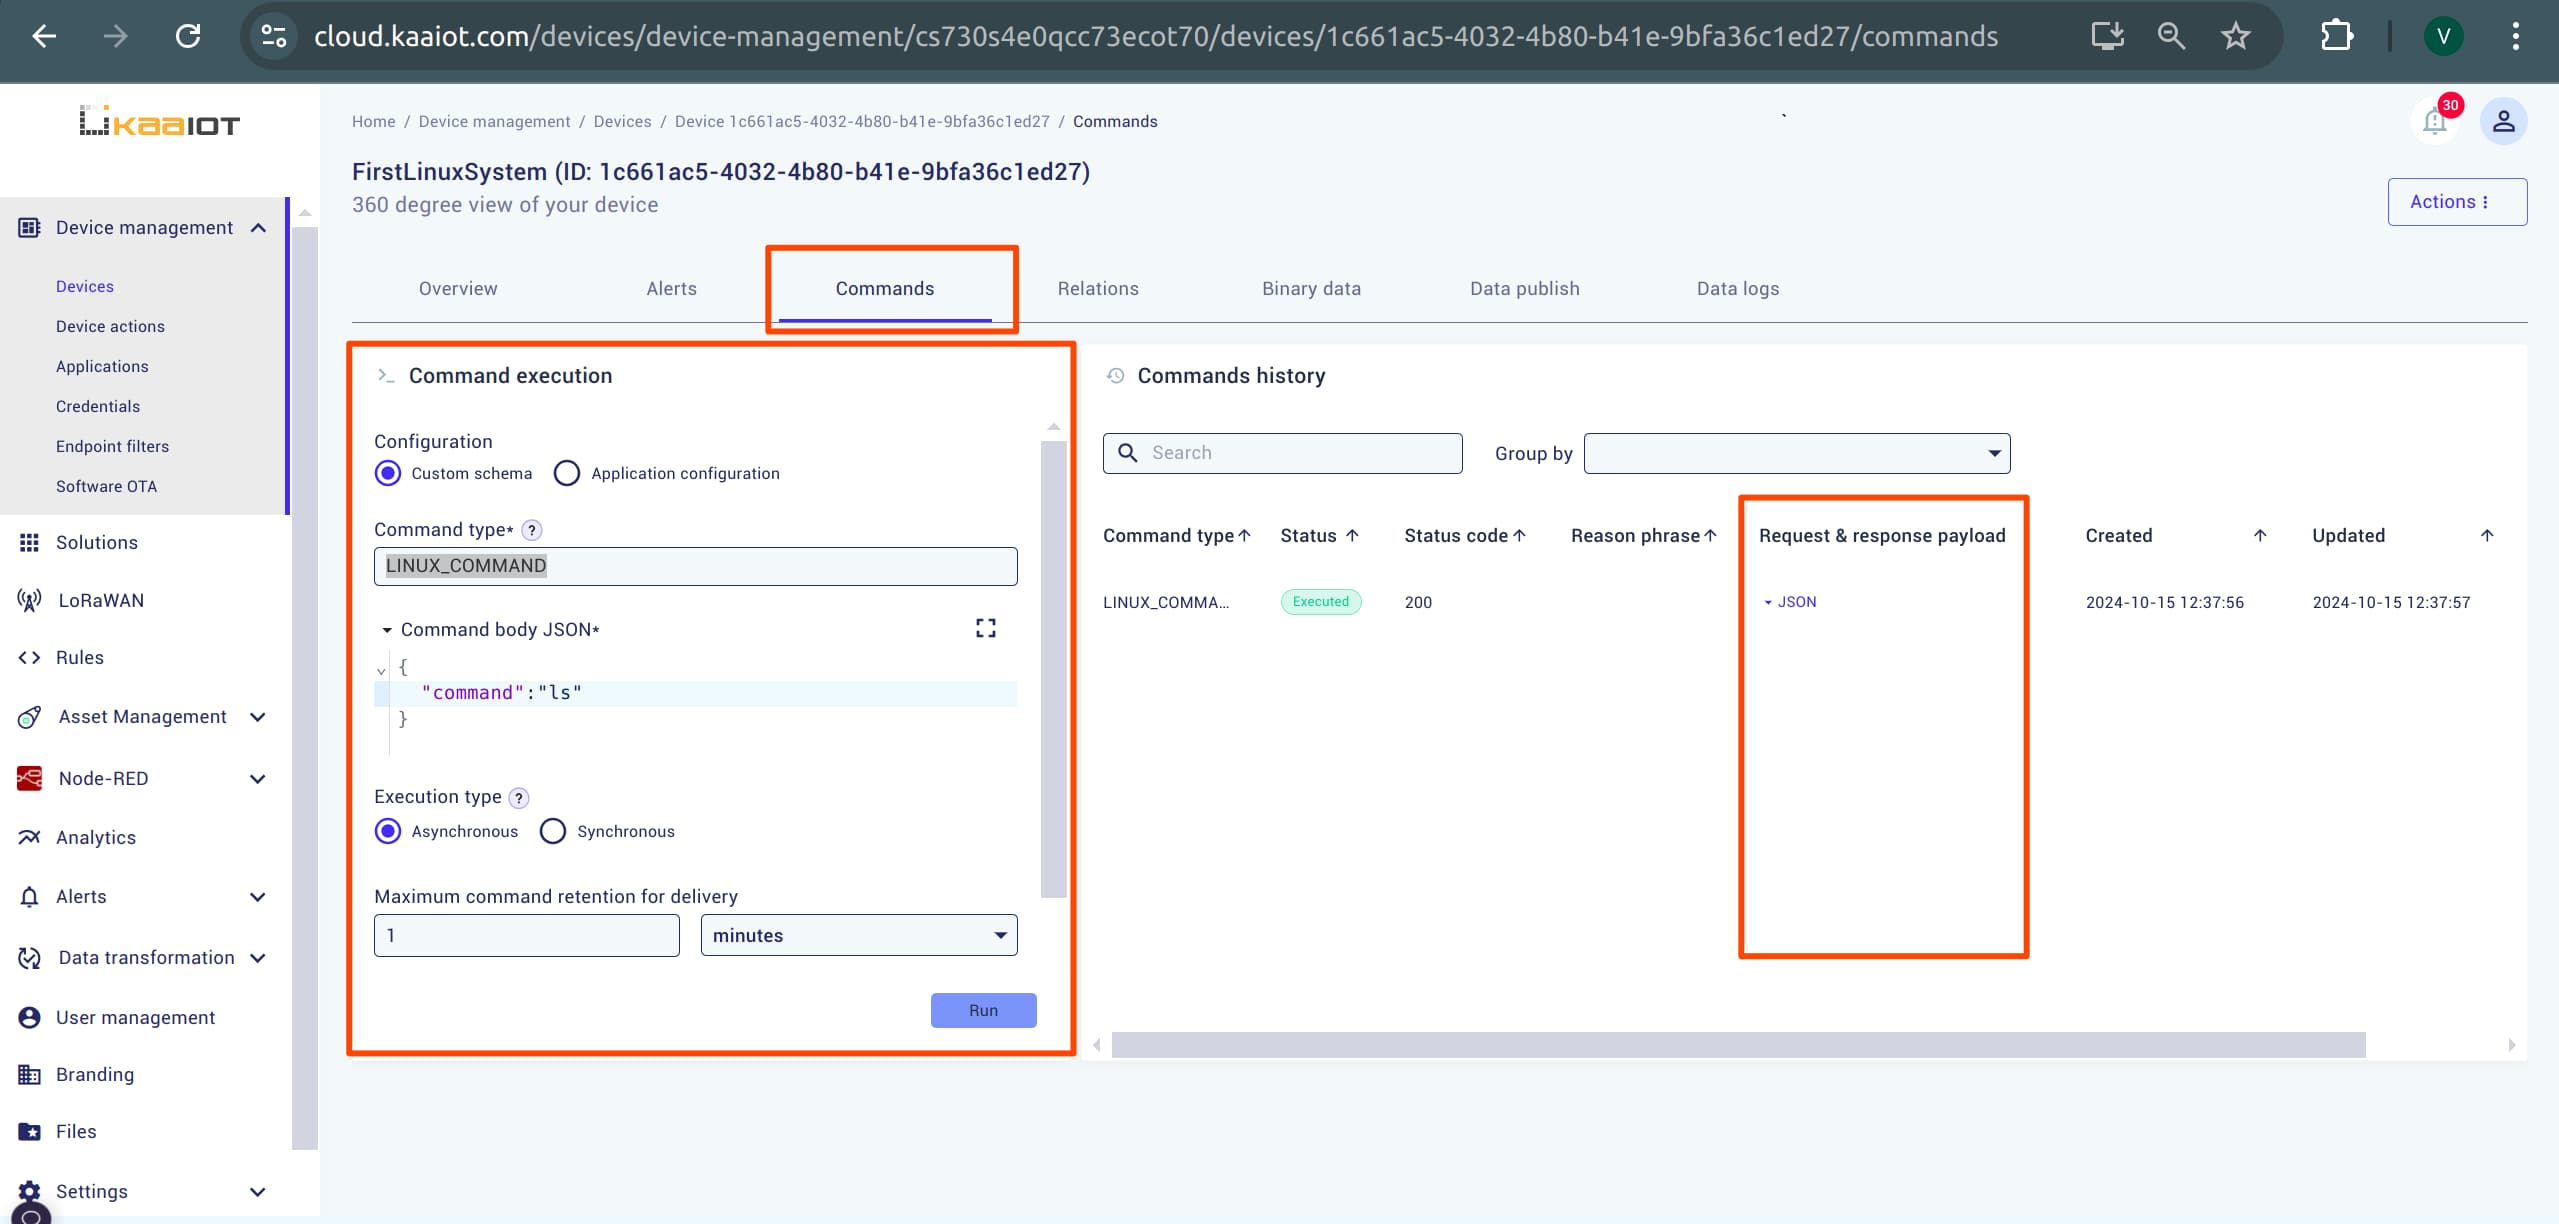
In your device page, navigate to the Commands section. You can execute terminal commands from Kaa and view the output in JSON format. To do this:
- Set “Command type” to
LINUX_COMMAND. - As an example payload, send:
{"command": "ls"}
Viewing Your Data with Kaa Dashboard (Optional)
You can use the Kaa dashboard to create a custom UI to view your data and go beyond the default device page.
Creating a Dashboard
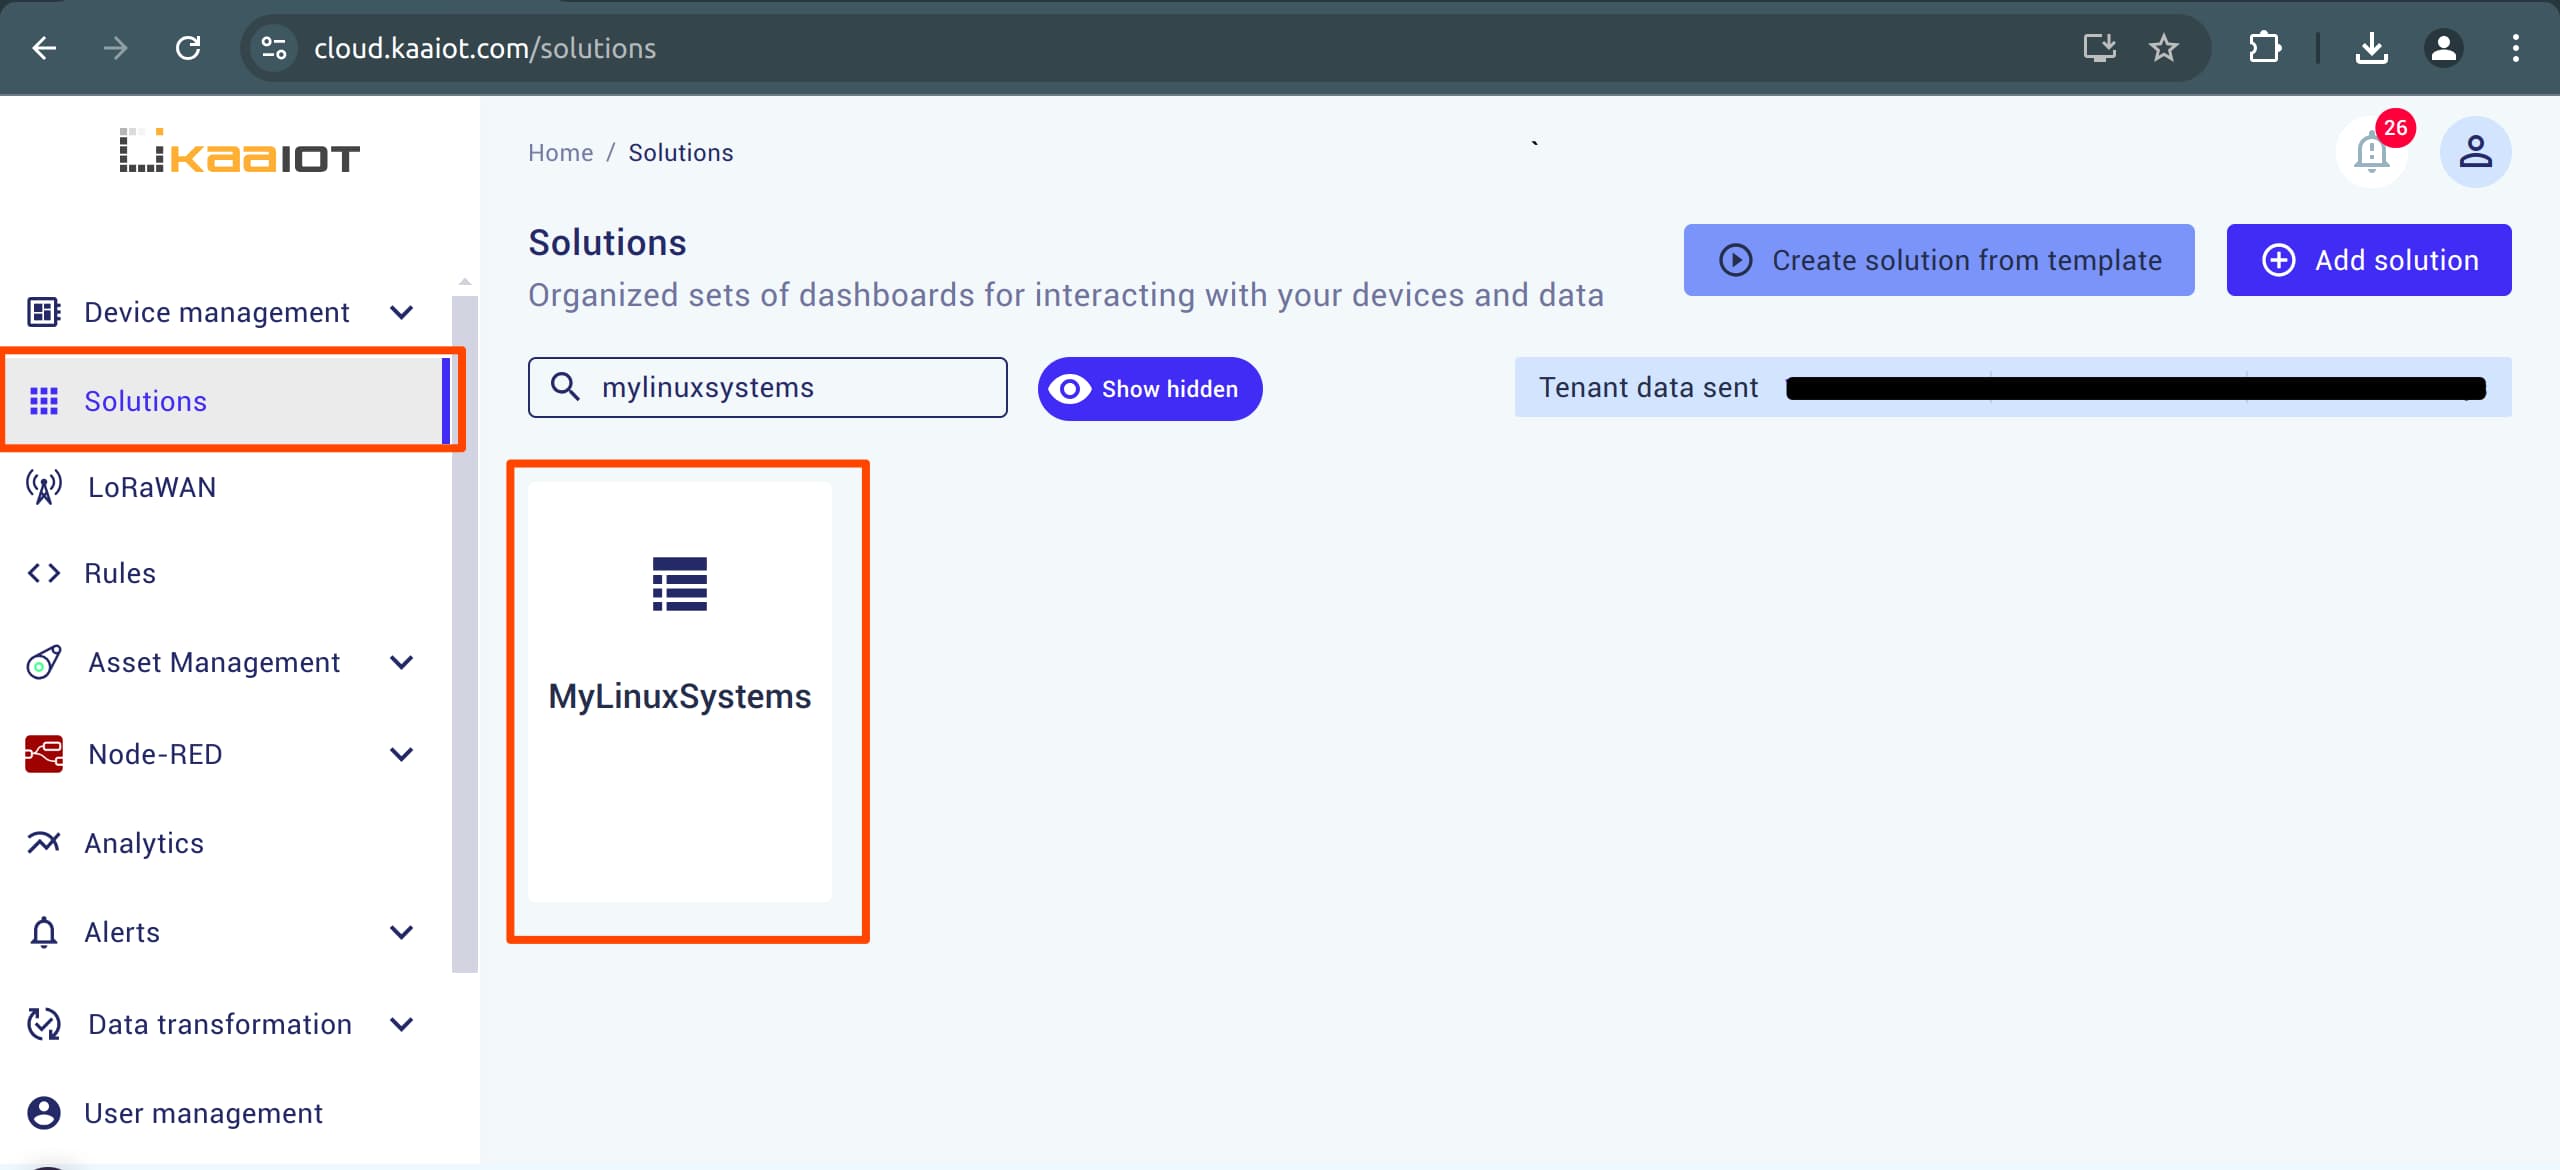
Open the Solutions tab.
A solution is automatically created for each application, but you can create a new one if needed.
Quick Start
To keep things simple, here’s a quick example. After running the python3 main.py script, a JSON template will be generated using the environment variables you provided earlier. To apply the template, follow these steps:
- In the top right corner, click Import Dashboard.
- Navigate to the
./dashboards/outputfolder and copy the code fromdevice_overview.json. - Paste the code into the import dialog.
- (OPTIONAL) This dashboard can execute Docker commands. To use this feature, you need to install Docker on your machine. Follow the instructions here.
You should now see a dashboard similar to the one shown below:

Congratulations, you have connected and visualized data from your UP Squared Series!


