Data Layer for Mixed-PV Fleets

Device Configuration Repository Tutorial
In this tutorial, we will demonstrate how to integrate the Device Configuration Repository with your device.
If you are not familiar with this feature yet, refer to the Device Configuration Repository Overview to learn more about it.
For demonstration, we will use a Python-based thermostat simulator instead of a physical device.
The simulator will:
- Extract settings from the configuration sent by Kaa.
- Adjust its state based on the received configuration.
- Adjust data reporting according to new settings.
By the end of this tutorial, you will have the foundation needed to configure real devices.
Prerequisites
- You have a Kaa Cloud account.
- You should already know how to connect a device to the Kaa Platform. If not, refer to Getting Started.
Playbook
In this example, we will set up a configuration to initialize the thermostat’s behavior by providing default settings for its preferred temperature during the day and night.
First Steps
- Create an application and an endpoint.
- Copy the application version and the endpoint token. These data will be used later.
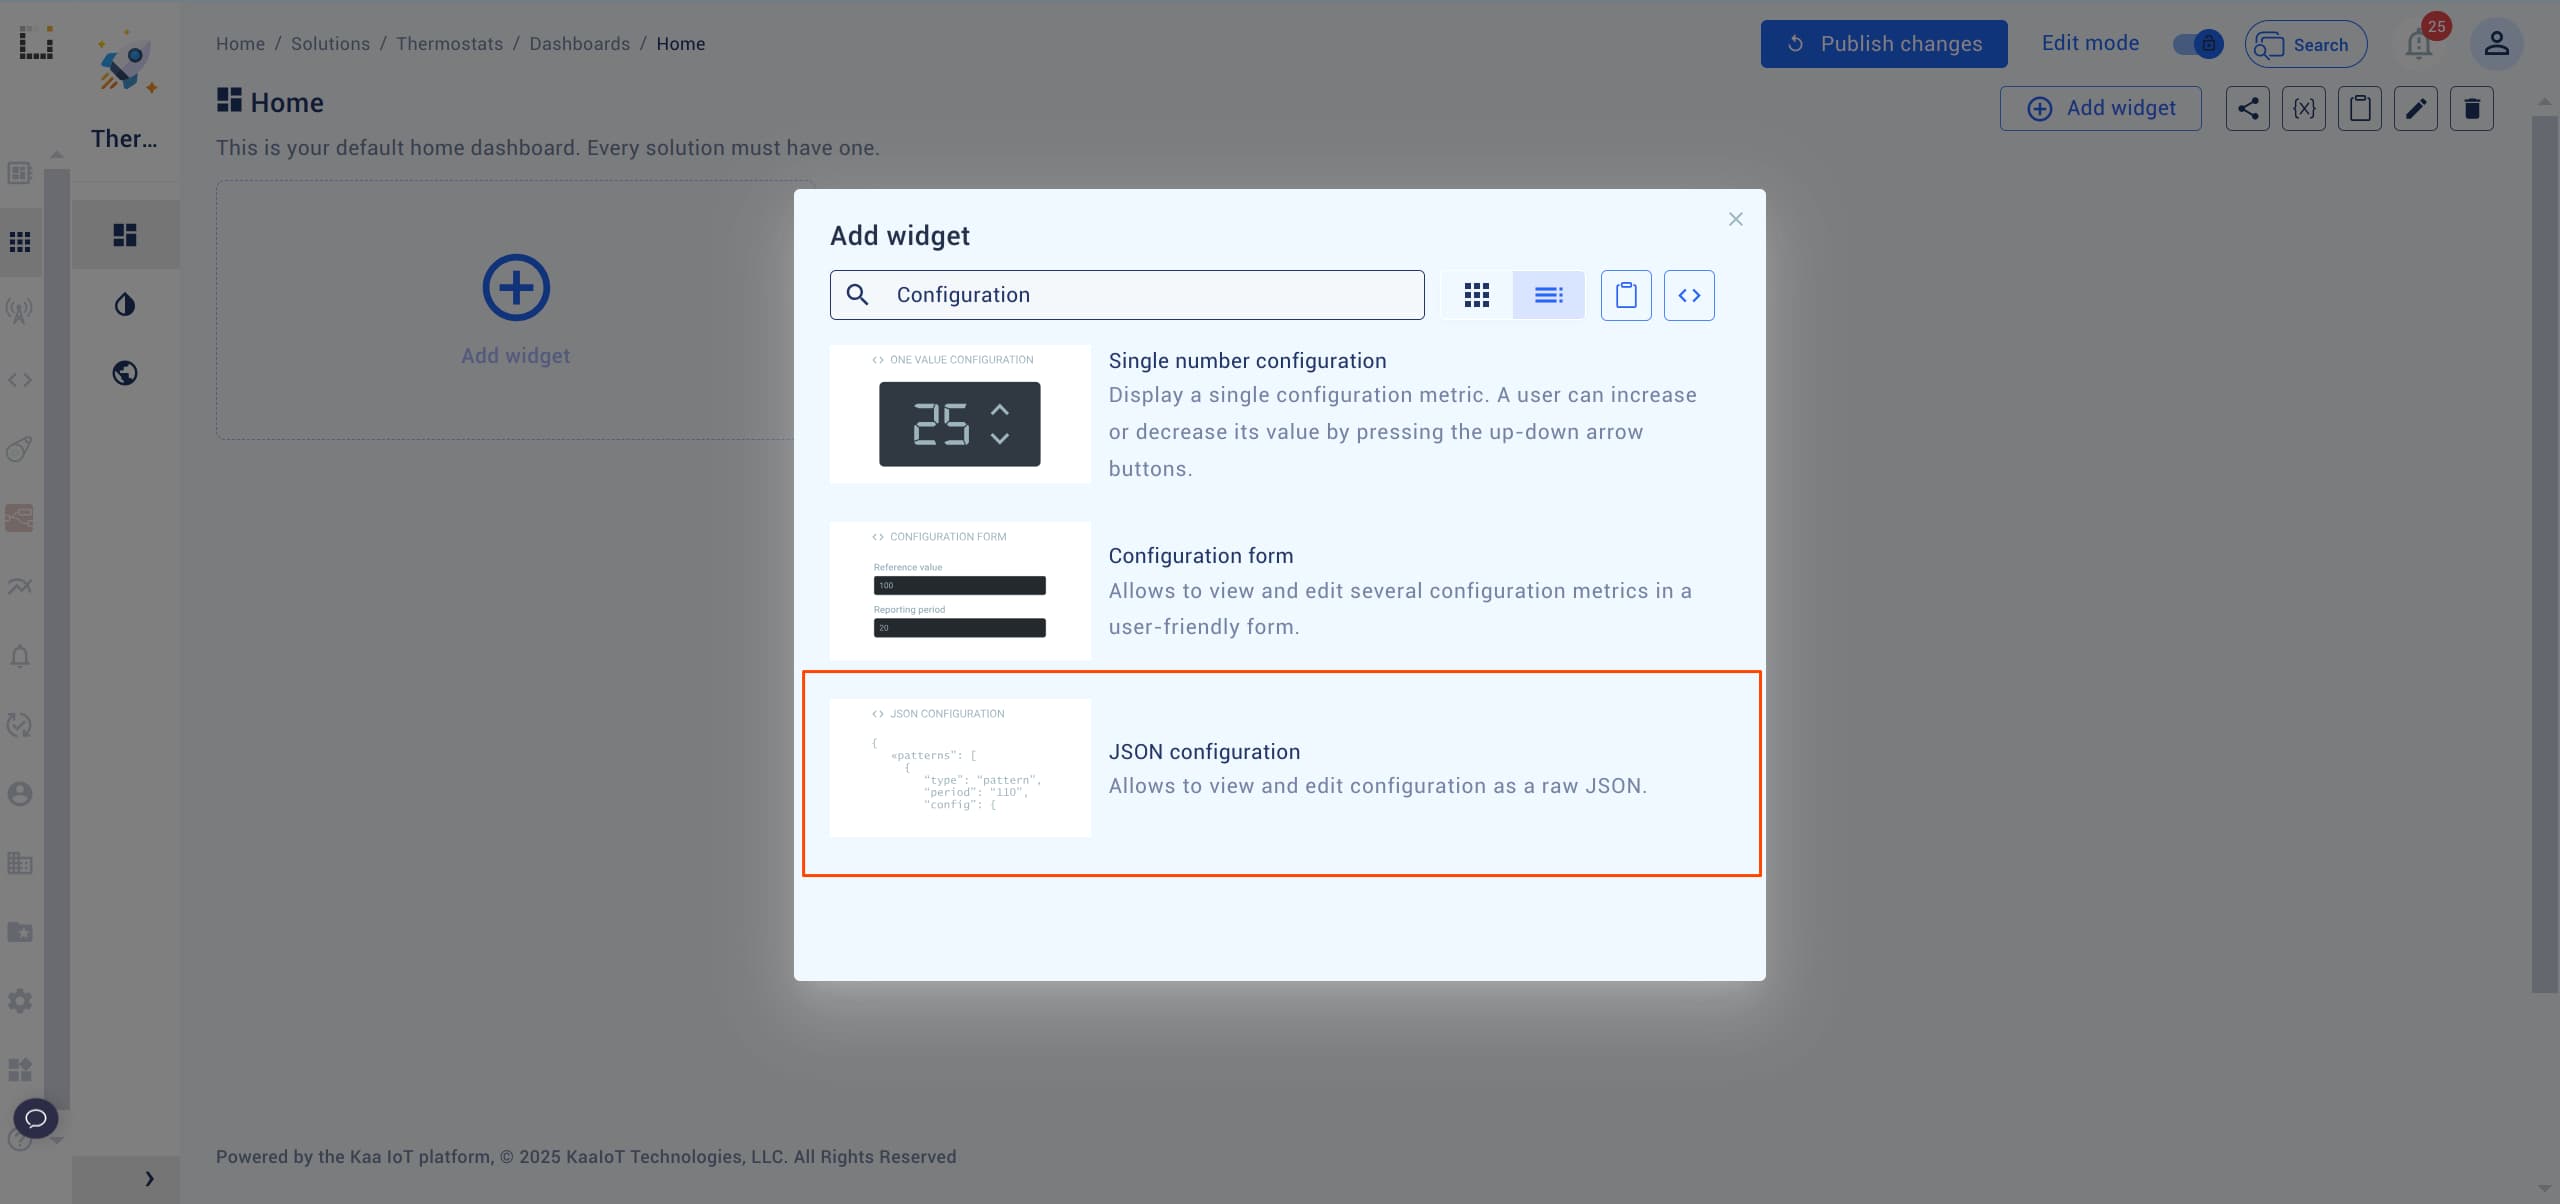
Set up JSON Configuration Widget
To start managing configurations, we need a specific widget. However, to set up a widget, we first need a Dashboard.
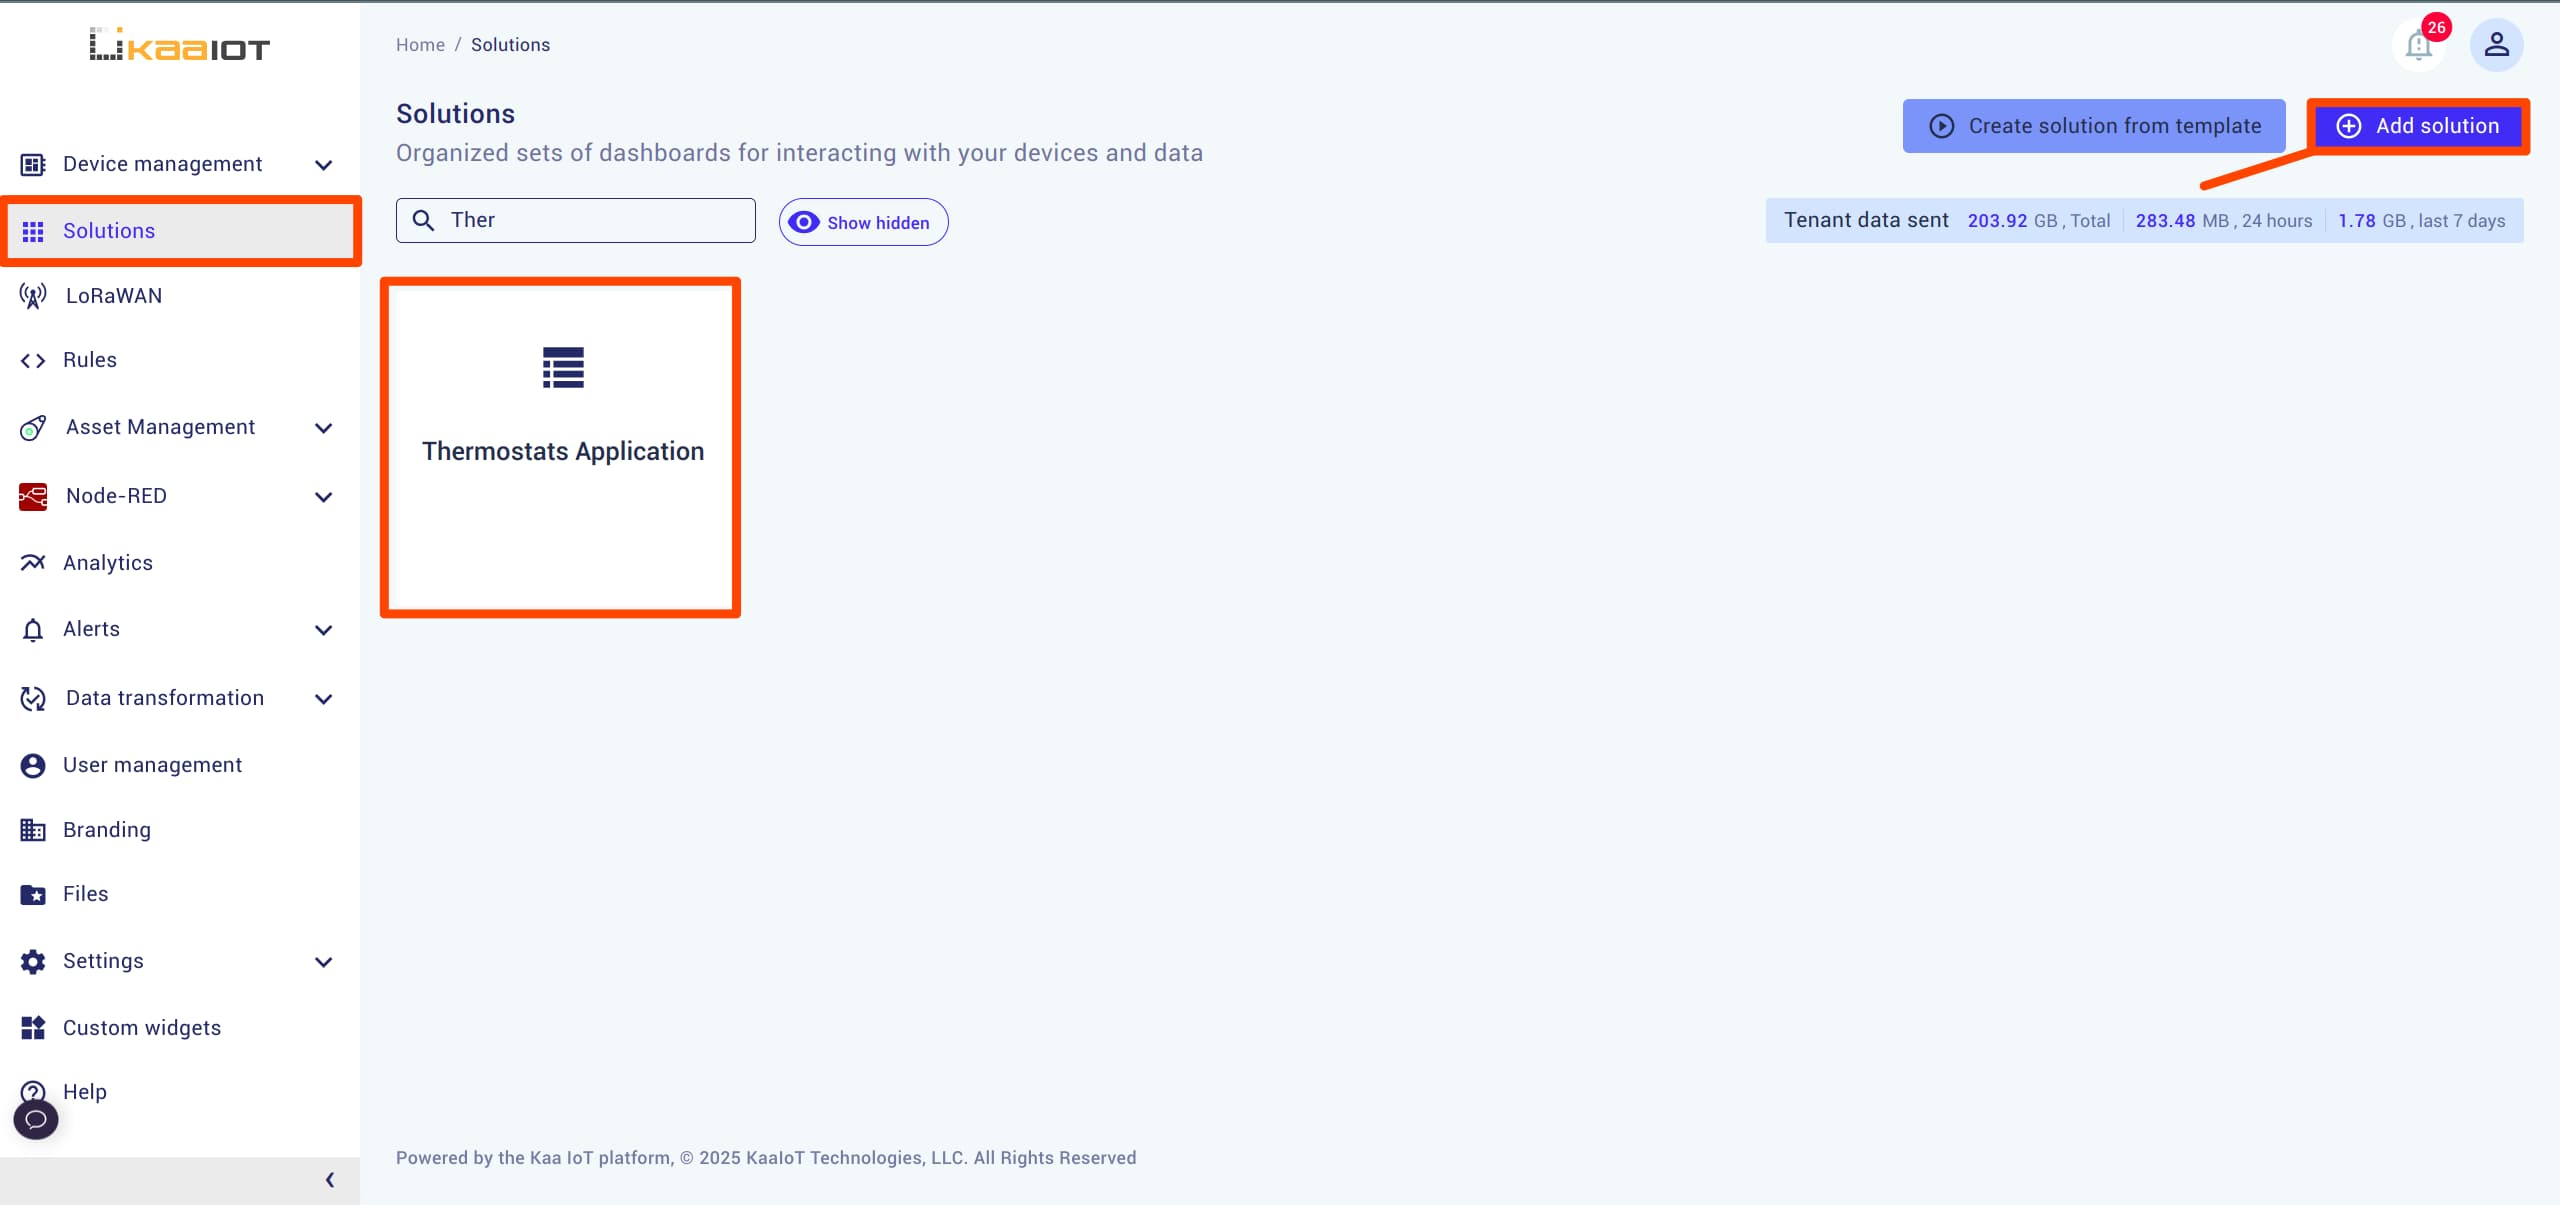
- In the sidebar, navigate to the Solutions tab.
- Open an existing solution or create a new one.
- Navigate to the Home Dashboard and add a JSON Configuration Widget.
Note: If you’re not familiar with widgets and dashboards, check out this tutorial.
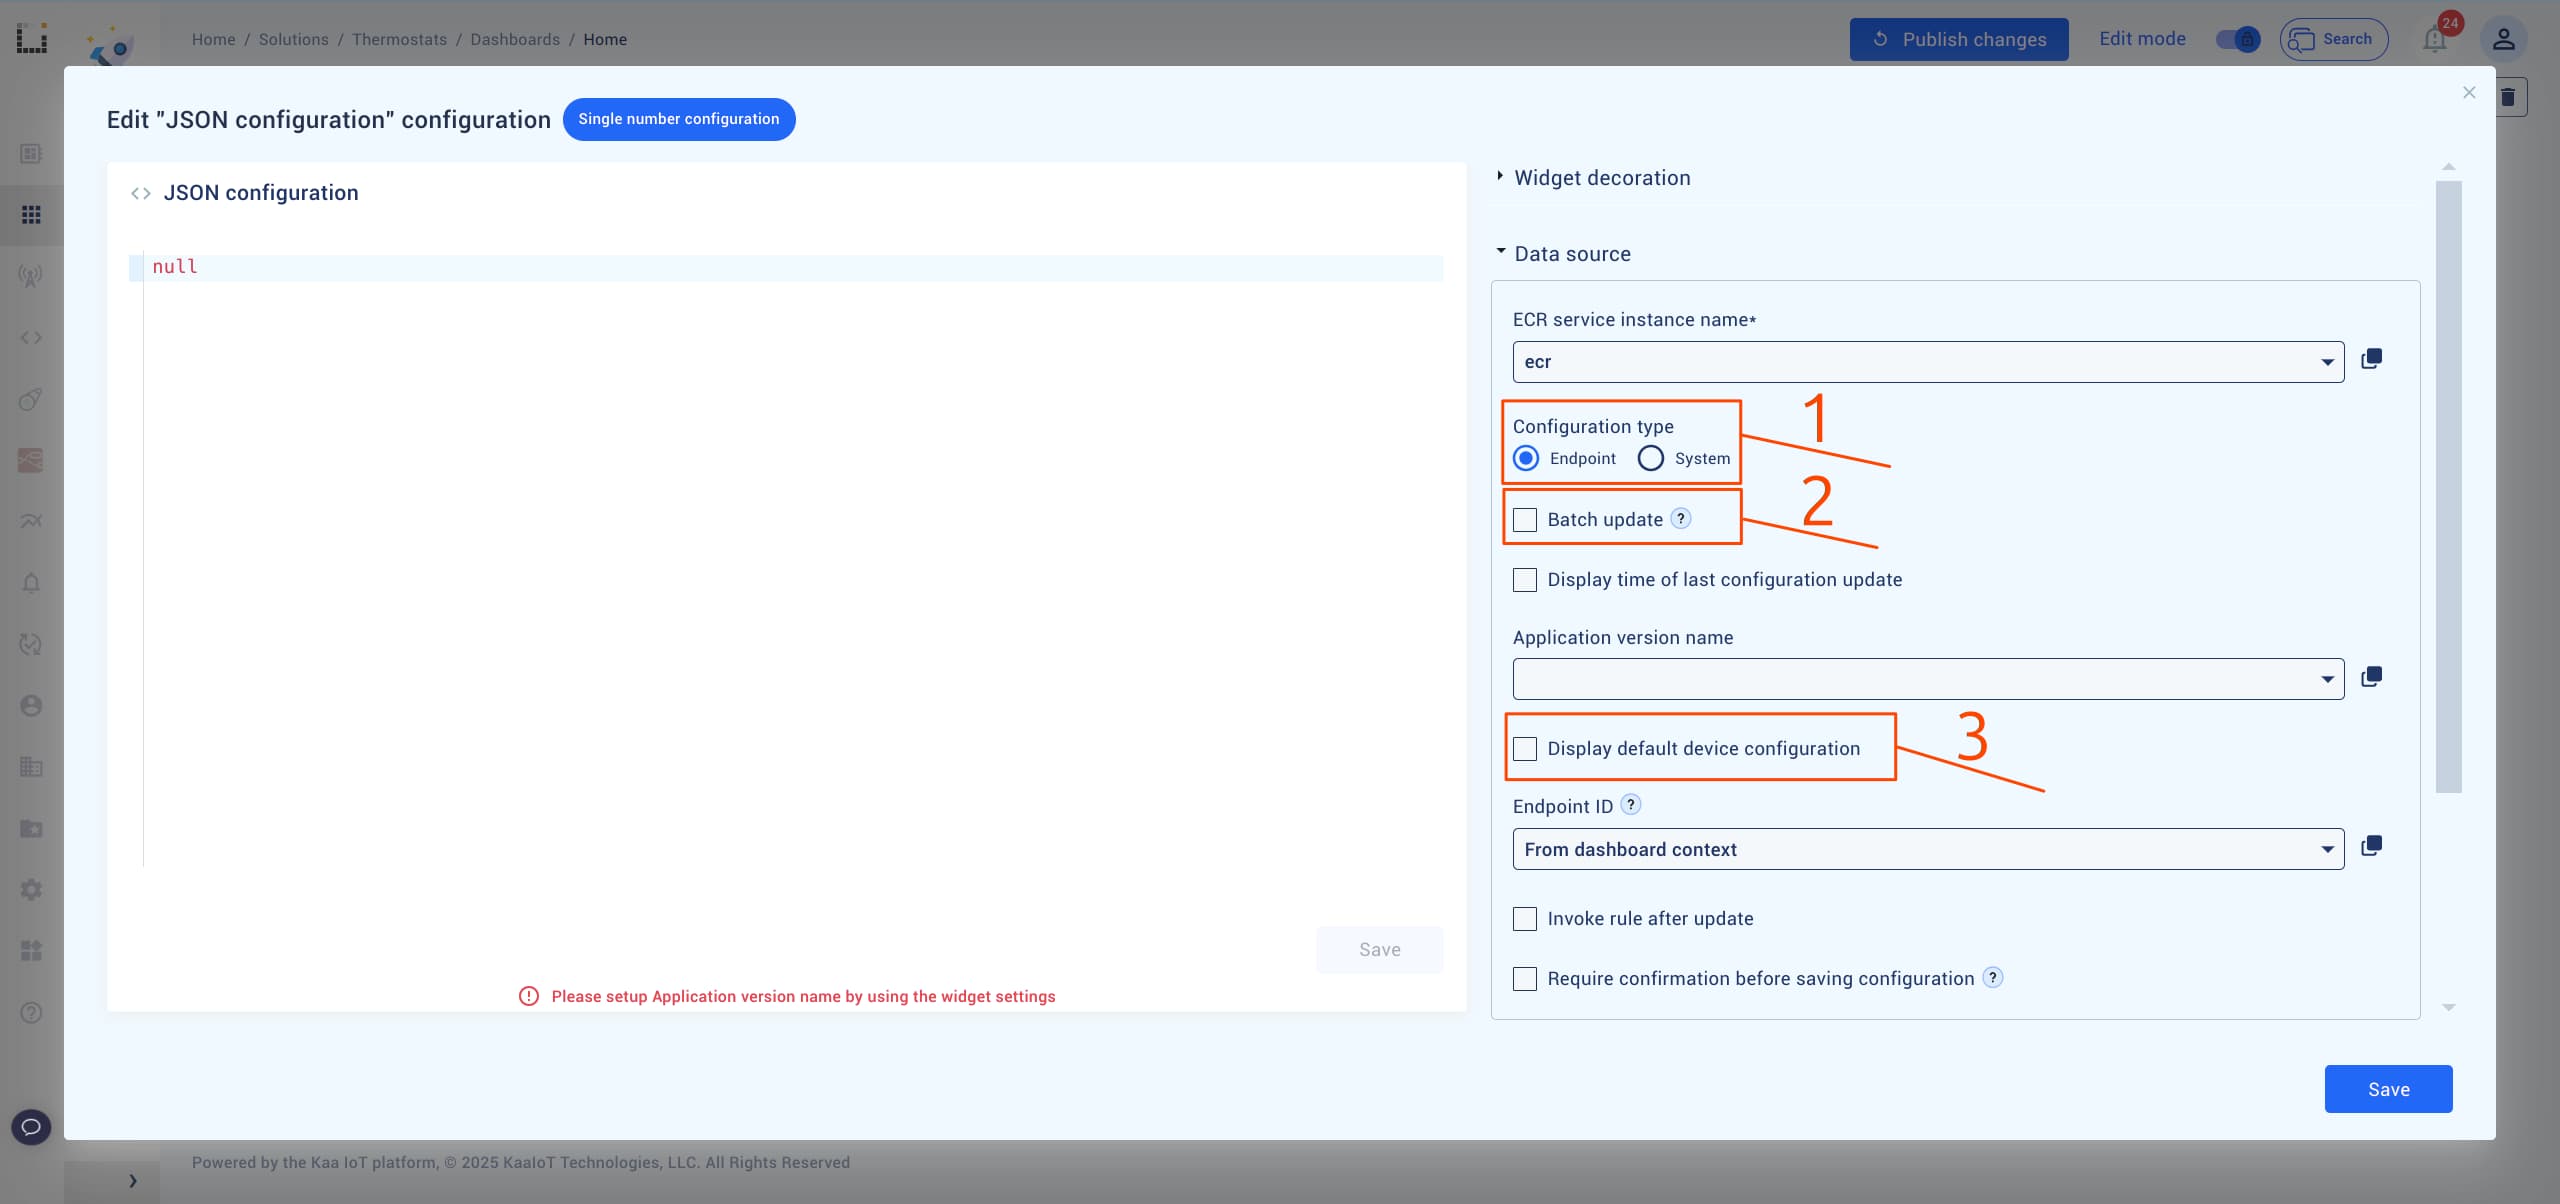
Configure JSON Configuration Widget
Let’s configure the JSON Configuration widget.
There are a few settings within that widget that are important:
-
Configuration type:
We’ll primarily work with the endpoint type to create configurations for endpoints.
System configurations are used to manage Kaa tenants and applications instead of endpoints, so we won’t be using that option. -
Display default device configuration:
Use this option if you want to set an application version-specific configuration that applies to all devices within the chosen application version. -
Batch update:
Use this option if you want to set endpoint-specific configurations for multiple devices at once.
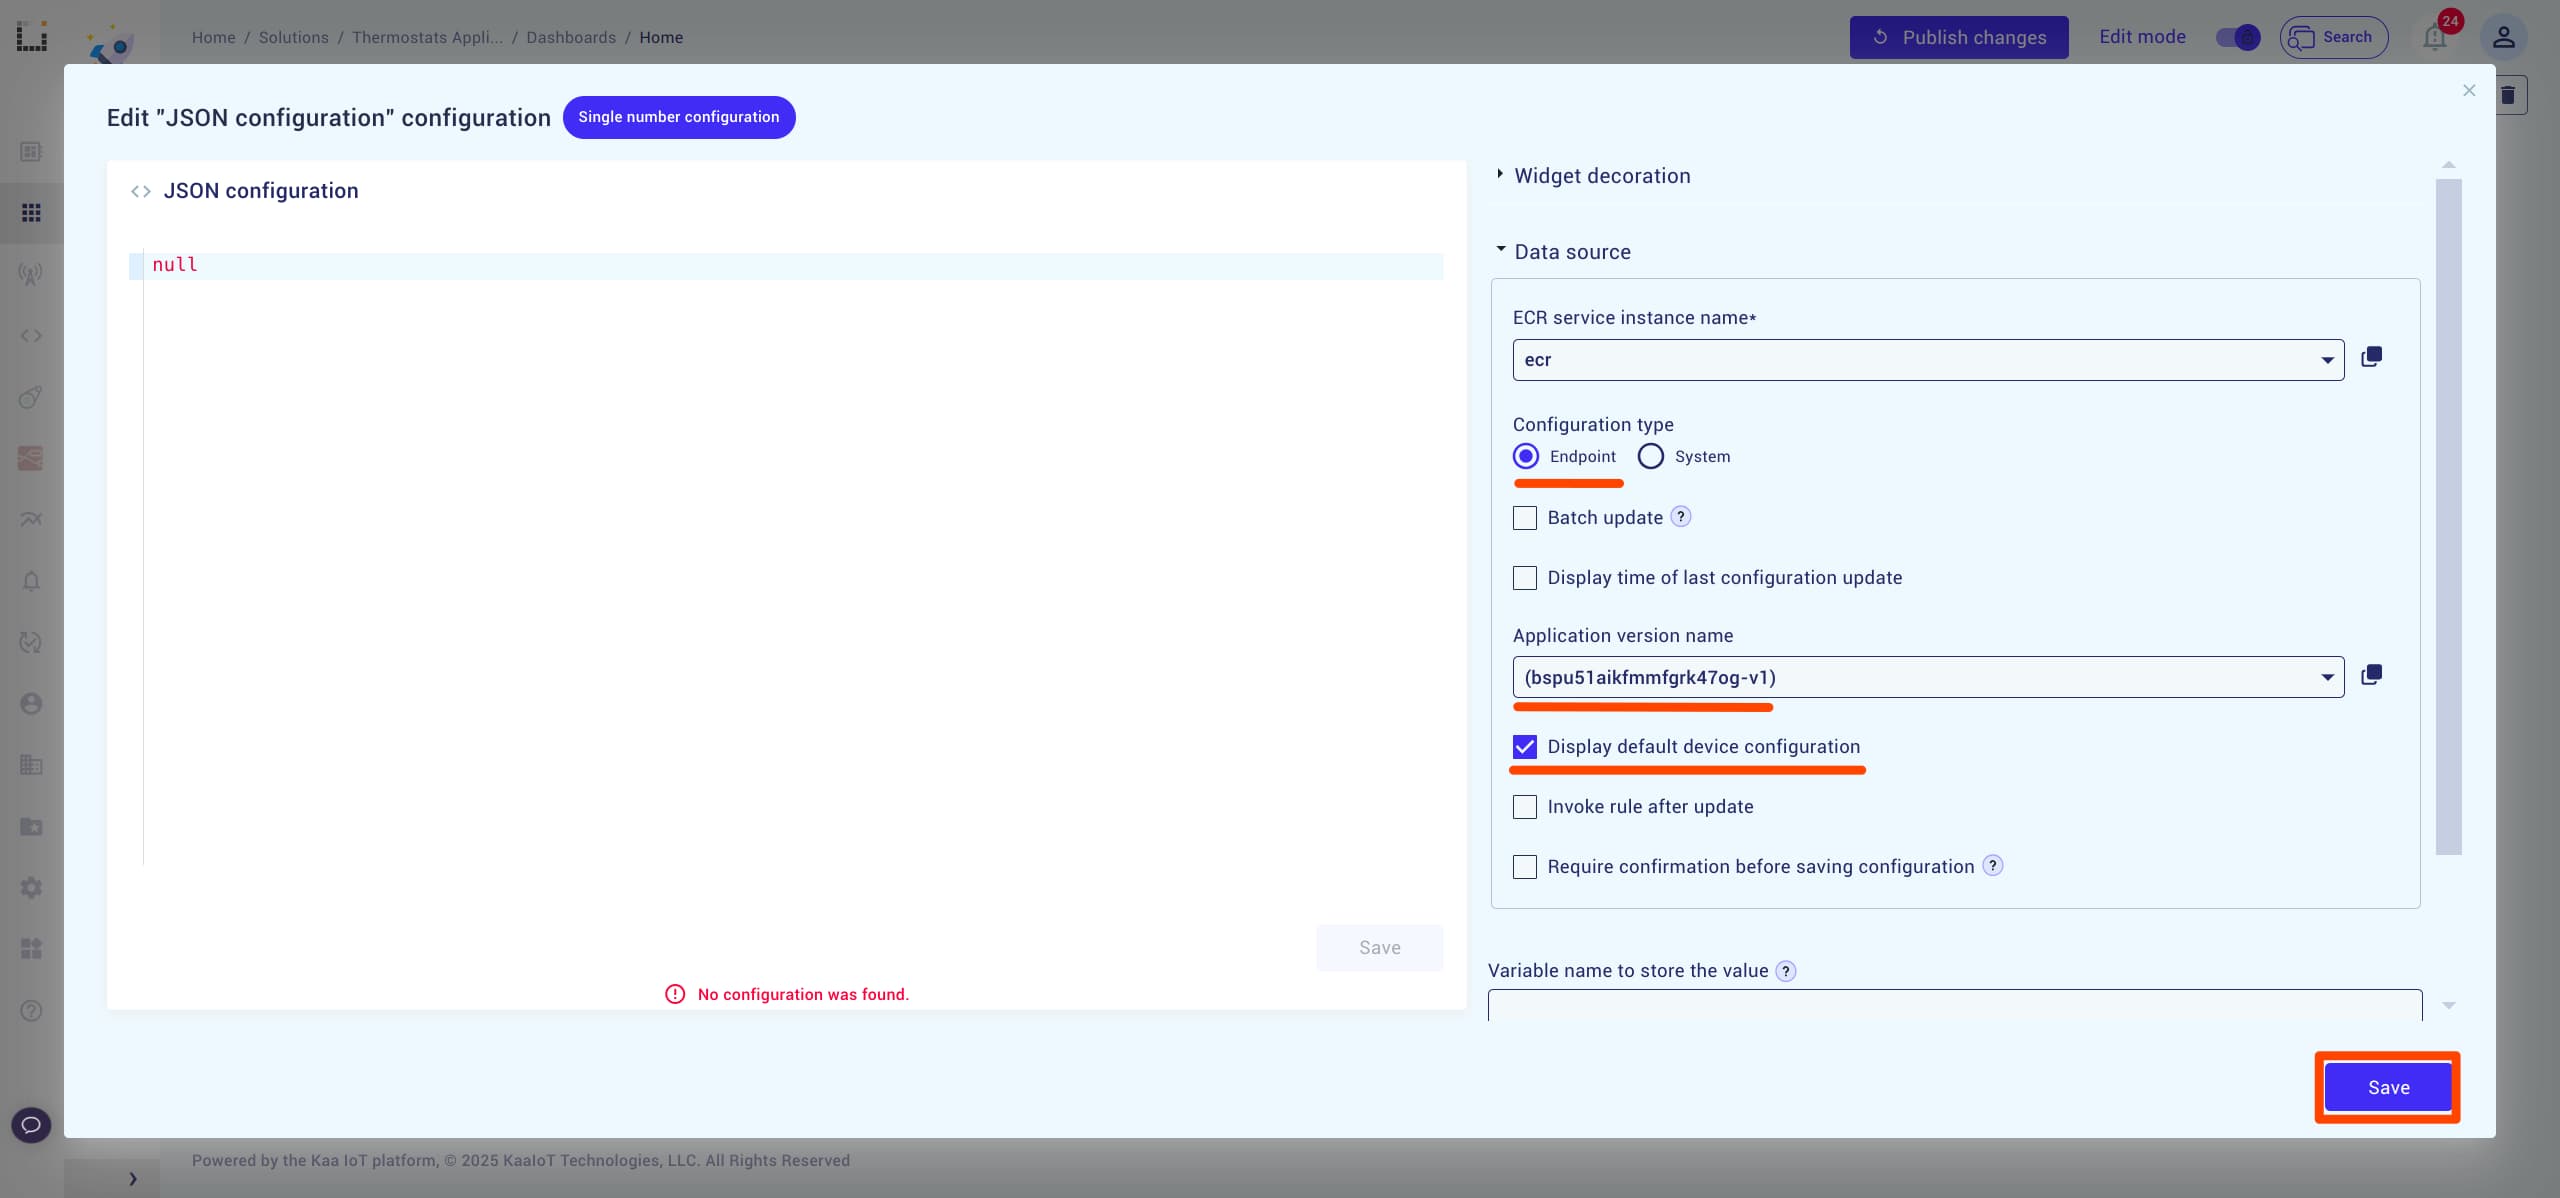
For this example, choose the application version, enable Display default device configuration and save the settings.
With this setup, the widget will manage an application version-specific configuration.
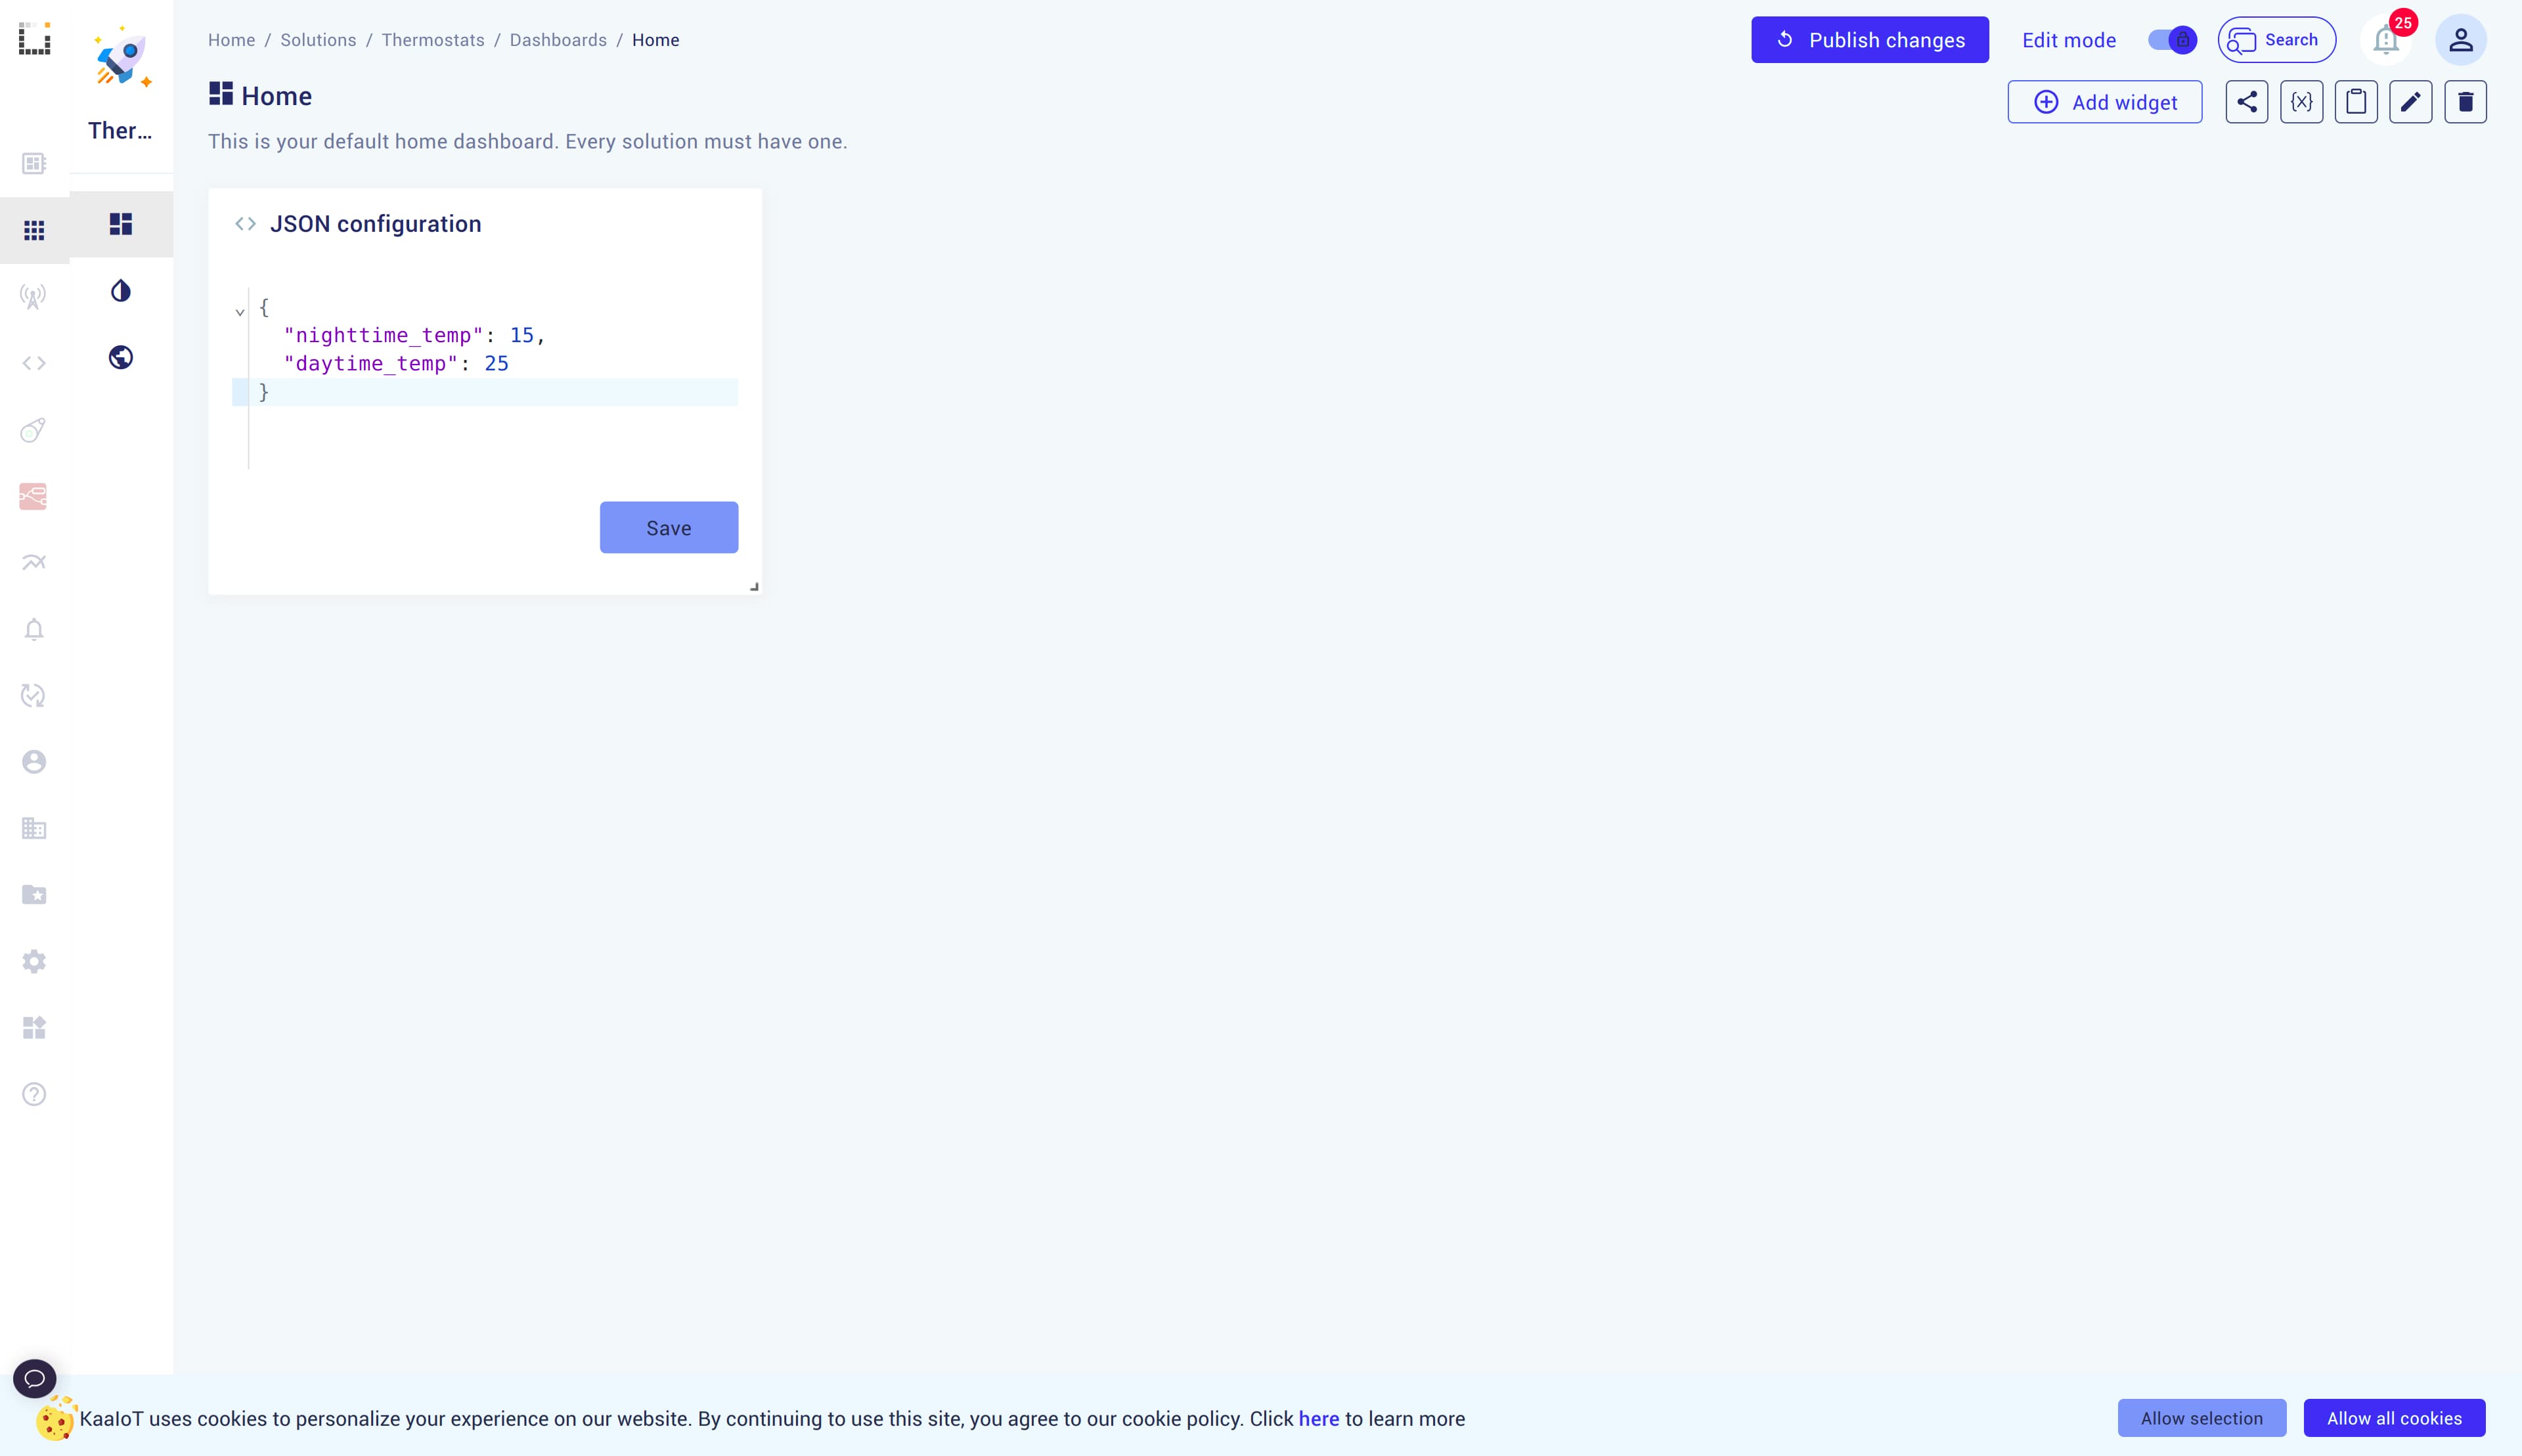
Once widget is configured, paste the below JSON configuration into the widget and click Save.
Don’t forget to Publish changes to your dashboard.
{
  "nighttime_temp": 15,
  "daytime_temp": 25
}
Now, any number of devices can fetch this configuration at any time. All that’s left to do is teach them how to apply it.
Run the Device Code
Open a code editor of your choice and copy the following code below:
Install the requests library:
pip install requests
In the code, under HTTP details comment, paste your token and application version.
import requests
import datetime
import json
import time

# HTTP details
app_version = "<your-app-version>" # replace with your app version
token = "<your-endpoint-token>" # replace with your endpoint token
request_id = 1
time_sleep = 10
domain = "cloud.kaaiot.com"

config_url = f"https://{domain}/kpc/kp1/{app_version}/cmx/{token}/config/json"
endpoint_url = f"https://{domain}/kpc/kp1/{app_version}/dcx/{token}/json"

# Thermostat's default temperature values
class Thermostat:
    def __init__(self):
        self.settings = {"daytemp": 30, "nighttemp": 10}
        self.current_temp = 30

    def set_settings(self, daytemp, nighttemp):
        print(f"\nCurrent settings: Day Temp: {self.settings['daytemp']}, Night Temp: {self.settings['nighttemp']}")
        print("Updating thermostat's settings...")
        self.settings["daytemp"] = daytemp
        self.settings["nighttemp"] = nighttemp
        print(f"New settings: Day Temp: {self.settings['daytemp']}, Night Temp: {self.settings['nighttemp']}\n")

    def update_temp(self):
        print(f"\nCurrent temperature: {self.current_temp}")
        print("Updating temperature...")
        current_hour = datetime.datetime.now().hour

        if 6 <= current_hour < 18:
            self.current_temp = self.settings["daytemp"]
        else:
            self.current_temp = self.settings["nighttemp"]

        print(f"New current temperature: {self.current_temp}\n")


thermostat = Thermostat()

# Extract values from payload and assign retrieved values
def handleConfigResponse(payload):
    try:
        # Safely extract temperature settings with defaults
        _daytemp = payload.get("config", {}).get("daytime_temp", None)
        _nighttemp = payload.get("config", {}).get("nighttime_temp", None)

        # Check if both temperatures are present
        if _daytemp is None or _nighttemp is None:
            raise ValueError("Missing required temperature settings in the payload.\nExpecting 'daytime_temp' and 'nighttime_temp'")

        # Update thermostat settings
        thermostat.set_settings(_daytemp, _nighttemp)
        thermostat.update_temp()

        # Pause briefly to ensure safe data handling and prevent request overload
        time.sleep(time_sleep)

        # Post temperature data to Kaa endpoint
        data = json.dumps({"temperature": thermostat.current_temp})
        print(f'Posting new data to Kaa: {data}')

        response = requests.post(endpoint_url, headers={"Content-Type": "application/json"}, data=data)

        if response.status_code == 200:
            print(f"Data was posted successfully! Response: {response.status_code} {response.text}")
        else:
            print(f"Request failed with status code {response.status_code}: {response.text}")

    except ValueError as e:
        print(f"Value error: {e}")
        print(f"Received corrupted data.\nnighttemp: {_nighttemp}\ndaytemp: {_daytemp}\n")
    except Exception as e:
        print(f"Error processing data: {e}")


# Main block to send POST request to config_url
try:
    print(f"Sending POST request to {config_url}")
    response = requests.post(config_url)

    if response.status_code == 200:
        print("Request successful!")
        response_data = response.json()
        print("Response data:", json.dumps(response_data, indent=4))
        handleConfigResponse(response_data)
    else:
        print(f"Request failed with status code {response.status_code}: {response.text}")

except requests.RequestException as e:
    print(f"An error occurred during the request: {e}")

except json.JSONDecodeError as e:
    print(f"Failed to decode JSON from response: {e}")
Install the paho-mqtt library:
pip install paho-mqtt==1.5.1
In the code, under MQTT server details comment, paste your token and application version.
import paho.mqtt.client as mqtt
import json
import datetime
import time

# MQTT server details
app_version = "<your-app-version>" # replace with your app version
token = "<your-endpoint-token>" # replace with your endpoint token
mqtt_server = "mqtt.cloud.kaaiot.com"
mqtt_port = 1883
request_id = 1
time_sleep = 10

# Endpoint topics
publish_topic = f"kp1/{app_version}/dcx/{token}/json/{request_id}"
response_topic = f"kp1/{app_version}/dcx/{token}/json/{request_id}/status"
error_topic = f"kp1/{app_version}/dcx/{token}/json/{request_id}/error"

# Configuration topics
config_publish_topic=f"kp1/{app_version}/cmx/{token}/config/json/{request_id}"
config_response_topic=f"kp1/{app_version}/cmx/{token}/config/json/status"
config_error_topic=f"kp1/{app_version}/cmx/{token}/config/json/{request_id}/error"

# Thermostat's default temperature values
class Thermostat:
    def __init__(self):
        self.settings = {"daytemp": 30, "nighttemp": 10}
        self.current_temp = 30

    def set_settings(self, daytemp, nighttemp):
        print(f"\nCurrent settings: Day Temp: {self.settings['daytemp']}, Night Temp: {self.settings['nighttemp']}\nUpdating thermostat's settings...")
        self.settings["daytemp"] = daytemp
        self.settings["nighttemp"] = nighttemp
        print(f"New settings: Day Temp: {self.settings['daytemp']}, Night Temp: {self.settings['nighttemp']}\n")

    def update_temp(self):
        print(f"\nCurrent temperature: {self.current_temp}\nUpdating temperature...")
        current_hour = datetime.datetime.now().hour

        if 6 <= current_hour < 18:
            self.current_temp = self.settings["daytemp"]
        else:
            self.current_temp = self.settings["nighttemp"]

        print(f"New current temperature: {self.current_temp}\n")

thermostat = Thermostat()

# Callback when connected to MQTT server
def on_connect(client, userdata, flags, rc):
    print("Connected with result code " + str(rc))
    client.subscribe(response_topic)
    client.subscribe(error_topic)
    client.subscribe(config_response_topic)
    client.subscribe(config_error_topic)

    # Publishing the message to connect to Kaa
    client.publish(publish_topic, json.dumps({
        "temperature": thermostat.current_temp
    }))

# Callback when a message is received
def on_message(client, userdata, msg):
    payload = msg.payload.decode()
    topic = msg.topic
    print(f"Message received on topic {topic}: {payload}\n")

    # Handle config_response_topic
    if config_response_topic == topic and payload is not None:
        handleConfigResponseTopic(payload, client)

    # Handle infinite loop, to repeatedly send data to Kaa
    if response_topic == topic:
        time.sleep(time_sleep)
        new_data_payload = json.dumps({
            "temperature": thermostat.current_temp
        })
        print(f"Publishing new data to Kaa: {new_data_payload}\n")
        client.publish(publish_topic, new_data_payload)

# Extract values from payload and assign retrieved values
def handleConfigResponseTopic(payload, client):
    try:
        # Parse the incoming JSON payload
        temp_data = json.loads(payload)

        # Safely extract temperature settings with defaults
        _daytemp = temp_data.get("config", {}).get("daytime_temp", None)
        _nighttemp = temp_data.get("config", {}).get("nighttime_temp", None)

        # Check if both temperatures are present
        if _daytemp is None or _nighttemp is None:
            raise ValueError("Missing required temperature settings in the payload.\nExpecting 'daytime_temp' and 'nighttime_temp'")

        # Updating local variables
        thermostat.set_settings(_daytemp, _nighttemp)
        thermostat.update_temp()

        # Pause briefly to ensure safe data handling and prevent request overload
        time.sleep(time_sleep)

        # Post temperature data to Kaa endpoint
        client.publish(publish_topic, json.dumps({
            "temperature": thermostat.current_temp
        }))
    except ValueError as e:
        print(f"Value error: {e}")
    except Exception as e:
        print(f"Error processing data: {e}")
        print(f"Received corrupted data.\nnighttemp: {_nighttemp}\ndaytemp: {_daytemp}\n")

# Setup MQTT client
client = mqtt.Client()
client.on_connect = on_connect
client.on_message = on_message
client.connect(mqtt_server, mqtt_port, 60)

# Loop forever
client.loop_forever()
Run the Python code.
Monitoring Behavior
Expect the results as shown in the screenshot.
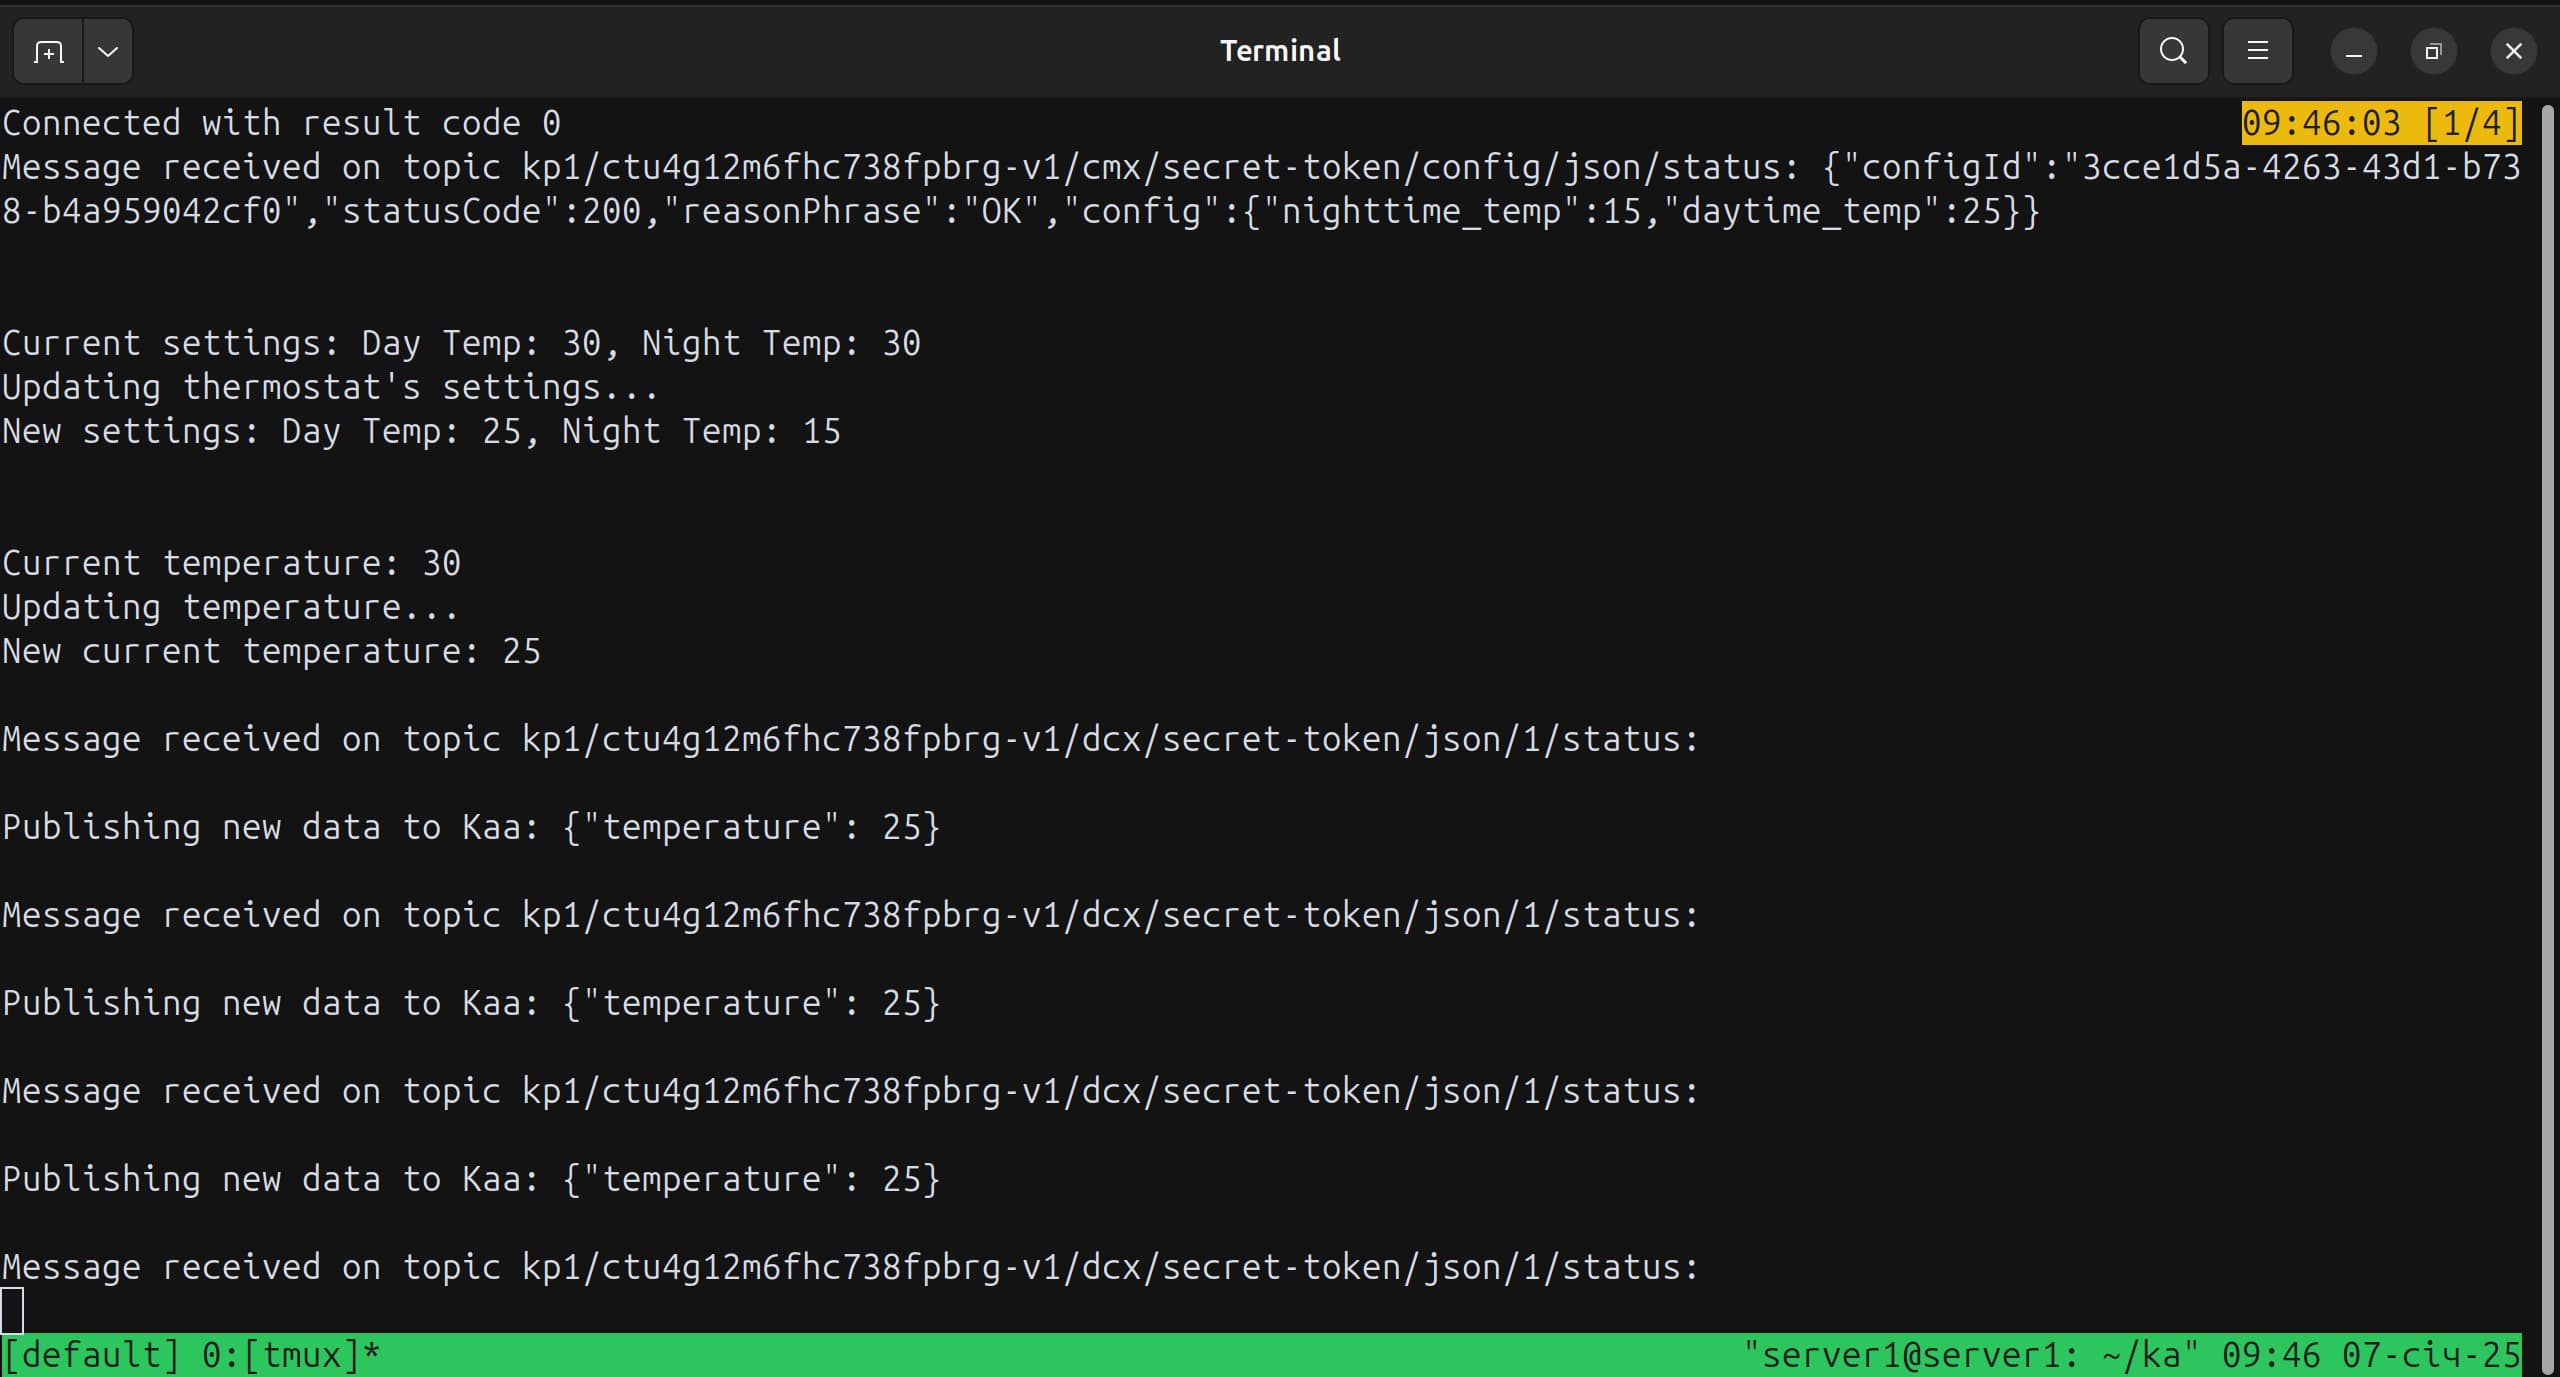
Let’s examine the important parts of the payload:
configId: The ID that identifies the received configuration. You can save it and, though the API, retrieve it later if the device logic requires it.config: The object containing our configuration with the data we specified earlier.
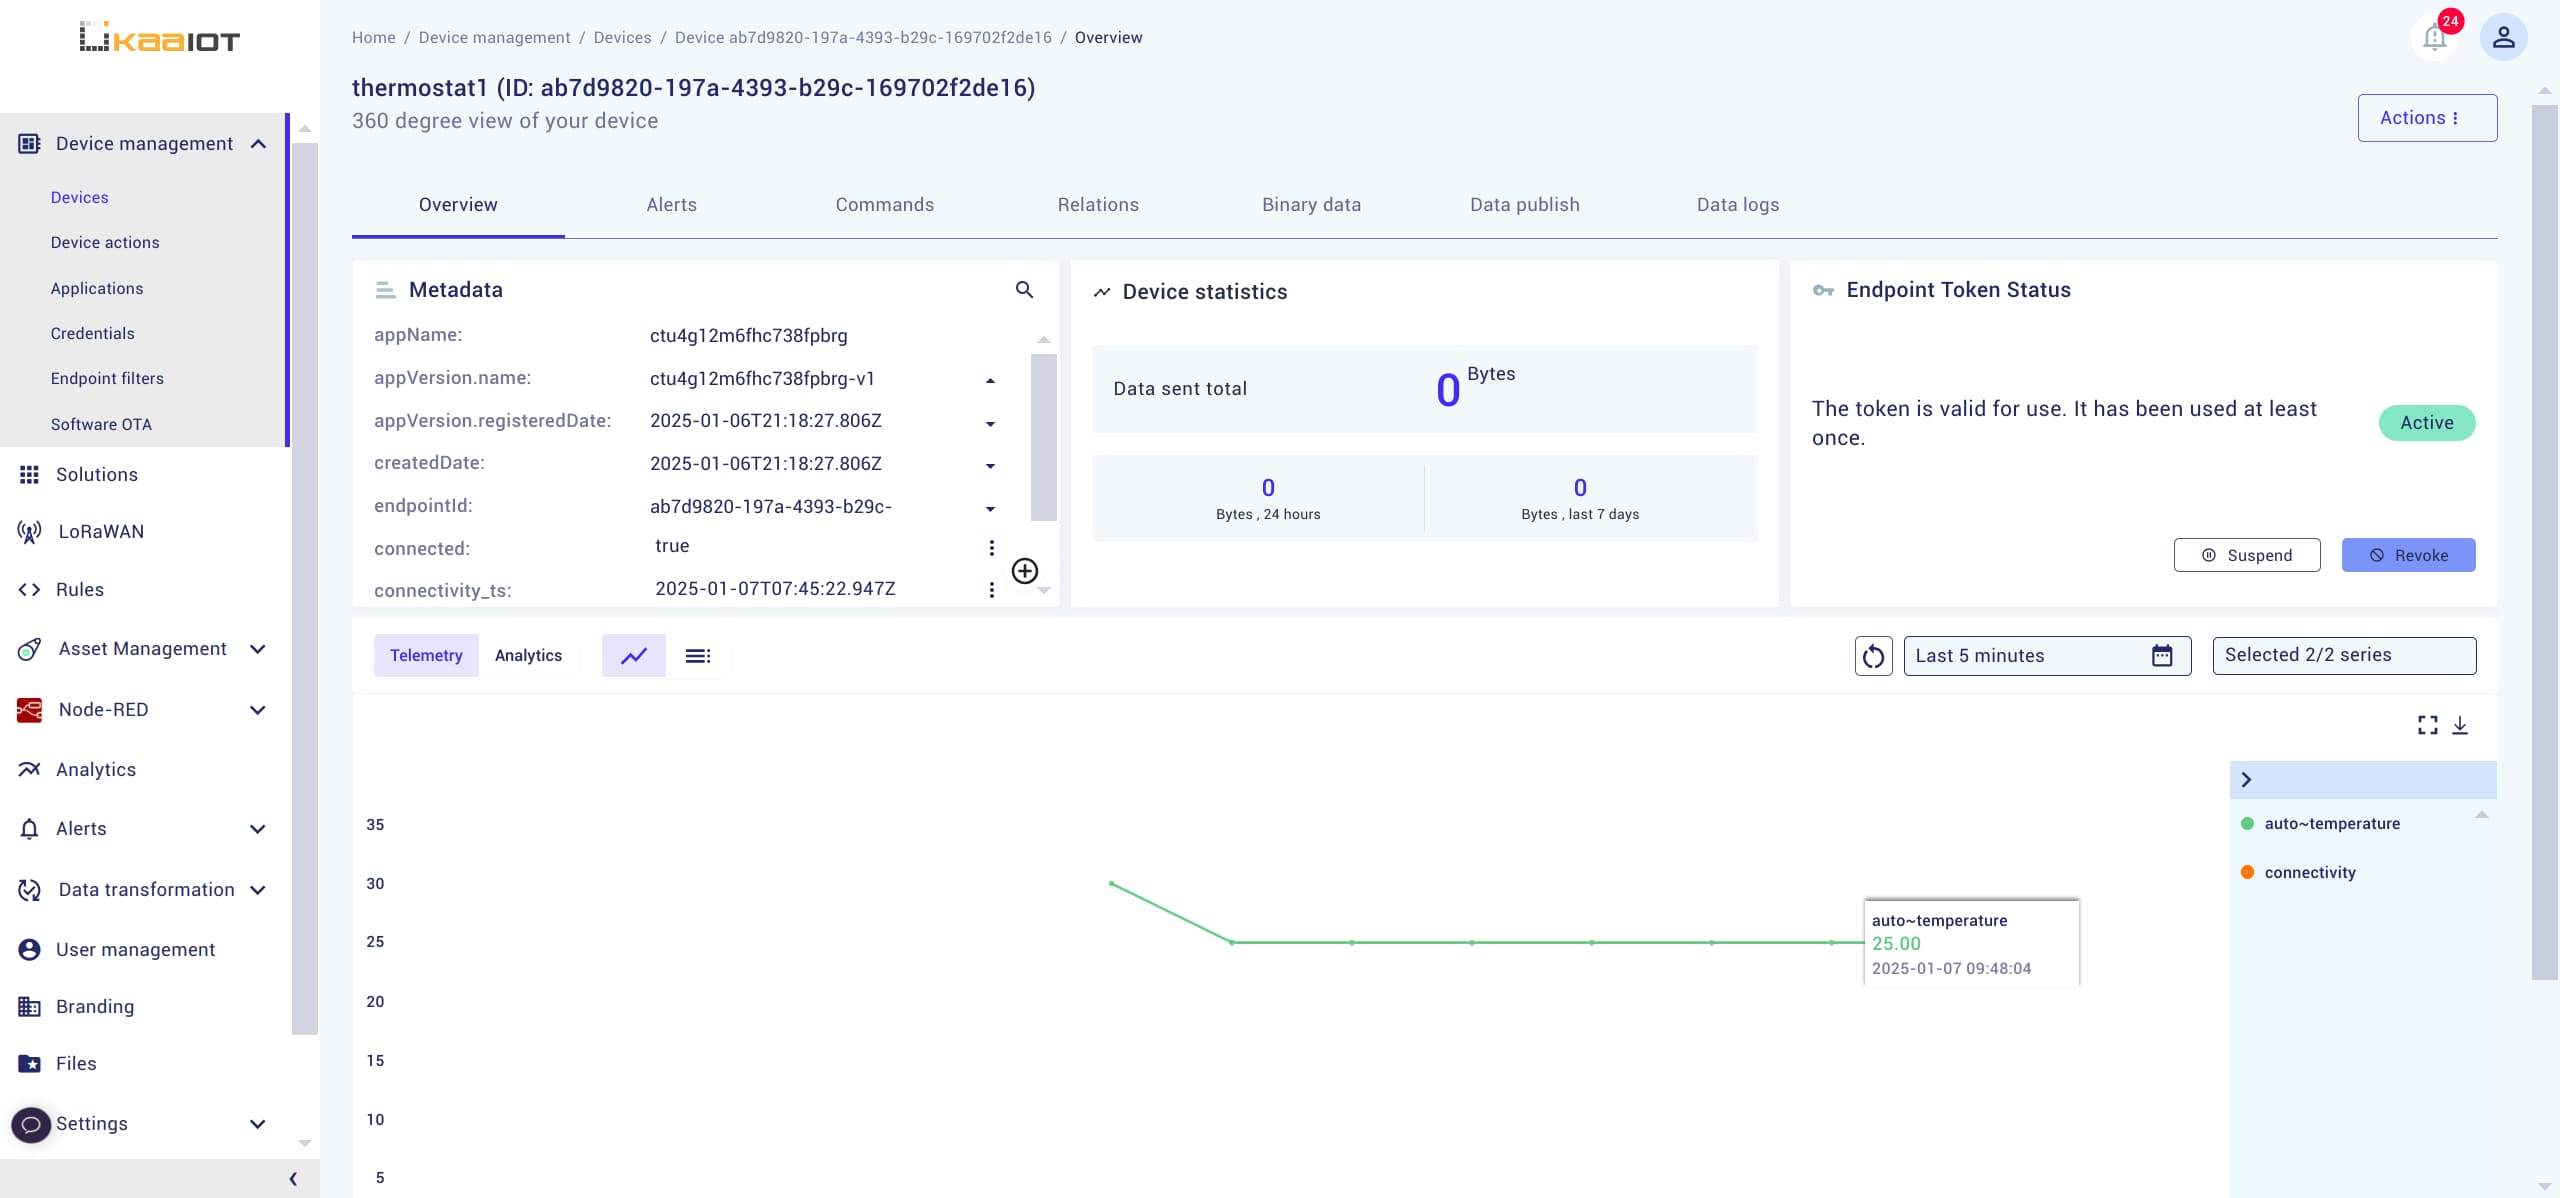
You will also see the changes reflected on the device page.
The default thermostat’s daytime temperature value was 30, but it was updated to 25, which was the daytime temperature received from the configuration.
Conclusion
In this tutorial, we’ve demonstrated a basic use case for Device Configuration.
Device Configuration is the solution for configuring your devices with custom properties.
It becomes especially useful when you have a large fleet of devices that all need to be configured quickly.
What’s Next
Check out the tutorial on Endpoint Configuration Schema, where we’ll learn how to apply basic validation to your schemas.